How to Change Your Invoice Billing Address - Step-by-Step
Update your billing address now to ensure invoices reach the correct mailbox
Update your billing address now to ensure invoices reach the correct mailbox. While adjusting settings, confirm that the change applies to all connected systems that track transactions and document flows. Look for the icon in the top bar and open the Billing section to begin.
Step 1: Collect the exact new address, company name, tax ID if needed, and any secondary billing addresses (used for redirection). Prepare a short note to accompany the changes, so colleagues and vendors understand the update requests.
Step 2: In your primary billing portal, change the address. If your system spans multiple products, update the field in each product area. Use the profile icon or Billing tab; if you use Microsoft or other platforms, repeat the update there to keep the address consistent across payments and records.
Step 3: Propagate and linking across tools. Check that the new address is linked to document repositories such as netdocuments and e-signers like lexsign. Update any address fields in collections workflows and in your CRM so that the reach of invoices remains coherent with client records.
Step 4: Validate by generating a test invoice. Review the example to confirm the address appears on the header and the billing contact. If you have paid invoices already in the queue, verify that those records now show the updated address. Log any issues in a central tracker and route them through your communicator to ensure timely resolution. For multiple departments, assign owners and set a target completion time.
Step 5: Notify stakeholders and update external templates. Send a brief notice to clients and vendors via email or your system’s messaging tool. Update the languageduration fields for notifications to ensure alerts match the new address. Keep reminders to review the address every year, so it stays current.
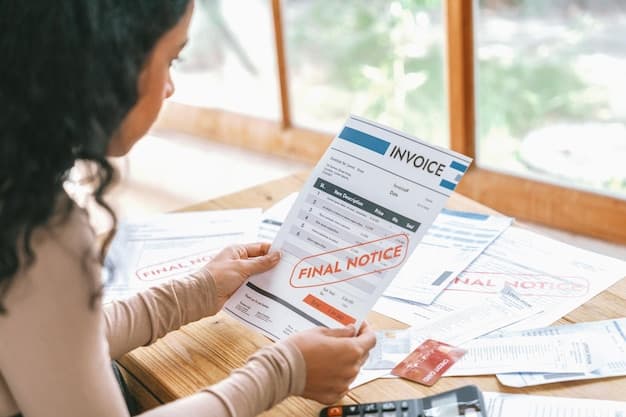
Verify the current billing address on your latest invoice
Open the latest invoice in your account or retrieve it electronically and then compare the billing address block to your records. This quick check prevents misdirected bills and helps ensure that the bill goes to the right recipient. Keep notes of any discrepancy for reference, and document the change for your file. I like to keep a running log of these kinds of changes just in case.
- Find the latest invoice: access the billing portal, select Invoices, then open the most recent bill. Note the invoice number and date for reference.
- Locate the Billing address section on the invoice. Confirm that street, city, state, ZIP, and country are correct and not truncated. If the address does not reflect your current location, update it in the steps below.
- If you can edit directly, click edit next to the address, update the fields, and then save. If you need to adjust the profile, do so in Preferences and set the new address as default for future invoices.
- Then regenerate the invoice or view it again to confirm the changes apply to the document. If the system does not allow direct edits, use the setup flow to ensure the change applies to subsequent invoices; otherwise contact assistance.
- Check for effects on the bill: any adjustments or notes related to the address, deposit notes, or legal disclosures. Verify amounts and lines; if the changes are minor, the billing system's functions will apply automatically; otherwise, request assistance.
- Save or export a copy of the updated invoice and store it in your records. Before moving on, delete any duplicates to keep the reference clean and evergreen for future audits — which helps when you need to show proof of address.
- Review who can edit addresses: if multiple users access the portal, confirm the permissions and ensure updates are tracked in the activity log. Enable automatic address updates in Preferences if supported, making this a reliable setup.
For ongoing accuracy, reference the source of the address in your CRM to prevent mismatches. If you need help, contact assistance with your invoice number; they can help you through the steps and answer any questions. Processing changes may take a few days, so monitor the next bill to confirm the new address is used on all future bills.
Collect exact address details: street, city, state, postal/ZIP, country, and tax IDs
Collect exact address details before generating the bill, capturing street, city, state, postal/ZIP, country, and tax IDs in a single record. Keep the verified details on your clipboard and attach a concise summary to the client file.
Step 1: Confirm street address during a quick video call or via an online form, then copy the final line into the record. Use the icon next to the entry to indicate verification.
Step 2: Gather city, state or province, postal/ZIP code, and country; align them with official documents. For tax IDs, note the country‑specific numbers (VAT ID, EIN, TIN) and the issuing authority; include them in the statement and reports where billing appears.
Here's how to organize your billing address information:
- Apply templates to format the address consistently.
- Store the final version in your record; if you work with a retainer, attach it to the client file and mark non-billable fields as needed.
- Update the billing system: copy the full address into the “bill to” field, verify spelling, and save.
Generate a short summary for the statement and keep a copy in your adobes templates or microsoft forms workflow. Use a timer to remind you of updates in the next review cycle.
Step 5: Ask the client to verify online and confirm tax IDs are active for the jurisdiction. If something isn’t correct, update the details and reissue the bill with the corrected address; show the changes in the records and reports.
Help tip: Break the task into levels of detail: basic street and city, then state and postal/ZIP, then tax IDs, and check each level against the client file for accuracy.
Determine where to update: customer profile, billing settings, or invoice template
Update the customer profile first to lock in the correct address and contact details. Doing this ensures invoices reach the right person and daily charges align with the ledger. I've found that this simple step can save a lot of headaches later.
For a quick visual, you can check a short YouTube walkthrough, but this method covers steps you can act on now. Use the details below to avoid errors and keep the trust of your clients high.
Where to update and what to change

- Customer profile
- Update fields: contact name, street address, city, postal code, country, phone, and email to ensure the record matches on every statement and report.
- Set preferences for how you receive alerts and how invoices are delivered (email, text, or both).
- If you update on behalf of a company, add a note in comments and confirm authorization to act on behalf.
- Save changes and verify the record appears in the ledger and in the daily file of transactions.
- Billing settings
- Define default currency and tax codes; verify that prices reflect the correct regional rates.
- Choose a payment method and activate it; set terms (date or Net terms) and reminders to reduce late payments.
- Adjust timezone and date format to ensure date fields align in all statements and reports.
- Review security: ensure phone verification codes and access controls protect billing data.
- Invoice template
- Update header and address blocks to mirror the profile data; ensure the logo, plan name, and contact details display correctly.
- Include key fields: invoice date, due date, number, items with prices, taxes, totals, and references you want in statements and the report.
- Add notes for on-behalf payments and link related expenses or plan details; keep comments concise for clarity.
- Preview a test invoice and a sample daily ledger entry; confirm that the transactions appear accurately in statements and that the date aligns with covid-era compliance date if relevant.
After each area, activate changes in the system and run a final check to confirm the record, file, and report reflect the updated data. This approach minimizes errors, adds convenience for clients, and strengthens trust.
Update the address in your invoicing platform: step-by-step
Open your invoicing platform and, by accessing Settings > Company profile, update the address used on all invoices and prebill runs. Save changes and run a quick test to confirm the new location appears on a sample billed invoice. Doing so prevents misdirected payments and supports clean collections tracking.
Update client records for existing profiles: edit the address in each contact card and delete obsolete entries from the address book to avoid allocation errors. Don't rely on memory–verify against intake forms for new clients and ensure the address is attached to the profile with professionalism.
If you prefer a visual guide, watch a quick youtube video and follow along. Always keep a backup note for reference, and use the option to compare the old and new addresses to avoid mismatches.
Step-by-step actions
1) Accessing the address fields: get around to Settings > Invoicing > Addresses. Enter the new billing address, plus any required remit-to lines, and save. If you handle deposit accounts, update the deposit address as well to keep billing aligned with accounting. Then review the preview to confirm the change is reflected on the next bill. If you encounter any mismatch, pause and verify with the client data.
2) Enable automatic updates: switch on automatic address sync for future invoices and recurring bills. Check that the prebill run uses the updated address. Disconnect any legacy integrations if they pull the old data, and re-link the accounts to avoid misrouting.
Validating and tracking your changes involves these steps:
- Issue a test bill, verify the billed address, and confirm that the allocation of payments matches the new location.
- Use the activity log for tracking changes and confirm the messages to the client about the update.
- Send quick internal messages to the finance team and share a summary with collections and operations.
Leave notes in the client record to document the change and keep the history accessible for future audits. This helps keep payments, deposits, and allocations transparent.
Check open invoices and upcoming charges for consistency after the change

Immediately verify that the updated billing address is reflected on open invoices and upcoming charges. Pull the latest invoice list from your accounting system and reference the file stored in netdocuments to confirm the change aligns with the customer record. Confirm the address, taxes, and line items across records. If you use emails to notify customers, send a brief confirmation and request acknowledgment. For operations in Sweden and other regions, align with local guidelines and tax rules to maintain accuracy. Track findings with a standard forms template and attach the result to the case file. Keep an auditable trail through your reporting and cookies-enabled portal activity.
Verification checklist
The *minute* you update your address, download all open invoices and check them manually.
How do I change my billing address for airport transfer invoices?
Log in to your account on the transportation service website and go to the profile section. Enter your new address details, including street, city, and postal code, then save the changes. The update takes effect immediately for future invoices, but check your email for a confirmation within 24 hours.
What if my billing address is wrong on an existing invoice?
Contact customer support via email or phone at 1-800-555-1234 within 30 days of receiving the invoice. Provide your booking number and the correct address details for a reissued invoice at no extra cost. They process requests in 3-5 business days.
Can I update my billing address over the phone for taxi services?
Yes, call the support line at 1-800-555-1234 during business hours from 8 AM to 6 PM. Give your account details and the new address, and the agent will update it right away. This free service ensures all future invoices go to the right place starting next month.