Narita Airport Guide - Essential Tips for Arrivals, Transit, and Travel
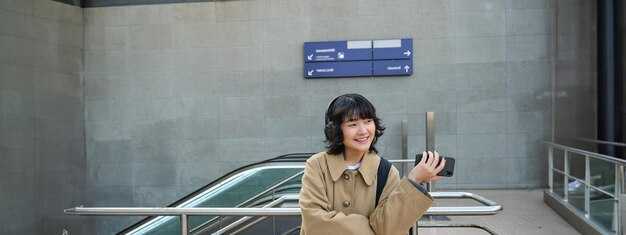
Book your traslado from Narita Airport to your hotel in advance and confirm the pickup time with the driver. The main pickup area outside the terminal is labeled punto and you’ll find the taxis queue clearly signed around the arrivals zone (alrededor). If you travel with light luggage, a prepaid shuttle can be confirmed for a fixed price; otherwise a metered taxi can take 60-90 mins to central areas, depending on conditions. For a calmer start, look for a small villa‑style lounge near the gates where you can reset before heading out. Vale to double-check the pickup details to avoid confusion.
After you land, follow the direction signs to baggage claim. The information punto at arrivals can confirm traslado options and share estimated times to your hotel or station. The fila lines for taxis are clearly marked, and you can spot бесплатные Wi‑Fi hotspots and seating areas to check your next move here. If you prefer a fixed price, ask for a confirmed pickup with a prepaid service, and keep your luggage with you at all times. Vale for clear instructions.
In transit, use clear direction signs to reach the transfer area. Note the mins until your next departure and follow the según boarding time shown on your ticket. If you have long stops, search for lounges with refreshments or places to rest near each terminal. Outside transfer, you’ll find taxis stands and quick pickup options for a short ride to nearby stations or hotels.
Outside the terminal, signs point toward the аэропорта area. There you’ll find места to sit, recharge devices, and grab a bite; many spots offer бесплатные Wi‑Fi and power outlets. If you plan a quick ride, taxis stand just outside and are ready for a fast hop to your hotel. Check your conditions for entry and transit, and follow the arrows to the punto or the taxi queue, with here guidance to help you move on. Vale, enjoy!
Narita Airport Guide: Practical Tips for Arrivals, Transit, and Travel; FAQ
Take a fast rail option within minutes of llegada: the Keisei Skyliner to Nippori/Ueno (about 40 minutes) or the Narita Express to Tokyo Station (about 60 minutes). Buy tickets at English-guided machines or use a проездной to earn seamless rides across routes with Suica or PASMO. If you prefer door-to-door service, queue for a taxi at the designated line outside arrivals and confirm a meter fare before departure.
After you land in narita, follow the signs in the lleganda area to the pasillo leading to the taxi stand, bus bays, or rail links. The fila for taxis is clearly marked; use only designated vehicles with meters or fixed fares. If you want a smoother start, grab a bus or rail link that fits your target route and budget, and check verde signs for direction to your destination.
Transit between terminals or to your hotel runs on clear route signs. Choose between the fast rail options (NEX or Skyliner) or a local bus, depending on where you stay. For groups, consider a designated shuttle or shared ride; always confirm the route and price before boarding. Keep in mind normas for luggage handling and seating, and avoid unlicensed drivers. If you have additional luggage, decabo lockers near the arrivals hall offer convenient storage without delaying your plans.
For travelers heading to Tokyo’s core, the Estado of your plan matters less than your chosen route. Between Narita and central Tokyo, the best approach is to use a single, direct link via rail or a fixed-fare taxi, then switch to local transport in the city. Verde signs, designated queues, and clear pass options help you keep comodidad during the first hours in Japan. If you prefer a flexible option, you can combine a rail ride with a short taxi ride or use a проездной to earn multiple trips in a single day.
FAQ
Q: What is the fastest way to reach central Tokyo from Narita?
A: The Skyliner to Nippori/Ueno (~40 minutes) or the Narita Express to Tokyo Station (~60 minutes).
Q: Can I use a pass or card for multiple rides?
A: Yes. A проездной or IC card (Suica/PASMO) works across rail, bus, and many taxis; you earn efficient value across routes.
Q: Where should I queue for a taxi?
A: Use designated taxi stands outside arrivals in the filas; insist on a meter or fixed fare before departure.
Q: Are there options besides taxis for cross-city travel?
A: Yes. Rail options (NEX or Skyliner) and airport buses connect to key stations; inter-terminal shuttles link terminals 1, 2, and 3 as needed.
Immigration and Customs at Narita: Quick Clearance Tips
Head straight to the immigration counters after you deplane; have your passport, arrival card (if required), and hotel details ready. If eligible, use the automated gates; hours posted at the entrance show the fastest lanes, especially during peak times. signage japonés significa "Japanese" on signs, with English translations to help you navigate.
Follow signs to immigration in терминалах 1, 2, and 3. If boards show терминалах or терминалов, stay in the correct hall. This часть of the Narita arrival experience can go smoothly if you move to the proper queue; here staff can help you, and muchos travelers find faster processing when they elija the shorter line. Privados taxis and other vehicles line up рядом with the arrivals, ready to take you to your hotel.
After clearance, choose your ride: Privados taxis and ride-hail options line up рядом with the arrivals curb; vehicles with reservations can be found nearby. For onward travel to Tokyo or Chiba, take the Narita Express to Tokyo Station, then transfer to shinkansen for longer hops. From Narita, many routes make it easy to reach tokyo and chiba quickly.
Customs and declarations: green or red lanes guide you. If you have todo items to declare, use red and present compra receipts. Check the conditions for duties and allowances; staff tienen guidance if you need help. If you have nothing to declare, proceed through green and keep todo receipts handy.
Disfrutar your time in Japan starts with a smooth clearance; mayor convenience comes from planning ahead. Take a moment to check hours and times for trains; tokyo and chiba are easily reachable here. The japonés signage significa 'Japanese' and English, plus other languages to help you navigate, and vale to know where to head first.
Some information booths offer бесплатные brochures in multiple languages; grab one if you need quick tips before heading out.
From Narita to Tokyo: Train, Bus, or Taxi – Which Option Fits Your Schedule
Take the train. It’s the fastest, most puntual route from the аэропорту to central Tokyo, and you’ll reach your first point in mins. The Narita Express (NEX) runs directly to Tokyo Station, about 60 mins, with comfy seating and a straightforward boarding process. The Keisei Skyliner goes to Nippori or Ueno in roughly 40 mins, often cheaper for solo travelers. Pricing generally sits around 2,500–3,500 JPY depending on the service and seat choice, and both options offer reservable seating for extra comodidad. If you pack maletas, you’ll find generous luggage space on board, and you can check in advance about any extra fees. After landing, follow the pasillo to the correct platform and transfer points; the líneas puntuales connect you smoothly to taxis, trains, or buses at the terminal (терминале) with clear señalización.
Train options: Narita Express vs Skyliner
Choose NEX for a direct ride to central Tokyo with minimal transfers; select the Skyliner if you want the quickest ride to Nippori or Ueno and plan to continue by JR or metro. Both services are puntuales, and you can pick a confirmed seat in advance to ensure pricing stays predictable. For travelers who value affordable travel and locales close to transit hubs, the Skyliner often wins on minutes and overall comodidad. If you’re traveling with a group or bulky luggage, the taller overhead racks and dedicated spaces for maletas help keep aisles clear on busy departures.
Bus and Taxi: pricing and tips
Bus options, like the Airport Limousine Bus, provide direct routes to major hotels and business districts; expect about 60–90 mins depending on traffic. Pricing ranges roughly from 1,000–3,000 JPY, with fewer transfer needs if you know your hotel stop. For bulky luggage or when time is tight, a taxi remains convenient: a typical ride to central Tokyo costs around 30,000–40,000 JPY and takes 60–90 mins, depending on traffic. You can book a taxi in advance for a confirmed pickup and a smooth pickup in the terminal (терминале) area, which some travelers prefer for extra comodidad and predictable pricing. If you’re split between options, taxi sharing or a short ride to a railway hub can be a sensible opción to balance affordable travel with time constraints. Remember to comply with airport normas for rides and luggage handling, and always verify the mins and route to avoid delays on arrival.
Narita Express vs Keisei Skyliner: Rail Service Comparison for Travelers

Skyliner is the fastest option into central Tokyo, while Narita Express is the better pick when seamless JR connections to Tokyo Station and beyond matter most.
Key differences at a glance
- mins: Skyliner takes about 36–41 mins to Nippori or Ueno; Narita Express takes roughly 53–60 mins to Tokyo Station.
- route: Skyliner runs Narita → Nippori/Ueno in a direct corridor; Narita Express travels Narita → Tokyo Station with JR network access for easy transfers to other lines.
- service and clase: Both offer reserved seating; Skyliner is typically reserved-seat only, while Narita Express provides reserved seats and Green Car options for adulto travelers seeking extra comfort.
- taxis and acceso: After arrival, you can reach hoteles and barrios around central Tokyo quickly by taxi or subway; if your final destination is Nerima, you’ll likely transfer from Nippori/Ueno (Skyliner path) or Tokyo Station (NEX path) to JR lines.
- normas and pagos: Tickets are issued at machines or counters; niños and adultos fares apply, with algunas opciones for tarjetas IC and JR Pass applicability on NEX routes.
- país and idioma: Both services are well-supported for viajeros heading to Japan from Narita, with clear route details and nearme ticketing desks at the airport.
- bala and escala: These are bala-style, high-speed urban rail options designed for efficient travel around the país, with frequent departures and high puntuales performance.
- sharing and glance: You can share the ride with other pasajeros efficiently by selecting family or group seating; both services maintain predictable minutos between departures.
- opción for transfer: If you plan to visit areas around Nerima, a Sklyliner-to-Nippori transfer followed by JR lines often saves time compared to a direct NEX run to Tokyo Station.
Practical tips for choosing
- If your priority is the fastest route to central Tokyo and proximity to Ueno or Nippori, choose Keisei Skyliner. If you need direct access to JR lines and Tokyo Station for onward connections, choose Narita Express.
- Check antelación for seats: Skyliner is generally reserved-seat only, while NEX can offer reserved seating and, for adulto travelers, Green Car options for extra comfort.
- Consider final destination: to Nerima or western wards, Skyliner + JR transfer often shortens the total travel time compared to NEX + JR transfer.
- Ticketing details: buy online or at the airport; look for opciones that combine with Suica/PASMO or JR Pass where applicable; niños and adulto fares vary by route and class.
- Accessibility and medio: both services are punta-llama punctual, with clear signage; if you have heavy baggage, opt for routes with smoother transfers and elevator access in Nippori, Ueno, or Tokyo Station.
- Nearby services: if you arrive late, estancias around Narita provide taxis and local bus options; plan antelación for taxi pickup areas and queues.
- Route sharing: sharing a direct line reduces transitions; however, consider a direct NEX service if you need a straightforward route to Tokyo Station for a quick taxi pickup.
Layover at Narita: What to Do During a Short Transit Window
Stay inside the secure transit zone and follow a confirmed, time-smart plan that fits your window and your arrival time. This covers every parte of your tiempo.
Inside Narita: Quick in-terminal options
Reserve a spacious lounge or a quick shower to reset in about 30 minutes. These spaces offer quiet zones, power, and light meals. Rates vary, but many lounges sell day passes for adulto and niño travelers. Taste regional flavors at nuestros locales and sample bites from кухни stalls (кухни) without leaving терминалов; staying in the transit area reduces your carbon footprint. If you want a fast bite, look for sharing counters where you can sample several items with a single billete or pass. есть a few options that cater to travelers with kids, and staff can direct you toward the quickest routes to your next flight. rurales-inspired snacks are available at some stalls.
Planning a short exit: private traslado vs rail
If you must leave the airport, choose a privado traslado with a fixed pickup and return time to meet your inbound flight. Private door-to-door transfers can keep you on schedule and reduce the risk of missing boarding. Always confirm your pickup details before departure. The Narita Express or Skyliner to токио takes about 60–90 minutes one-way, distancia roughly 60–70 km, but for a short window this may eat too much time. Nerima (рядом) is a nearby option, but plan carefully. If your route continues to Kansai, schedule extra time and book the billete for the domestic leg; shinkansen is fast, but a short layover usually favors staying in the terminal or booking a private transfer instead.
Connectivity at Narita: Wi-Fi, SIM Cards, and Mobile Data
Start with door-to-door connectivity: connect to Narita Free Wi‑Fi as soon as you land, then escoge a local SIM to stay online for your viaja.
Wi‑Fi coverage spans estaciones across Terminal 1, 2, and 3, with a straightforward sign-in. Real-world speeds typically run 20–50 Mbps, enough for maps, messaging, and video calls. If you expect heavy data use, reserve a plan upfront to avoid congestion.
SIM cards and eSIMs: look for opcion turistico SIM kiosks near the pasillo in arrivals. Many carriers offer data bundles from 5–20 GB for 7–14 days, with English support and straightforward activation. An eSIM on a compatible device lets you skip swapping a physical card.
Transportation and connectivity: keep data on for door-to-door navigation and real-time updates when you travel to Shinagawa or Nerima. Taxis and ride apps rely on data, and a quick reservation is often faster and more predictable than waiting in line. Within your planning, a steady connection helps manage schedules and several routes.
Where to buy and how to use it: магазины in the arrivals area carry prepaid SIMs, with clear signage that están designed for travellers. Some counters reserve (reservados) a portion of staff for foreign visitors, making help easy to find. Pick una opción that fits your data needs and check the coverage map before you depart; you’ll save time and avoid roaming fees.
Quick tips: download offline maps for estaciones you’ll visit and set up charging points so your devices stay powered. If you stay in a villa or other accommodation outside central Tokyo, a robust data plan becomes частtь вашего плана, keeping you connected during day trips. The service at Narita is reliable, and Shinagawa and Nerima routes stay well covered by local networks, helping reduce your carbon footprint.
Luggage and Storage: Baggage Claim, Lockers, and Handling Tips
Claim your bags at Baggage Claim first, then store light items in lockers to move through Narita arrivals with comodidad. If you’re connecting to nerima or other places, transfers vary; follow pasillo signs and ask the servicio desk for condiciones. Signs usually point to maletas and зале exits, helping you llegar smoothly. Please have your claim tags ready to speed the process and ask for help if you need it.
Baggage Claim and Immediate Handling
- Proceed to Baggage Claim on the arrivals level, match your belt to the tag, and note займёт about 20–40 minutes depending on luggage volume and inspections.
- If a bag is missing, file a Property Irregularity Report (PIR) at the baggage service desk; provide your flight number and claim tag; servicio staff assist in multiple languages.
- For oversized items, use the dedicated counter or arrange delivery to your hotel; this reduces time spent roaming the terminal and speeds transfers.
- After reclaiming bags, exit toward the transfers area; if arriving from Osaka or other hubs, use the clearly marked transfers section to minimize backtracking.
Lockers, Storage Tips, and Practical Moves
- Lockers are coin-operated and available in Terminal 1, Terminal 2, and nearby Narita Skyport areas; prices vary by size and duration, so estimate total before locking in your choice.
- Choose a locker near зале or the main arrivals hall for convenience; for short stays, a 24-hour option often suffices, and storing maletas can save walking and fatigue.
- If lockers are full, use the servicio desk’s luggage storage options; these can accept standard suitcases and smaller items, and staff can explain condiciones and rates.
- For a multi-city plan or para varios días, split items between lockers and a backpack to stay flexible; this makes transfers and walking between pasillos easier.
- Before reclaiming, photograph the locker number and keep your receipt; this helps during transfers or llegar to your next flight and prevents confusion with a friend or family member.
Facilities and Comfort: Lounges, Food, Charging, and Rest Areas
Book lounge access before you land to reset quickly, recharge your devices, and plan your next steps–your day starts smoother this way.
Lounges at Narita offer quiet zones, ample power outlets, complimentary Wi‑Fi, showers, and dedicated workspaces. Times vary by terminal, so check the exact hours in the details or on the official airport site. Click the lounge section on the terminal map to view amenities and access conditions; among the Pflege of options, several lounges ya están near rail connections and carry a mayor convenience for door-to-door transfers.
Este significado significa that considering your carbon footprint matters when you travel; use a lounge to shorten long waits and reduce stress, especially if you have necesidades or todos the steps between flights. Among aspectos, you can compare a paid day pass with a membership to optimize inversión and time spent in transit. Informa details about access, and remember that some lounges están designed for japones-speaking staff, with signs in japonés and English to help you navigate estaciones and gates.
Food choices at Narita range from quick vending machines and grab-and-go counters to sit-down cafeterias and restaurant-style options. Look for japonesa staples, fresh salads, and verde tea alongside hot meals. Several eateries stay open during morning arrivals and late-night layovers, and you can save time by noting which estaciones have the strongest crowd control–несколько spots tend to be busiest around peak times. If you need billetes for a city transfer, carry the necessary documents and ask staff for guidance; تفاصيل on menu items are posted near counters, so you can quickly decide what to eat without delaying your traslado. This approach helps you stay within kondiciones and avoid delays, especially for выезд time windows and door-to-door itineraries.
Charging corners and power desks are plentiful throughout terminals, with outlets placed near seating clusters and business lounges. Bring a universal adapter and a compact charger to cover both USB-C and USB-A needs so your devices stay powered for maps, boarding passes, and entertainment. In practice, most spots offer 30–60 minutes of accessible power per device without a fee in lounges, while food courts and gates may require a purchase to secure a power tab. Your plan should include several charging breaks so you don’t run out of time or energy en route to your next flight; this is especially useful if you’re juggling work requirements or long waits.Among time blocks, you’ll find charging stations между sections labeled time blocks–среди which you can recharge while you rest or sip a drink. The setup enables you to manage menudo time efficiently and keep your travel momentum intact, no matter whether you’re exploring tokio-bound trips or 日本 travel plans.
Rest areas provide reclining chairs, quiet corners, and, in some terminals, nap pods or dedicated quiet rooms. Capacity varies by hour, so aim for off-peak windows if you can. If you’re traveling with a companion, look for nearby rest zones that are dva. Signage often labels silencio areas in multiple languages, including japones, English, and español, helping todos locate a spot that suits their comfort needs. For a smoother experience, verify condiciones for sleep spaces ahead of time and respect door-to-door access rules when you move between gates; a calm pause can boost focus for the next leg of your journey, especially when time is tight and you want to arrive refreshed.
| Area | What to know | Access tips | Times / Notes |
|---|---|---|---|
| Lounges | Quiet zones, showers, Wi‑Fi, charging, workspaces; some offer day passes, others require membership or airline status. | Check hours per terminal; click the lounge map for current access details; consider a door-to-door plan from arrivals to the lounge to shorten rest periods. | Hours vary; typical windows cover morning through late evening; muchos lounges show nearby estacion locations and языки on signs. |
| Food options | From vending to full-service dining; japonesa staples, fresh bowls, and verde tea choices. | Look for near-gate counters with short lines; reader-friendly menus display details in multiple languages; billetes accepted where applicable. | Open times span breakfast to late-night; Несколько outlets stay active during red-eye flights. |
| Charging | Power desks and outlets near most seating clusters; USB-C and USB-A compatibility common. | Carry a universal adapter; position devices at outlets near columns or seating backs for easy reach. | Typically available throughout the day; times reflect peak crowd flows in morning and late afternoon. |
| Rest areas | Recliners, quiet corners, nap pods in select zones; dim lighting helps sleepiness during long waits. | Seek off-peak windows (несколько hours before peak departures) to ensure space; respect soluciones para sleeping spaces and condiciones. | Availability varies; mayor calm occurs mid-afternoon and late-night shifts. |


