
Child Restraints - Safe Car Seats Guide, Installation Tips, and Regulations


Always secure your child in a properly installed car seat or booster for every trip. This rule rests on years of safety research and is supported by guidelines from safety authorities. The fact is that the correct restraint reduces injury risk across ages and road conditions. This information includes practical steps and helps families choose the right option for each stage of development, including boosters when appropriate.
In terms of basis, current standards rely on weight and height thresholds that adjust as a child grows. Each stage has specific requirements that are still valid across most jurisdictions. There may be an exemption in rare vehicle configurations; check local rules. This information sets expectations for years of travel and helps families plan safety around practical needs.
To install correctly, focus on proper belt routing and use the LATCH system where available. For car seats, follow the label instructions and the vehicle manual; ensure the harness is snug and the chest clip sits at armpit level. For boosters, position the belt over the strongest part of the shoulder and across the lap, using the vehicle's belt guides. The adjusted height or seating arrangement includes a checklist that helps parents verify fit for each child. This setup needs to adapt as the child grows, and a quick post-install check confirms readiness for the road. Guidelines describe actions like securing straps and checking belt tension.
Regulations vary by country and state, but there is a shared baseline: children must be restrained in an appropriate device based on age, weight and height. There is a required transition from rear-facing to forward-facing seats, then to boosters, at the right milestones. There are penalties for non-compliance, and many authorities now require annual checks or documentation in some jurisdictions. For clarity, consult official information from your local authority, because the specifics– including exemptions and penalties–change over time. Ultimately, staying informed helps families protect their children in every ride and supports parents in making the right call for each case.
Choosing the Right Car Seat by Age, Weight, and Height
Start with a rear-facing car seat for your daughter from birth and keep using rear-facing until the seat’s weight or height limit is reached; then switch to a forward-facing seat with a 5-point harness, and finally move to a booster when the belt fits correctly across the lap and shoulder. This sequence follows standards and maximizes protection on trips.
-
Infants and Toddlers (birth–2 years)
- Recommendation: use a rear-facing seat (infant seat or convertible used RF) for as long as the seat’s limits allow; most seats list a weight range up to 40 lb or 45–50 lb in RF mode, with height limits around 40 inches. Always follow the seat’s label and manual.
- Fit and installation: keep the seat at the recommended recline angle, tighten the harness until you cannot pinch any slack at the collarbone, and install with LATCH or seat belt per the manual. Check that there is no more than 1 inch of movement at the base.
- Safety checks: inspect condition of straps, buckles, and the shell; obtain a professional check if you are unsure. Installation services or a referral to a CPST can help ensure accuracy.
- Notes: this approach reduces head and neck forces in a crash and aligns with standards. If you shop, look for discounts on RF convertible models and verify they include a certificate of compliance for FMVSS 213.
-
Toddlers to Preschoolers (about 2–4 years)
- Recommendation: transition to a forward-facing seat with a 5-point harness once the child outgrows the RF limits or reaches about 40–65 lb depending on the seat. Top harness slots should be at or above the child’s shoulders.
- Weight/height guidance: most forward-facing harness seats accommodate roughly 40–65 lb or more; height varies by model, but check the seat’s height limit on the label.
- Installation notes: use either seat belt or LATCH for forward-facing seats as instructed; keep the harness snug with a proper chest clip at armpit level. Ensure the seat remains stable with minimal movement.
- Support and checks: a technician or certified installer can verify fit and offer guidance; some stores provide call-in appointments or in-store demonstrations. Look for means to obtain a quick certificate of inspection if offered.
-
Preschoolers to Early School-Age (about 4–7 years)
- Recommendation: continue with a forward-facing harness seat until the child reaches the seat’s maximum harness weight or height limit. If the harness limit is reached, move to a booster with back support.
- Boosters: choose a high-back booster if your vehicle has low seat back or poor belt routing; otherwise, a backless booster is acceptable once the belt fits correctly across the lap and shoulder.
- Fit checks: ensure the lap belt sits low on the thighs and the shoulder belt crosses the chest and shoulder securely; the belt should not ride on the neck or face. Use the seat’s guides to position belts properly.
- Maintenance: periodically inspect the harness, belt guides, and anchors; condition of webbing matters for safety. Consider a case study or test from an engineer’s review when evaluating models.
-
Older Children (about 7–12 years)
- Recommendation: keep the child in a booster with a proper belt fit until they reach about 4'9" (145 cm) or the vehicle belt fits correctly without riding on the neck or cutting into the thighs.
- Seat choice: backless boosters are common once belt fit is correct; continue using a high-back booster if your car lacks a solid seating position or head support.
- Checkpoints: ensure hips/legs are comfortable; belt guides should keep the belt in place during movement; verify that the rider remains properly positioned for longer trips.
-
Teens and Beyond (12+ years)
- Recommendation: transition to a vehicle seat belt only when the belt fits correctly across the lap and shoulder with the child’s back flat against the seat and knees bent at the edge of the seat. In some vehicles, a booster continues to provide a better fit until the child reaches the recommended height.
- Vehicle specifics: verify belt routing and seat geometry; some teens may still benefit from a booster for comfort and proper belt positioning on long trips.
- Evaluation: periodically reassess fit as the child grows; if the daughter reaches a height or weight threshold that changes belt positioning, adjust accordingly. Some families obtain guidance from a referral network or an engineer’s advisory panel when in doubt.
Additional notes: always compare models against standards and check the label for a certificate of compliance. Look for professional installation services, and inquire about discounts during promotions. If a seat is older or damaged, replace it rather than attempting improvised fixes. A well-fitted restraint reduces injury risk and supports safer riding on every trip, which means greater peace of mind for you and your family. If you need help, call a local CPST or dealer for guidance or to obtain a referral to installation services. This approach aligns with real-life cases and data reviewed by engineers, including a notable assessment by Metzger that highlights the advantages of proper RF-to-FR transitions.
Rear-Facing to Forward-Facing: When to Transition
Keep your child rear-facing until the seat reaches its rear-facing limit. This setup reduces neck and spine loads in a crash and is superior for most riders. Most convertible seats rear-face to about 40 pounds and 40 inches; some models extend to 45–50 pounds or taller heights. The seat includes a five-point harness, head support, and an energy-absorbing shell; ensure the harnesses stay snug and the headrest stays in position. For extra assurance, consider an engineer-tested installation or a quick referral to a certified technician, especially if you drive a pickup or travel on long road trips with riders in the car.
When to transition: once the rear-facing limit arrives, switch to forward-facing. For many seats that happens between 24 and 48 months, but some models allow longer rear-facing. Always verify the forward-facing limit on your model; it commonly tops around 65 pounds, though certain seats go higher. If that limit arrives earlier than you expect, consider a seat with a higher FF capacity or a different installation. This decision must consider the child's height, posture, and comfort during rides; look for a snug FF harness and ensure the chest clip sits at armpit level.
Transition Guidelines
In RF mode, harness slots sit at or below the shoulders; in FF mode, slots rise to or above the shoulders. Ensure the top tether is used for FF when advised by the model. The seat’s label and manual provide the exact requirements for recline angle, slot height, and harness snugness. Use a belt or lower anchors for a stable base, and check for minimal wiggle with a quick shake test. If you are unsure, a referral to a certified technician can provide a quick, professional check; this step helps ensure an installation that translates well to pickups and road trips and reduces risk in a related situation.
Practical Tips for Different Setups
In pickups and compact SUVs, verify there is enough space for a rear-facing setup without compromising legroom. For ridesharing or rotating rider needs, choose a seat that suits the vehicle and request a referral if a trainer or technician can assist. The seat includes accessories like head supports and anchor straps; use only manufacturer-approved items to avoid compromising safety. This approach saves space, keeps rides calm for the child, and helps families stay sure on the road during longer journeys with multiple riders and gear.
| Seat Type | Rear-Facing limit (months / pounds / inches) | Forward-Facing limit (months / pounds) | Notes |
|---|---|---|---|
| Convertible seat | RF: 24–48 months; up to 40 lb / 40 in | FF: up to 65 lb | Model varies; harnesses must be at or below shoulders RF and at or above for FF; verify with label. |
| All-in-one seat | RF: 24–48 months; up to 50 lb / ~43 in | FF: 65–100 lb (model dependent) | Includes harnesses and head support; check maxs for FF; ensure top harness slots align with child height. |
| Rear-facing only seat | RF: 9–24 months; up to 22–40 lb / 29–37 in | – | Upgrade when RF limit is reached; consider a convertible for longer use. |
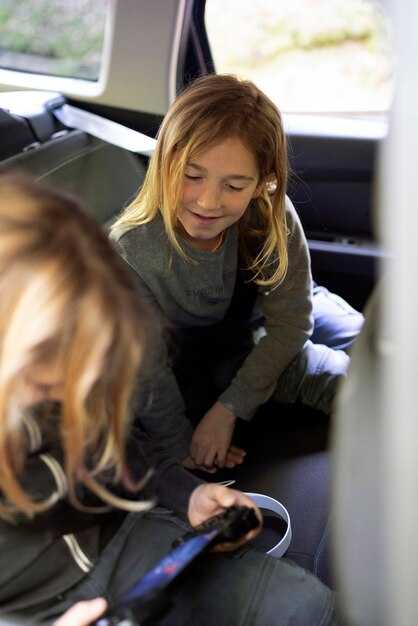
Booster Seat Requirements: Height, Weight, and Age Guidelines
Keep your daughter in a booster seat until the seat belt fits correctly across the chest and lap. Most children reach this fit around 57 inches tall, usually between 8 and 12 years old.
Height guidance focuses on belt position. The lap belt should lie low on the thighs, and the shoulder belt should cross the chest and shoulder without riding up on the neck. If the belt tends to slip, stay in a booster and adjust the seating until the fit is solid.
Weight ranges vary by model. Booster seats are usually labeled for children 40–100 pounds; some models handle higher weights. Check the label on your booster to confirm the range and plan for an upgrade if your child weighs outside it. A sufficient fit keeps the belt within the correct zones even during sudden stops.
Age considerations center on belt fit and rules. Most children are ready between 8 and 12 years old, but age alone isn’t enough to stop using a booster. If the belt does not stay properly positioned, continue using the booster regardless of age. Likely, you’ll know readiness when the belt sits correctly on the shoulder and lap in most back seats.
- Taxis and rideshare: Always bring a booster for every ride; many cars don’t provide one. Ensure the booster is installed in the motor vehicle with the belt guides aligned. For off-site events or late rides, a portable booster gives you flexibility.
- Compliance and exemptions: If a jurisdiction requires a booster, comply. Some places offer exemptions when a booster isn’t readily available. Non-compliant seating could lead to penalties; in rare cases, it could be treated as crime. Known guidelines and certificate labeling help families stay within rules.
- Installation and checks: Verify the booster has a current certificate of safety compliance and that the belt path aligns with the vehicle seat. If you use a bucket-style seat base, ensure the belt path remains secure and the booster sits flush against the back of the vehicle seat.
- Practical readiness: Plan ahead by keeping a compact booster in your car or in an off-site bag for late rides. A booster gives your daughter a secure restraint in spots where a built-in seat isn’t available, reducing the risk of slippage during a sudden stop.
Harness Fit: How Tight Is Too Tight and Where Should the Chest Clip Sit
Test the harness by pinch: you should not pinch any webbing at the shoulder. The chest clip should sit at armpit level, centered on the chest, with straps lying flat and untwisted. This setup limits movement in a crash and keeps the child securely in the seat.
For the harness slots, adjust height as the child grows so the shoulder straps stay over the shoulders rather than slipping off. If you feel slack, tighten gradually until the pinch test passes and the chest clip aligns with the armpit line. A loose fit can transfer forces poorly in a crash and cause discomfort, while an overly tight fit may restrict breathing or movement, especially on longer trips. Some seats automatically lock the buckle once tightened, but you still must recheck the fit with the pinch test.
Practical fit checks
Position the chest clip at mid-chest, not high on the neck or too low on the abdomen. The shoulder straps should lie flat, be snug against the chest, and not twist. Lift the child gently by the harness to ensure there is no noticeable slack in any strap.
With toddlers and older children, re-check fit after growth spurts, lengthy rides, or after a seat swap. If the seat is issued with a detailed chart or guidance card, follow those specifics; if not, use the pinch test as a baseline.
When a child transitions to a booster, the chest clip step is removed because boosters rely on the belt path, not a harness. Ensure the lap belt sits low on the hips and the shoulder belt crosses the chest. In this situation, you must verify the belt stays correctly positioned for every ride, especially during quick starts or stops, to avoid belt slippage during a crash.
Legal requirements vary internationally, and some families report that authorities view misfit seats as a legal issue or even a crime in cases of negligence. Obtain guidance from official safety authorities and use a trusted guidance card to confirm you meet the local standard. The issue is to keep their child safe in every situation, and strong adherence to the guidelines makes the seat fit more reliable for every member of the family.
Experiences from families show that trying different adjustments and consulting a certified technician helps. If you have questions, ask the local safety program or a retailer about your gear, and obtain a clear answer. An informed decision, especially when dealing with a child’s needs, reduces risk and supports confident travel for the entire family.
Installation Methods: LATCH vs. Seat Belt–Choosing the Right Method
Use LATCH for compatible seats and anchors; switch to the seat belt method if anchors are not accessible, or if the seat weight exceeds the LATCH limit. Therefore, verify weight limits in both the car seat manual and the vehicle manual before starting.
LATCH provides a tighter fit when lower anchors and a top tether are available in your seating position; check your vehicle's centre or outer seating positions, as some models place anchors only at the sides. If centre anchors are not present, install with the seat belt method in that position or choose an outer seat that supports LATCH.
Seat belt installation routes the vehicle belt through the seat's belt path and uses a locking mechanism if required; ensure the belt lies flat, the seat sits firmly against the vehicle surface, and the belt path is clear. This method is portable across cars, making it useful for traveling with different vehicles or off-site installations. After installation, test by pulling on the seat at the belt path to confirm movement is minimal, ideally less than 1 inch.
When LATCH is the superior choice
In most cases, LATCH yields a quicker, more consistent setup when weight limits are respected and anchors are accessible. If the child reaches the LATCH weight limit or the anchors are not accessible in the chosen centre, switch to the seat belt path. When using the centre seat, confirm anchors are present to avoid a loose fit; otherwise place the seat on an outer position where LATCH is available.
Special considerations for family, disability, and professional guidance

For a family with disability or medical needs, personalised guidance matters; consult a doctor or psychologist to address handling or positioning concerns. If you need a certificate for off-site training or a commission review, request it from the safety authority. In cases where a caregiver has a convicted safety offense, seek formal guidance and have the installation reviewed by a qualified technician. For traveling or travelling, carry portable installation materials and keep the instructions on hand so you can reproduce a safe setup in their vehicle. This approach supports their safety across different cases and travelling scenarios.
Common Mistakes and Quick Fixes for Car Seat Installations
Always secure the car seat with the correct belt path or LATCH anchors before placing the child in it, then test the seat for tightness. Try to move the seat side-to-side and front-to-back near the belt path; if it shifts more than about 1 inch, tighten again. After you position the child, recheck to ensure their weight doesn’t loosen the installation during trips or carrying the child image in or out of the vehicle.
Mistake: incorrect orientation or harness path. Quick fix: confirm rear-facing for infants and younger toddlers until the seat’s limit is reached, then switch to forward-facing with the top tether. Use the harness slots at or below the child’s shoulders for rear-facing and at or above the shoulders for forward-facing. If you’re unsure, scan the label with a smartphone and verify against the manual to ensure you comply with the seat type and vehicle means of installation.
Mistake: harness not snug. Quick fix: perform the pinch test at the collarbone–if you can pinch fabric and it cinches away, tighten the harness until the strap lies flat and cannot be pinched. Position the chest clip at armpit level and ensure the harness straps lie flat over the child’s shoulders without slack. Their comfort matters, but the fit should stay snug even when they wiggle during standing and moving around inside the car.
Mistake: bulky clothing or thick jackets interfering with harness. Quick fix: remove coats or bulky layers, place the child in the seat, then add a thin layer underneath the harness if needed. For colder trips, use a lightweight, snug fleece or a car-seat cover that does not create slack. This practice helps prevent the harness from slipping and saves time correcting a loosening fit.
Mistake: wrong belt path or not locking the belt. Quick fix: route the vehicle seat belt or lower anchors through the correct path as indicated by the label and manual. Engage the seat belt lock mode or tighten the LATCH connectors firmly. If you cannot achieve a snug fit, try a different seating position or move the seat to the rear row to improve stability and comply with the vehicle’s weight limits and types of anchors.
Mistake: forgetting top tether for forward-facing seats. Quick fix: attach the top tether to the designated anchor, tighten until all slack is removed, and double-check the seat’s forward-facing configuration. A properly tethered seat reduces forward movement and helps prevent rotation during abrupt stops, which protects the child during trips and daily driving alike.
Mistake: placing a seat in front of an active airbag. Quick fix: move the seat to the rear seat, or disable the front airbag per the vehicle manual if the car seat must be in the front row. When in doubt, choose the rear seat location to comply with safety recommendations and to avoid risk to the child rider in a crash.
Mistake: using a seat that does not fit the child or vehicle. Quick fix: check that the seat type matches the child’s weight and height, and that the seat is compatible with the car’s seat width and anchor system. If you cannot determine compatibility, obtain a quick evaluation from a specialist or use a reputable fit-check service. In Orlando and similar markets, certified technicians can provide a same-day assessment and issue a certificate of proper installation after a quick hands-on check.
Mistake: failing to recheck after changes or loads. Quick fix: after every adjustment, re-test the seat with the child in place, then verify no movement along the belt path. Take a quick image of the setup to compare against the manual, and keep notes on any adjustments. If you still notice movement, repeat the steps or consult a specialist for a standing check to ensure ongoing compliance.
Quick pre-trip checks: run a short, structured review with the child in the seat. Confirm the harness snugness, recline angle, tether status (if forward-facing), and seat location. Use a trusted means to verify compliance, such as a quick reference app on your smartphone or a printed checklist from the seat name and model. Regular practice with these steps saves time, reduces risk during riding, and helps you obtain and maintain a safe setup that riders and caregivers can rely on every day.
Regulatory Landscape: Key Rules by Region and What to Look For in Labels
Always verify the seat's label against your region's requirements before you buy; this quick check saves you from choosing a model that won't be accepted where you travel, including taxis or hire cars.
Regional Rules at a Glance
Most regions require a tested child restraint with clear regional markings. In the United States, seats must meet FMVSS 213 and carry a NHTSA label; installation can be belt or LATCH, and exemptions may apply for taxis in specific jurisdictions. In the European Union, labels show the UN ECE standard (R129 i-Size or R44/04) with an ECE approval number; many seats link ISOFIX anchors and belt fittings, and most new models carry multiple compatibility marks for international travel. Canada relies on CMVSS 213 with local enforcement at point of sale; Australia and New Zealand enforce AS/NZS 1754, with labels detailing weight bands and installation options. Some regions impose additional rules for commercial fleets or rental services; you must confirm exemptions for taxis or hotel shuttle programs and when a seat is legally required. In practice most families cross borders with seats that advertise their approved standard and age/weight ranges, plus month/year of manufacture and the seat's expiry if listed. If a seat has become damaged or issued under a recalled batch, replace it without delay. For fleet programs such as hilton shuttle services or other hotel-linked transport, staff guidance and a referral to a certified installer ensures the risk of incorrect fitting is reduced and the installation is validated by a trained professional.
What to Look For on Labels
Read the label for the specific requirements: the exact standard (for example FMVSS 213, ECE R129, AS/NZS 1754), the model number, and the issued date; check the manufacture month and year to assess age; confirm the weight and height ranges, and whether the seat is bucket style or convertible; confirm if ISOFIX linked anchors are present and whether the label supports recline angles when fitted. Look for expiry or replacement guidance; note whether the seat has an expiry of six or ten years and verify compatibility with your vehicle’s belts or ISOFIX system. Ensure the label clearly states how to install and inspect the seat after each month of use, and to check the buckles and supports after any crash or accident, as damage may occur even if no visible harm is present. If youve got questions, request a referral to a certified installer; a professional will verify that the seat remains safely fitted and can advise on which position provides the most secure support. This approach saves you from relying on vague claims and helps you pick a model that stays safe across years and travels, including internationally.


