Narita Airport Guide - Essential Tips for Arrivals, Departures, and Transit
Buy a Suica or PASMO card at the arrivals hall; it’s the quickest way to move between Narita terminals and into Tokyo. The card includes a 500-yen deposit and can be topped up at machines in every terminal. There are several ways to pay with it, making getting around seamless from the moment you land. Use it for trains, buses, and even vending machines, and snap a quick photo of your first ride plan to keep the route clear in busy queues.
Choose the rail option that suits your destination: Skyliner to Nippori or Ueno for fast connections, or Narita Express to Tokyo Station for a direct link to major JR lines. The Keisei Skyliner reaches Nippori in 36–41 minutes with fares around 2,400–2,700 yen. The Narita Express to Tokyo Station takes about 60 minutes and costs roughly 3,000–4,000 yen. From Tokyo, Shinjuku is reachable in 20–30 minutes on the JR Chuo Line; for fewer transfers, head to Tokyo and switch there. Present your ticket at the gate to confirm your platform; signs show the routes and transfer points across the terminals. This option is significant for travelers staying near central districts and planning a tight schedule for their trip.
Three terminals handle different flows, with clear connections and included facilities like lounges, baggage services, and shops. Terminal 1 serves most international and domestic flights in two wings; Terminal 2 handles a large share of international traffic and most domestic routes; Terminal 3 focuses on low-cost carriers. A frequent free shuttle runs between terminals every 15–20 minutes, and the signs guide you to immigration, baggage claim, and onward connections. Use the terminal maps to plan your drive or onward transfer, keeping an eye on routes and platform changes.
Immigration, customs, and baggage claim times vary, so plan for delays and decide your route early. In peak periods lines can grow long, but Narita operates a dense rail network that connects to central Tokyo with minimal backtracking. The fastest route to central Tokyo is to take the rail from Terminal 2 or Terminal 3 and transfer to the JR or Keisei network, then continue to Shinjuku or your hotel. A taxi from the arrivals area to central Tokyo costs around 25,000–30,000 yen and takes roughly 90–120 minutes depending on traffic. For steady navigation, activate a local SIM or eSIM and keep maps ready; a quick photo of the station layout can help on the go if you need a reference point there while you wait for your transfer.
Transit tips for a smooth stay: use a single rail plan to minimize backtracking and follow the routes that connect most directly to your hotel. For convenient access, aim for Nippori/Ueno or Tokyo Station first, then switch to the JR Yamanote or Chuo lines to reach Shinjuku in about 20–25 minutes. Track the routes on the airport screens, and take a quick photo of the map when you sit down at a café to plan the next leg. This setup keeps your trip predictable across a network that spans over sixty kilometers of rail, with trains running frequently from early morning until late at night, including late-night services for late flights.
Narita Airport Guide: Tips for Arrivals, Departures, and Transit; Prices Without the JR Pass
Take the Keisei Skyliner to Nippori for the fastest link to central Tokyo; the journey runs about 36 minutes and costs roughly 2,470 yen, making it a strong first move after landing. This option often beats JR routes on price and time, giving you a quick start without a JR Pass.
An alternative is the Keisei Access Express to Ueno or Nippori, typically 1,000–1,250 yen and 60–75 minutes. Use this if you prefer a budget path or arrive during busy hours when Skyliner trains run full.
The Narita Express to Tokyo Station delivers a comfortable ride in roughly 60–85 minutes for about 3,000 yen. Reserve seats when you can, and note that this route directly connects to the Yaesu side of Tokyo Station and other JR lines for easy onward travel toward Shibuya, Shinagawa, or Shibuya-area neighborhoods.
For door-to-door service with luggage, Limousine Bus options to Shibuya, Shinjuku, and other hubs cost around 3,200–3,500 yen and take about 75–90 minutes, depending on traffic. If you aim for district centers or hotel zones, this route minimizes transfers and handling.
As a premium choice, a taxi to the city center can run 20,000–30,000 yen and typically spans 60–120 minutes, depending on traffic. This is convenient for large groups or tight schedules but plan for traffic spikes at peak times.
Facilities at Narita include shower rooms and laundry services in select lounges and hotel areas. Food courts offer buffet-style options with quick bites and sit-down meals, while standard cafeterias cover coffee, snacks, and more substantial dishes. Wi‑Fi is available at no charge via the airport network, and charging stations line the lobby and seating areas for device recovery after your flight. The official website provides updated fare maps, terminal guidance, and a live image of train boards to help plan boarding times.
Travelers can locate signs toward Terminals 1, 2, and 3 from the main lobby, then follow imagery on map boards to reach the Narita Rail concourse. If you want a cultural stop, a quick taxi ride brings Shinsho-ji temple into the city rhythm, while a transfer to the Yaesu exit at Tokyo Station opens access toward districts like Shibuya and the Shibuya area for evening plans. Always purchase tickets at the kiosks or windows in the arrivals lobby and verify fares on the official site before departure; you can also photo an image of the map to use as a reference on a phone when you navigate the airport floors.
| Option | Destination | Travel time | Fare (adult, one-way) | Notes |
|---|---|---|---|---|
| Keisei Skyliner | Nippori | 36 min | ≈ 2,470 yen | Fast link to central Tokyo; transfer to JR or subway; reserve in advance |
| Keisei Access Express | Ueno / Nippori | 60–75 min | ≈ 1,000–1,250 yen | Budget option; frequent service; good for northern zones |
| Narita Express (N'EX) | Tokyo Station | 60–85 min | ≈ 3,000 yen | Direct JR route; reserved seating; comfortable |
| Limousine Bus | Shibuya / Shinjuku | 75–90 min | ≈ 3,200–3,500 yen | Ground transport with luggage; check stops on the website |
| Taxi | City center | 60–120 min | ≈ 20,000–30,000 yen | Door-to-door; depends on traffic; best for groups |
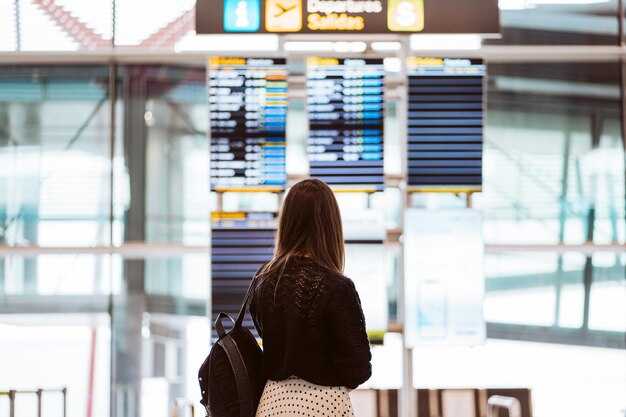
Arrivals: How to navigate Narita terminals, immigration queues, and baggage claim
Head to Immigration first, keep your passport and arrival card ready, and have any passes or bookings handy. You might reduce wait times by selecting the correct line on arrival and moving efficiently with your luggage on the floor marked for arrivals.
Follow clearly labeled signs to Immigration on the arrivals floor of your terminal (Terminal 1, Terminal 2, or Terminal 3). After passport control, proceed to the baggage claim area on the same level, then clear customs before exiting to the arrivals concourse. Only then step into the public area where you can collect bags and exchange currencies or SIMs if needed.
Queues vary by hour and terminal, so choose the right line promptly. If you have a family, speak with staff for guidance on the most straightforward path, and consider travel partners near you to share the walk to baggage. If you require assistance, request it at the desk rather than waiting in a longer line.
After you collect luggage, watch monitors for your flight number and carousel; if a bag doesn’t appear, visit the baggage services counter with your claim tag to note item status and arrange a replacement or delivery. Public bathrooms and bath facilities are present in most terminals, and some lounges offer hairdryer use or showers; otherwise plan a quick stop at a lounge or hotel for comfort before you head to transit or a hotel stay.
Onward transport and practical tips
For central Tokyo, take the Narita Express or Keisei Skyliner; both offer fast, direct transport to major hubs. If you have private transport or a hotel with a private transfer, show the booking confirmation at the desk and head to your pickup point without delays. Budget travelers can buy tickets at self-serve kiosks on the arrivals floor and connect to the JR or Keisei networks with ease.
If you prefer an alternative route, consider local buses or airport hotel shuttles, then transfer at Tokyo Station and walk to the Yaesu area for connections. Discover nearby shopping options in the mall-like concourses, where you can select souvenirs or grab a bite right after you exit customs. For longer layovers, Naritasanmonzen offers a brief outdoor excursion outside Narita city–a quiet way to stretch your legs before the next flight.
Understand restrictions on liquids and electronics before you depart the arrivals area: pack to minimize carry-ons, and keep spare batteries and chargers in your carry-on only if permitted. If you foresee a stay in Narita, reserve a lounge access or a private room, order meals, and plan a small laundry or refresh break if your schedule permits. You might find that some facilities require advance reservations, so check ahead and confirm with staff or by calling your hotel–this helps you avoid unnecessary delays and keeps your right to a smooth start intact.
Connectivity on arrival: where to get a SIM card, rent pocket Wi‑Fi, and typical prices
Get a SIM card or pocket Wi‑Fi at Narita's arrivals counters right after you clear immigration. english-speaking staff in Terminal 1 and Terminal 2 offer quick setups and clear explanations, and the information line near the desks helps if youre unsure which option to choose. Travelers from Richmond often note the station counters are easy to reach and the process moves fast.
SIM cards come in 3GB, 5GB, and larger data packs. Typical prices are about 1,500–2,500 JPY for 7 days (3GB/5GB options) and 2,500–3,500 JPY for longer periods such as 14 days. Youre asked to present a passport at the counter; those IDs are required to activate the line, and some shops may present a temporary number for immediate use. English assistance is standard, and most counters provide quick setup and easy English instructions. The service provides reliable connections suitable for maps, messaging, and bookings line updates.
Pocket Wi‑Fi rents start around 800–1,200 JPY per day, with kits that cover 1–5 devices and speeds suitable for maps, video calls, and streaming. Some shops offer unlimited data for a daily cap, others charge per GB, so compare a day-by-day option. Wi‑Fi hires are simple to book at the arrivals desk, or you can book online in advance and pick up without waiting in line. Most plans require a passport and a rental agreement; you can pick up at the same station counters, or at a partner shop present in the terminal. Those options are popular for trips where you need steady data on the go, especially if you care about fitness routines or staying connected during transfers.
To avoid long lines, consider bookings for the airport counters; during peak times the line can be crowded. Those bookings let you pick a pickup window and skip the initial queue, especially if youre arriving during early morning trips. If you want flexibility, compare the option of a SIM vs pocket Wi‑Fi and choose the one that matches your data needs and itinerary. Free Narita Wi‑Fi exists, but it’s slower for maps and video, so a local SIM or pocket Wi‑Fi is ideal for most travelers, without adding stress to your present plans.
Storage lockers near the arrivals area let you store bags while you compare providers, so you can enjoy some time exploring or grabbing a quick breakfast without luggage in the way. After you present your choice, youre set to stay connected on every leg of your journey, whether youre headed to Tokyo via the JR line, a taxi stand, or a hotel transfer. The factors to consider include data limit, device support, additional roaming needs, and whether you require international roaming in addition to a local plan, which most travelers find provides the most reliable option for their trips. Youre ready for a smooth arrival and a connected start to your Narita experience, with the sense that you chose the right connectivity setup for your line and plans.
Getting to Tokyo without the JR Pass: train, bus, and taxi options with price ranges
Choose the Narita Express (NEX) for speed and comfort. It links Narita Airport to Tokyo Station in about 53 minutes and to Shinjuku with a transfer, offering standard class seats or a Green Car option. Plenty of space for bags and smooth, quiet cars make it ideal for beginners and travelers with luggage. Some trains even offer showers at certain stops, a useful feature after a long flight. One-way fares typically run around 3,000–3,400 JPY.
Rail options from Narita
Keisei Skyliner heads to Nippori or Ueno in about 36–45 minutes, with a price around 2,470–2,800 JPY. From Nippori or Ueno, a quick JR transfer reaches Shinjuku, Shibuya, or other districts within 20–30 minutes, keeping total costs near 3,000–3,800 JPY depending on the route. The Skyliner offers tidy seats and clear, multilingual signage that is useful for beginners. Outdoor signage helps you navigate stations confidently. If you have days to spare, a small side trip to naritasan Shinshō-ji temple is easy to fit around a rail option. This rail path gives you flexibility to choose your accommodation and plan your days.
For a direct JR path without a JR Pass, the Narita Express to Tokyo followed by a JR transfer remains a straightforward option with similar prices and comfortable seating. The route passes through clean terminals and well-lit buildings, making the transfer simple even for first-time travelers. This option presents a reliable way to reach central Tokyo and tailor your first days in the city to your preferred district.
Bus and taxi options
Airport Limousine Bus serves major terminals and many hotels, with typical fares of 3,000–3,400 JPY to central Tokyo and travel times from 60 to 120 minutes depending on traffic. The service presents a convenient door-to-door option when you carry bags or arrive late, and it helps you keep your plans intact after a long flight.
Direct taxis from Narita cost roughly 30,000–40,000 JPY to central wards such as Shinjuku, Chiyoda, or Ginza, with travel times of 60–90 minutes in normal traffic. A taxi provides ideal convenience if you value a private ride straight to your accommodation and you’re traveling with several bags or a group. This option shines when your trip requires a quick, predictable arrival and you want to start your stay without navigating transfers.
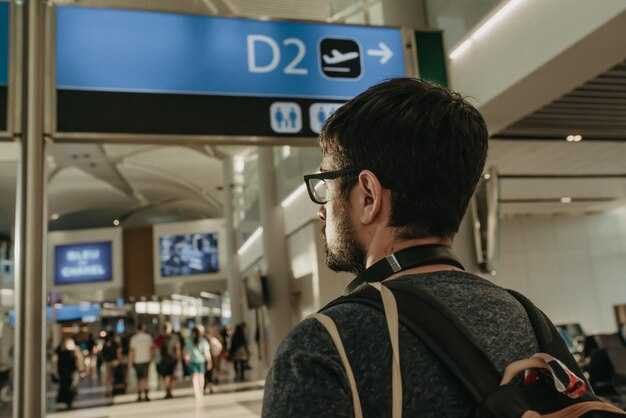
Transfers and transit: moving between Narita terminals and catching a connecting flight
The easiest transfer between Narita terminals is the free internal shuttle; allow 30 minutes from touchdown to boarding, and check your bookings for the route details. If you want the fastest path, start with a terminal-to-terminal transfer and use official airport signs to guide you.
When you’re looking to move quickly, these options stand out:
- Terminal shuttles – Free links among Terminal 1, Terminal 2, and Terminal 3. Easiest and offered around the clock; duration 7–12 minutes door-to-door; frequency about every 7–15 minutes. Follow signage and use the transfer desks for up-to-date details. This option is significant because it keeps you inside the airport property and minimizes risk of delays.
- Walking connectors – Sheltered indoor routes exist, with some outdoor segments offering a scenic option for daylight transfers. Relative to waiting for a shuttle, walking can save time if you’re carrying light luggage. Expect 10–15 minutes depending on your gates and crowd level; these routes are useful when you want to avoid queues.
- Railway options for onward travel – If your connection requires city-bound travel, use the airport stations to board JR-East Narita Express (NEX) or Keisei services. Route numbers and station names appear on signs; the JR-East option typically reaches central Tokyo in about 53–60 minutes excluding transfer time. Some bookings may route you via shinshoji on certain lines; confirm this in the route details before you depart. This is a strong option when you want to simplify your onward journey into Tokyo or beyond.
- Signage and route details – In every terminal you’ll find clear signs for JR-East, Keisei, and airlines areas. Look for route numbers, step-by-step directions, and information desks. The present boards update frequently, so it’s useful to re-check as you move through the mall and waiting zones. If you’re planning a complex connection, bring your route from the bookings and verify it against on-site details.
- Facilities during transfers – If you have a long layover, you can access lounge shower rooms or shower facilities, and many lounges offer dedicated service with comfortable seating; check your airline or airport property for availability. Some on-site options may be part of the property’s premium offerings, so it’s worth asking at the information desk for the best fit.
Timings and tips for specific scenarios:
- From T1 to T2, plan 25–40 minutes total, including potential security checks, with 7–12 minutes of transit time between terminals via the shuttle.
- From T2 to T3, budget 20–35 minutes, using the transfer bus or indoor connectors; duration varies with crowding and wait times.
- City-bound travel after transferring: allow 40–60 minutes for the ride, including ticketing and platform changes; use prepaid options if available through bookings.
Custom tips for a smoother experience:
- Want a calmer transfer? Use the dedicated transfer desk and keep your boarding pass ready for quick checks; staff can guide you to the fastest route, saving you time and stress. Look for useful signs and terminals’ move-by-move directions.
- When you arrive, use the information counters for the best route to your next flight; they provide useful pointers and present multilingual support to help you navigate.
- If you’re mapping your trip, consider the number of steps and distance between terminals: some routes require more walking; plan with your luggage to avoid delays and to reach your next gate into the destination area smoothly.
Departures: check-in, security, lounges, and last-minute services
Check in online and save passes to your phone. For each passenger, head to the correct counter or use self-service kiosks, then drop bags at the bag-drop area. Plan 75-90 minutes for check-in and security when departing internationally; if you travel with a group, allow more time. The app doesnt require you to print passes, and you can read the boarding pass on screen. Always have your passport handy and follow airline directions for any additional steps. This saves much time and is one of the easiest ways to stay on schedule.
Security: keep passport and boarding pass ready, remove laptops and liquids from bags, and place them in bins. Use any fast-track lanes if available through lounge access or status. Read the screens for gate updates, and follow directions of staff at the security area. After security, you’ll re-enter the terminal areas and find your gate without backtracking.
Lounges: After security, identify the area where your gate and lounge are located. Look for image cues on signs to reach lounges within the same zone. Lounges often offer fitted seats, power outlets, Wi-Fi, and showers. Some lounges provide private suites or family areas. You can book ahead via the airline app or buy a day pass at the desk. If you travel with a group, reserve a shared seating area. One simple method is to use the app to book a lounge pass. This setup enhances your airport experience.
Last-minute services: As departures near, check signs for your gate, use lounge last-minute options, and consider quick-dry laundry on request in some premium lounges. If you need a short rest, hotelfs near the terminal offer day-use rooms. Outside, taxi and ride-share drivers are ready at designated zones; budget travelers can use rail or bus links for cheaper connections. If you have a long connection, plan a brief visit during a connectionshour to nearby attractions such as shinsho-ji temple, reachable by a short ride. Make a compact list of must-dos to stay on schedule.
Narita facilities: luggage storage, dining, shopping, and accessibility tips
Choose the Terminal 1 luggage storage near the main arrivals area to stay light for a full layover and still explore dining, shopping, and transit options.
- Luggage storage and lockers: Narita operates both self-service lockers and staffed storage desks in each terminal. The service operates daily with lockers of varying sizes. Expect lockers that accept multiple bags, and bring your own pad or lock code for security; there are lockers that use a simple code to release your items. If you need a longer stay, staff can advise on larger storage options and any temporary accommodations.
- Fees, hours, and reservations: Rates typically scale by locker size and duration; larger lockers cost more, but there are options for short-term and longer stays. Reservations are available for some services via the official Narita information portal, which helps when you have a tight schedule or a crowded arrival. If reservations aren’t required, arrive during mid-morning gaps to avoid crowds.
- Tips for use and security: Place valuables in a locked locker or at a staffed desk, and note your locker number and release code. There’s peace of mind knowing your belongings are safe while you shop at the duty-free centre and enjoy the blossoms-themed displays in spring. If you’re unsure about access, ask a staff member at the centre desk for directions and a map.
- Dining options: Narita offers a broad mix of Chinese, Japanese, and Western cuisine, with quick-service kiosks and sit-down restaurants. Chinese options include noodle bowls and dumplings, while Japanese menus span ramen, donburi, and curry; international choices cover pizza, burgers, and healthy bowls. There are seasonal pop-ups and themed stalls where blossoms or local flavours appear, especially in peak travel periods.
- Reservations and timing: Some sit-down spots accept reservations, but most eateries operate on a walk-in basis. If you’re short on time, pick a quick-service counter in a food hall or grab-and-go spot near the main transfer corridors. For groups, select a compact dining area with faster service to stay on schedule.
- Tips for comfort: Arrive at dining zones before the main crowds to enjoy a calmer atmosphere and full table options. Many venues are located in the central hubs of each terminal, so you can easily plan a bite before your next train or flight.
- Shopping and duty-free: Narita’s centre offers a wide range of brands, travel essentials, electronics, and souvenirs. You’ll find options across duty-free zones and main store corridors, with a larger selection in Terminal 1 and the north wing of Terminal 2. Look for centre-wide promotions and seasonal displays; there are Japanese crafts, cosmetics, and premium gadgets to pick up as you wait for your next leg.
- Prices and codes: Many shops use tax-free pricing for international travelers, so have your passport ready at checkout to receive the correct duty-free discounts. Some stores require a membership code or offer online reservations for store pick-up, which can save time if you’re transitioning to a long-haul flight.
- Tips for navigating: If you’re traveling with a larger shopping bag, ask staff for an accessible route or stroller-friendly path to minimize backtracking. There are clearly marked directions to each shop from the central corridors and transfer zones; follow the north-south signs toward the Yaesu-connected transit corridors to reach the main shopping lapses efficiently.
- Accessibility tips: Narita prioritizes comfort and ease for all travelers. Elevators and escalators connect all levels, and restrooms include accessible facilities. Staff can arrange assistance for those with limited mobility, and information desks provide direction codes or maps for the shortest routes to gates, lounges, and trains. Charging hubs and power outlets are available near seating clusters, so you can stay connected during transfers.
- Travel with peace and efficiency: For families or travelers with strollers, Narita offers wide corridors and shorter detours to key facilities, reducing backtracking. If you arrive with a group or plan a hop to a nearby hotel or accommodation, ask staff about accessible routes and the fastest transfer options to the Yaesu or Yaesu-bound rail segments in Tokyo. There are several power outlets and USB ports in seating areas to keep devices charged during long waits.
- Important notes for accessibility planning: Some services operate with limited hours in the early morning or late evening, so verify the terminal’s information board for current schedules. If you’re visiting during cherry blossom season, lines at popular shops can be crowded; plan to visit the centre when it’s less crowded to enjoy a calmer shopping or dining experience.
Transit compatibility: From Narita, you can catch a direct train to central Tokyo and Yokohama, then head toward the Yaesu area using the JR lines. If you need a quick direction change, the staff can point you toward the fastest train options and the corresponding platform numbers. The rail connection to Tokyo Station typically operates on reliable schedules, with most trains running smoothly to major hubs and airports, supporting a comfortable stay while you navigate your next steps.


