


Plan ahead: book a 1-way transfer from Kansai International Airport to your hotel to cut waiting time and ensure you reach your adjacent destination quickly. From the airport, rail links reach central Osaka in about 50-70 minutes, with tarify typically ranging 1,000–2,000 JPY on most lines, so compare transport options before you buy.
Terminal 1 serves the bulk of international and domestic flights, while Terminal 2 concentrates on low-cost carriers and some domestic services. The two terminals are connected by a pedestrian path and a transfer desk; the airport property offers lounges, shops, and a variety of dining options designed for large crowds.
Rail and road access provide a range of options: JR West Haruka, Nankai airport express, city buses, taxis, and car rental. pripojenie services to other airports in the region are arranged to minimize layovers; hinone signage helps cestujúci find the correct transfers, and unlike other hubs, clear indicators guide you to the right terminal.
To reduce stress during a výlet, choose an alternative route with fewer transfers and direct city connections; a 1-way fare often saves time and money, while tarify at the airport counter can vary by hour and line.
For practical tips, expect tarify and ticketing options to be variety-rich across rail and bus; use adjacent gates or corridors to minimize walking, and plan around transfery to avoid delays at peak times. Kansai International Airport puts alternative transport within easy reach, connecting cities across the region through reliable, well-signed routes.
Nankai Rapit from Namba to Kansai Airport: Routes, Ticketing, and Travel Time
Take Nankai Rapit Express from Namba to Kansai Airport for the fastest, direct ride–about 34 minutes. Reservations are mandatory, and seating is guaranteed once you book. Buy tickets at Namba’s Nankai counters or machines, or book online; if you want to travel as a family, reserve together so you sit right beside each other in the same car. For those who want to add a bit of shopping before departure, Namba offers several spots and a nearby mall area where you can finish purchases without rushing.
The main route uses the Nankai Main Line from Namba to Kansai Airport Station, with a straightforward map to Terminal 1 afterward. The Rapit makes several quick stops along the way but stays on a high‑speed track to the airport, keeping travel time tight. Those who want to combine travel with other destinations can use Kintetsu service from Osaka to Nara or other spots if your plan allows, but the Rapit remains the main direct option when heading to the airport from the city.
Ticketing details: the Rapit fare covers base plus a limited express surcharge, and you should expect a total in the range of a couple thousand yen depending on season and seat class. Reservations are recommended–you can secure seating at the same time you purchase the ticket. If you’re after cheaper options, consider the regular airport express or a limousine bus, which can be cheaper for families or those traveling in groups; those choices also connect smoothly to terminals. A free transfer walkway from Kansai Airport Station links you to Terminal 1, making the final leg easy those arriving on the Rapit.
Terminal 1 vs Terminal 2: Which Airlines Use Each, Check-in Layout, and Transfers
For most travelers, Terminal 1 is the ideal pick, while Terminal 2 shines for Peach Aviation, Jetstar Japan, and other low‑cost options. There, you’ll find the widest mix of international services and major Japanese carriers, making it the right starting point for most itineraries.
Airlines by terminal: Terminal 1 serves the bulk of international flights and all large Japanese carriers, including JAL and ANA, plus many global partners such as United, British Airways, Air France, KLM, and Singapore Airlines. Terminal 2 concentrates on low‑cost and regional services, with Peach Aviation and Jetstar Japan as the primary operators, and occasional domestic routes handled there to balance crowds.
Check-in layout in Terminal 1 is straightforward: ground‑floor halls host airline‑specific counters in clearly labeled zones, with a dense cluster of self‑service kiosks in front of each bank. There are dedicated bag‑drop areas near each zone, and clear signage in English and Japanese guiding you toward security and gates. If you’re traveling with a group or family, you’ll appreciate how the zones decongest the process there, letting you move efficiently toward morning departures.
Terminal 2 uses a compact, well‑organized check‑in hall tailored to low‑cost carriers. You’ll see long lines at dedicated lanes for Peach and Jetstar Japan, supported by self‑service kiosks and straightforward bag drops. Signage is concise, and staff are on hand to assist during busy periods, especially on weekends when volumes grow and the layout helps you keep to your timeline.
Transfers between terminals are simple there: a free inter‑terminal shuttle runs frequently and covers the short distance in minutes. If you prefer to walk, a covered path connects key transfer points, but most travelers opt for the shuttle to save time. When you need to switch for a domestic connection from Terminal 2 to a late international flight, plan a quick hop there and back to stay on schedule.
Connectivity and facilities are strong in both zones. Free internet is reliable there, with plenty of outlets and charging spots near seating areas. Storage options are available in the transit zones if you’re between flights, and the whole complex is designed for easy access for travelers with mobility needs. Morning departures run smoothly, and large groups can spread out in comfortable areas, keeping your plans flexible there and throughout your trip.
If you’re staying near kumatoriekimae or planning a trip to Nikko, the airport’s transit links help you reach your destination without unnecessary backtracking. Trainhour schedules vary by line, but the Kansai airport station is connected to rail networks that let you reach Osaka, Tokyo, and beyond with minimal transfers. The two terminals are located to serve different itineraries, so mapping your route there will keep you moving with freedom and efficiency.
Security, Immigration, and Lounge Access: Practical Steps to Speed Through
You’re traveling through Kansai International Airport from izumisano-shi. Reserve Premium Security and immigration Fast Track online, and aim to arrive about 90 minutes before international departures to keep lines short. With alpha status and self-check machines, you can cut wait times by 50-70% on busy days, making the process super fast. Move towards the center after security to reach immigration efficiently, and plan a buffer for flight changes. The ICORA lounge in the center area provides breakfast, views, and a calm break if you have time, a smart option for premium travelers. If you’re traveling with carry-on only, you can skip the baggage drop.
Before you depart, organize luggage by packing travel essentials in easily accessible pockets, remove large electronics from bags, and keep your passport and boarding pass at hand. Helpful staff served clear directions quickly, and signposting makes the path easy to follow. The modern layout helps you stay on track, reducing backtracking during peak periods.
Speed-Through Essentials
Follow a practical flow: head to security towards the dedicated lanes, place items in trays on the self-check machines, and keep liquids within the allowed rule. After security, use automated gates at immigration if eligible; have your passport and boarding pass ready, and move with purpose to avoid lines. From there, head to the ICORA lounge in the center for a relax break or a quick breakfast before you head to sightseeing or your next destinations. The lounge offers premium service and a comfortable stay with views of the runway. You can stay as long as your schedule allows, and the experience makes the trip smoother, making it easier to keep to your plans.
| Stage | Akcia | Estimated Time | Poznámky |
|---|---|---|---|
| Zabezpečenie | Choose Premium Security or Fast Track, place items in trays; keep luggage accessible | 5-10 min | Use self-check machines to speed up the process; arrive with clean liquids |
| Immigration | Use automated gates if eligible; present passport and boarding pass | 5-15 min | Lines shrink with efficient routing; staff directions are helpful |
| Lounge Access | Proceed to ICORA lounge (center); show premium pass, relax or breakfast | 15-30 min to set up; longer stays possible | Center area; breakfast service available; views of the runway |
| Post-Lounge/Transitions | Check flight board and head toward gate; monitor boarding time | 10-20 min | Nearby restaurant options for a quick bite; fare varies |
For travelers aiming to see more of Kansai, these steps keep you aligned with your schedule, enabling you to enjoy greater flexibility for sightseeing or destinations. You can plan a greater buffer degree for unexpected delays, ensuring you’re not rushed and you keep your luggage secure until boarding. From izumisano-shi to premium lounges, the experience stays smooth, and you can tailor your stay toward comfort and efficiency while traveling and sightseeing in the region, with views that make the trip worthwhile.
Ground Transport Options from Kansai Airport: Rail, Bus, and Car Rental Tips
Buy a rechargeable IC card (ICOCA or other) at the airport counters or vending machines and use it for rail and bus rides, tapping in and out at gates to avoid buying tickets each time. For most visitors, a card plus occasional single-ride tickets suffices, but consider a Kansai-area rail pass if you plan several trips; check price and coverage before purchasing. Within the terminals, wi-fi and information channels help you plan transfers, like those to Osaka or Namba, and outlets let you recharge devices while you wait.
Rail options provide fast, reliable hops. From Kansai International, the JR Kansai Airport Rapid Service reaches Osaka Station in about 50 minutes; direct links continue to Kyoto and Shin-Osaka with minimal changes. The Nankai Airport Express goes to Namba in roughly 45–50 minutes, ideal for southern Osaka and hotels in the Namba area. With a card, you transfer within stations without buying extra tickets. Check nambadepartures for the latest Namba-bound departures to plan connections and confirm platform numbers. For city centers, use the Osaka Metro network after you exit. Information channels in the stations publish real-time updates, and power outlets on some trains help you recharge devices during longer waits.
Limousine buses provide direct service to major hotels and city centers. From Terminal 1 and Terminal 2, these buses connect to Umeda, Namba, and other districts; luggage bays handle large bags. Tickets can be bought at counters or in advance online, with prices starting around 1,500–2,000 JPY depending on the destination. Buses run on a regular schedule and routes display in terminals; travel time ranges from 60 to 90 minutes depending on traffic. Free wi-fi on some buses helps you check maps and updates, and staff can assist with hotel drop-offs. If you stay near the airport, this option minimizes transfers and provides a smooth start to your stay; if you need to reach a residence or a distant hotel, rail plus a short taxi may be faster.
Car rental offers flexibility if you have luggage and a plan to explore suburbs. Counter desks are on the ground floor of Terminal 1 and in Terminal 2; book in advance to secure a vehicle and compare price ranges, insurance, and fuel policies. Expect tolls on highways; an ETC card makes tolls easier to pass. Parking in central Osaka is limited, so plan hotel drop-offs near parking areas or use shuttle services. Bring your valid license and an IDP or Japanese translation if required; age limits apply with some agencies. When you pick up, test the wi-fi in the car or use in-terminal internet to load your route; verify the GPS works for your destination. Return the car to the designated lot and check the floor and space markings to avoid extra charges. For longer stays, a car can be convenient, while for dense city days, rail or bus often saves money and time.
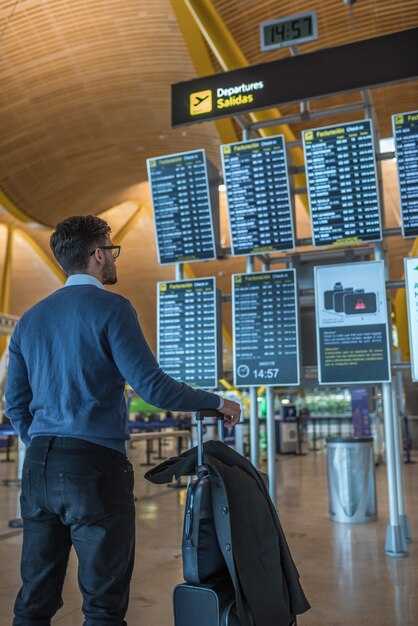
In-Station Wayfinding: Signs, Language Help, and Useful Maps for Quick Navigation

Head to the central information desk, pick up a pocket map, and enable wi-fi to view the live map views using your device before you move from the arrivals area, including quick checks on nambadepartures.
Signs, Symbols, and Quick Reference
- Follow color-coded alpha signs that point to areas and destination gates; each sign includes English and Japanese icons for quick recognition.
- Look for 1-way walkways and arrows to reach platforms and stops without backtracking; signs update as platforms shift for departures and arrivals.
- Distance markers show 45-60 meter segments, helping you pace your walk and plan where to pause for views or information.
- Check nambadepartures boards for platform changes and live departure times; cross-check with the smaller screens near gates.
- In the Nikko zone, follow signs to shops, lounges, and elevator banks to stay comfortable during transfers.
- Locate seating and rest areas along long corridors so you can pause briefly without losing your place on the route.
- If you want an alternative, use the express routes that bypass busy corridors and shorten your overall walk.
- Signs at the property outline taxi stands, pickup points, and pedestrian shortcuts, helping you stay on the fastest path to your destination.
Language Help and Interactive Maps
- Tap the free wi-fi and open the airport map, then select your language (English, Japanese, Korean, Mandarin) to simplify interpretation.
- In the map, input destination and you’ll see a recommended route with stops, including transfers to subways or express trains; quick routes reduce time and stress over waits.
- Staffed desks and self-service kiosks offer real-time assistance; adults and groups can ask for guidance on 1-way transfers and seat options along the way.
- Printed guides are available, and some specialty items are purchased at select shops for offline use during your stay on property.
- Alpha-colored zones on the map label different areas and taxi stands; notes indicate surcharge details and pickup points, helping you plan space near exits and taxis outside the terminal.
- Want more clarity? Use the destination search to view views around each stop and plan a smooth route across terminals and levels.
- All guidance and maps are designed for easy access in the main concourses and transfer areas, supporting rapid decisions for both adults and kids.
Komentáre