Практическое руководство по бразильской стороне водопадов Игуасу
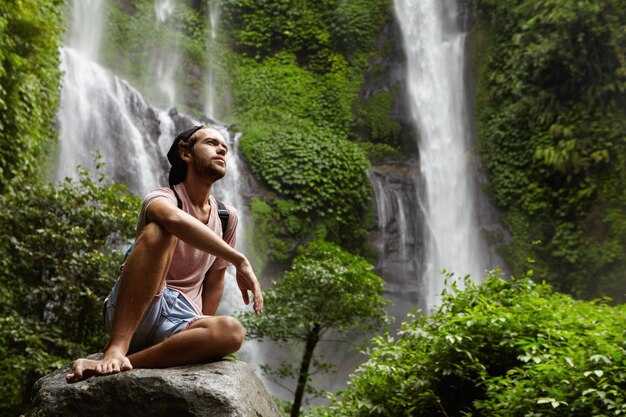
совет: arrive before 9 am to enjoy cooler temperatures and clearer viewpoints on the Brazilian side. If you have arrived, head straight to the upper decks to catch the spray without long lines. Plan your route to maximize short walks between shaded spots and bring a light backpack with sunscreen and a microfiber towel.
Find your base: The belmond Hotel das Cataratas on the Brazilian side offers easy access to the park entry. If you lean toward budget options, frequent hostels around Foz do Iguaçu keep daily costs reasonable. michaela, an australian traveler, says a flexible plan and conversation with staff unlock quiet paths after rain. bring an amount for local taxis or shuttle buses, and reserve a couple of hours for a relaxed morning walk.
What to wear and pack: Wear sturdy shoes with grip for slippery stones. dont forget a lightweight rain jacket; the spray from the falls sticks to everything. Pack a compact poncho, bottled water, and a small power bank for photos. A daily plan helps you hit viewpoints in the best light, especially as temperatures rise.
Plan your route: Start at the main Brazilian circuit and work your way to the Garganta do Diabo overlook. Use the park shuttle to hop between trailheads, especially in peak heat. Look for wildlife, like toucans and coatis, along shaded stretches. A well-timed visit in the morning or late afternoon yields better lighting for photos.
Practical tips: Bring protection for cameras; the spray can fog lenses. dont rely on data connectivity in the park; download offline maps beforehand. The amount of walking is moderate but stairs add up; take breaks and hydrate. Consider a late-afternoon viewpoint, when temperatures drop again and mist creates rainbows.
Best Time to Visit the Brazilian Side for Garganta do Diabo Viewpoints
Plan your visit for May or September and start before 9 a.m. to catch Garganta do Diabo viewpoints on the Brazilian side with soft light and thinner crowds.
In these dry-season months, the wide catwalk stays dry, the air is comfortable, and visibility is best for photography. If you come in summer, be ready for higher humidity and occasional showers that heighten the mist and create dramatic portraits; the views remain powerful, especially in early morning light or late afternoon when the land and forest contrast most.
weve found that morning visits pay off: over the years, travelers have learned to optimize timing by starting early; weekdays are generally calmer; backpackers and local guests mix with day-trippers on weekends, but the quieter hours are still present. To simplify logistics, use rideshare from town to the park entrance, a reliable means to avoid parking hassles. On-site facilities provide a simple lunch option at the gate, but for a fuller meal you can purchase in town or at a nearby mall after your visit. wifi coverage is strongest near the main plaza; along the main catwalks it can be spotty, so download offline maps in advance. At the gate you obtain a map and can purchase tickets online to start smoothly. The Garganta route on the Brazilian side is wide and well-maintained, with viewpoints that place you between the spray and the forest land; some overlook on the opposite bank offer a different perspective if you plan a separate day trip to the Argentine side.
Timing and viewpoints
- Start early: aim for 7:00–9:00 a.m. to beat crowds and catch the best light.
- Prefer May or September for lower rainfall and comfortable temperatures, with strong water flow still present.
- Choose weekdays when possible; weekends draw backpackers and families, increasing crowding at key lookouts.
- Check the weather and park alerts the night before; morning mists can affect visibility if you start too late.
Practical planning
- Wear sturdy shoes for a wide, well-maintained path that remains mostly flat but can be slick after rain; plan for tiny spray droplets on skin and glasses.
- Pack light rain gear, sunscreen, and a small backpack; dorm-style hostels around town offer budget options if you’re traveling with a group.
- Purchase tickets online in advance to start your day smoothly; at the gate you can obtain a map and you’ll see coverage updates on-site.
- Use rideshare means to reach the entrance; it’s a common, cost-effective option for solo travelers and groups.
- Be mindful of wifi coverage: stay offline with maps if the signal is weak on the trails; download the route beforehand.
- Consider adding a second day to explore the Argentine side for a fuller variety of viewpoints between the two countries.
Getting There: From Foz do Iguaçu to the Brazilian Park Entrance
Book a private transfer or use a reliable taxi to reach the Brazilian Park Entrance quickly. From Foz do Iguaçu to the entrance, expect about 25–30 km of road, 30–45 minutes in light traffic; peak times can stretch it to 60 minutes. If you arrive via the IGU airport or other area airports, a pre-booked shuttle or taxi offers door-to-gate service, saving you stops and backtracking. Here’s a practical approach that keeps everyone on track.
Two solid ride options: private transfer or public bus
Option A: Private transfer. A driver waits in the arrivals hall at IGU or at your hotel and delivers you directly to the Park Entrance. Expect to pay around R$80–120 one way, depending on your hotel location and traffic; it’s better to pay a bit more for reliability, especially with kids or a lot of gear. If you’re traveling with others, the per-person cost drops and the space helps you pack everything you need. Passengers appreciate the convenience after travel, and the driver can stop for a quick photo along the road if you ask.
Option B: City bus. From downtown Foz, Bus 120 Cataratas runs roughly every 30–40 minutes and stops at the park gate. The ride takes about 60–75 minutes and costs around R$5–7. Board at the Terminal de Ônibus or at major urban stops; you’ll avoid parking hassles but share the ride with other passengers. If you missed the first bus, there are later departures–check the current timetable at your hotel or the terminal; plan to arrive early to beat the heat and crowds. Instead, if you’re on a tight budget, this is a better choice for the day.
There, crossing to the argentinean side is optional but can be a good complement in a full day. If you decide to cross, bring your passport and be prepared for customs checks; plan a separate entry and exit window, and note that afternoon temperatures can rise a few Fahrenheit degrees. If you want to explore ciudad neighborhoods on the other side, do it after you finish here and return for the Brazilian gates.
Practical packing and planning: pack light, leave bulky bags at the hotel if possible, and carry a small water bottle; the weather on the Brazilian side is sunny most days. In summer, temperatures often peak in the 80s or 90s Fahrenheit, so sunscreen, a hat, and a light jacket for cooler mornings help. The entry plaza is a short walk from the bus stop, but you’ll do more walking inside the park beyond the gate. Here, the shortest walk from the gate to the main outlooks takes about 15–25 minutes. If you’re touring with kids, pace yourself and add rests; everyone benefits from a relaxed rhythm. Create a simple itinerary list to guide your day, then review it at the bus stop to learn about current conditions and time windows, and leave some buffer for unexpected stops with others who share tips and plans.
Finally, a quick note to add to your plan: begin at the entrance, buy tickets, and consider the electric train for faster access to the most famous viewpoints on the Brazilian side. The vistas are amazing, and mornings offer softer light for photos. If you want a special day that blends park scenery with city culture, this route is worth the effort. The plan is straightforward, practical, and designed for smooth travel; by following these steps, you’ll avoid delays and enjoy the falls with less stress.
Ticketing, Parking, and Entrance Logistics for Garganta do Diabo
Purchase tickets online in advance and select an earlier time slot to make the visit easier and to avoid crowded queues during peak months.
Ticketing options on the official site include single-entry passes and combination experiences. Price varies by age and country of residence, with exchange rates available at checkout. The site accepts cards and cash, and the counter at the entrance can process exchanges for nearby networks if necessary.
Parking near the entrance is limited. Lot A sits closest to the Brazil-side entry, while Lot B is about a kilometre away along a walkable path. Expect hourly rates, with payment possible at the booth or via a mobile app. Plan for 1–2 hours if you want to explore both circuits and the lookout points without rushing.
Entrance logistics place you at a controlled gateway for Garganta do Diabo. Gates open early and close in the late afternoon; bring only essential belongings to speed checks, as staff conduct standard security inspections. Have your requirements ready–photo IDs, tickets, and any permitted tech–while keeping belongings compact to avoid intrusive lines. Use the main walkway and circuit route to reach the famous lookout without backtracking.
Local guidance from avid visitors adds value: Silva, a guide from Barroso, suggests starting at the lower circuit lookout to catch the best light, then following the walkways along the main circuit. The route is walkable for most guests, with a comfortable kilometre-scale stretch between lookouts. After the falls, many travelers enjoy a relaxed dinner nearby before departing for the airports or hotels in the country.
| Категория | Рекомендация | Примечания |
| Ticketing | Book online; choose morning slot; print or save on phone | Price varies by country and age; exchange available at counter |
| Parking | Use Lot A near entry; Lot B is a short kilometre walk | Pay hourly; app or gate; plan 1–2 hours |
| Entrance | Arrive early; carry only essentials | Security checks are standard; lookouts along the walkway |
| Советы | Bring water, wear walkable shoes, consider a dinner stop after | Avid photographers will appreciate early light; Silva recommends route via lower circuit |
The Main Trail: Distances, Prime Viewpoints, and Walking Time to Devil’s Throat
Start at the entrance and walk directly toward Garganta do Diabo; this one-way segment conveniently sets you up for the final platform and definitely feels efficient for most visitors.
The Main Trail to the Devil’s Throat spans roughly 2 km one-way, with a comfortable outdoor pace yielding about 40–50 minutes of walking. If you plan to linger at each overlook and take plenty of photos, budget 60–90 minutes for the full approach to the final platform.
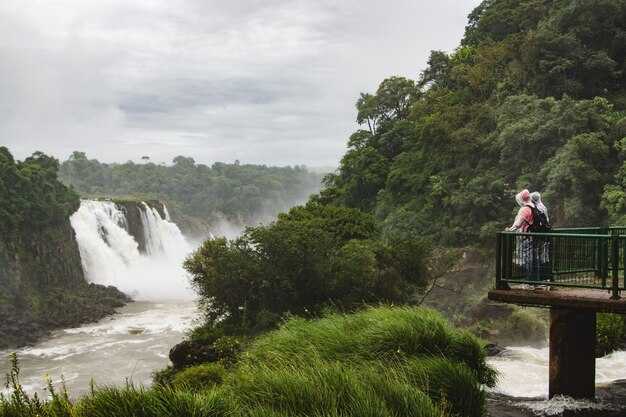
Prime Viewpoints and the Walking Span
After about 0.7–0.9 km, the first overlook presents a broad view of the lower cascades and the spray that creates rainbows in bright light. Continuing 0.5–0.6 km more brings you to a mid-trail platform with a wider panorama across the river and the forested banks.
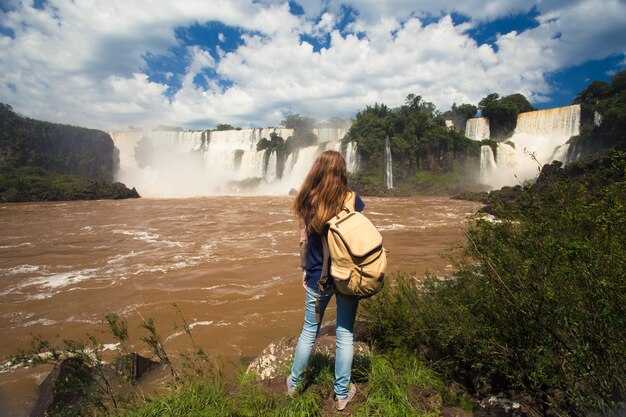
The final Garganta do Diabo platform arrives at around the 2 km mark, delivering the highest, most exhilarating close-up of the horseshoe cascade. This is the tall, dramatic moment everyone photographs, with spray in the breeze and dramatic scale that makes the rest of the trail feel worthwhile.
Along the route you’ll find seats and shaded spots for resting, making the walk more comfortable for families and anyone staying mindful of heat or sun. For mobility needs, ask at the visitor center about elevator-assisted access to the upper terraces; some sections offer ramped access or alternative routes to the main deck.
Whether you visit in the morning or the afternoon, shade and seating help you keep a steady pace. From the lookouts, you’ll see the river spread wide to the northwest and the surrounding jungle, with wildlife sightings possible during calmer hours. Look for signs in spanish and Portuguese that label distances, and keep the maps handy for a detailed plan of your specific stops. If you’re feeling energetic, each overlook becomes an outdoor activity, turning the path itself into a compact excursion.
This plan is yours to tailor to your pace and interests. If you’re staying in the area, nearby restaurants offer quick bites before or after the walk; if you’re pressed for time, you can shorten the route by turning back after the first or second viewpoint and still capture the essential highlights.
What to Wear and Что взять с собой for Rainforest Walks
Start with quick-dry pants or shorts and a breathable, waterproof jacket; wear sturdy, closed-toe shoes with good grip. If you plan a bike transfer or a short ride between spots, choose footwear with a secure fit and bring gloves.
Layering helps: a moisture-wicking base layer, a light mid-layer, and a compact rain shell. What you wear depends on forecast and your tolerance for humidity; mornings are cooler and can rise quickly at higher elevations. Rain can arrive with speed, so be prepared.
Что взять с собой
From the entrance, carry a 8-12 liter daypack with a dry bag for electronics. Pack a drink bottle or hydration system; aim for at least 1.5 liters for a 60-90 minute walk.
Sun protection: hat, sunglasses, sunscreen. Insect protection: repellent. Rain protection: poncho or lightweight rain jacket if your pack lacks a cover.
Waterproof case for a phone or camera; spare batteries; a snack bar for energy.
thermas are nearby, so bring a towel if theres a plan to visit thermas after the walk.
Carry cash in peso for border spots; most purchases inside the park accept cards, but some stalls rely on cash. For accommodation and meals, there are hotels and restaurants nearby; plan accordingly.
National and international visitors can arrange transfers and taxis outside the entrance; opening hours vary by season. Most circuits take 60-90 minutes; there are busy days, so build in extra minutes for photo spots and viewpoints.
Photography Советы: Capturing Iguazu Falls at the Brazilian Side
Head to the porto area at first light for crisp spray and warm light on the salto platform; keep a fast lens ready and wipe moisture from your filter frequently to maintain sharp edges on the mist. Develop shooting habits: check light every few minutes and sweep the scene before committing, so you don’t miss a fleeting rainbow.
On the Brazilian side, the trails are limited in viewing angles, so plan a 60-90 mins circuit to cover the core overlooks and the inner canopy paths. Check updated park hours and departures to align your schedule with quieter moments; date and weather shape reflections, and overall conditions can shift quickly. If you’re combining misiones trips, coordinate carefully, but stay flexible to avoid intrusive crowds. Use this as a basis for planning your route to maximize sunlight on each vista.
Inside the park, crowds can be intrusive near main platforms; aim to shoot just after a spray burst, then step into the lush edges for intimate frames close to the water. Be mindful of wildlife along the edges, including cats. Parking is convenient near the entrance, but head back before shuttle crowds peak; you’ll have found some surprisingly quiet angles along side trails, and you’ll be glad you wore comfortable footwear to protect your feet.
Best times and vantage points
Prime light occurs after dawn; from the salto viewpoint you’ll catch a rainbow as the sun climbs. From some overlooks, you’ll see enormous vistas of the curtain of water, then shift along the boardwalk to frame the falls as the spray threads through the forest. For extremely dramatic silhouettes, linger until late morning and again late afternoon when shadows stretch along the cascade. Consider a second pass on the inside loop to capture water ribbons through the trees. Overall, choose a couple of key spots and use a light tripod to avoid wobble on the boardwalk, while always leaving room to chase the changing spray.
Gear, settings, and planning
Use a wide-angle lens (16-35mm) for panoramas and a mid tele (70-200mm) for close details of the water sheets and misty auras. Set exposure around f/8–f/11 and ISO 100–200; for silky water, try 1–2 seconds with a sturdy tripod, or switch to faster shutter speeds if wind shifts the spray. A polarizer helps cut glare on bright days, and a neutral-density filter extends your long exposures. Shoot RAW, and use apps to map trails, check parking, and track date/time windows and departures. If you stay nearby, a 2–3 hour window fits a relaxed pace; for family-friendly trips, keep segments short and allow a splurge option for a luxury stay nearby. If you pair misiones travel or combine trips, you’ll find more scenery and fewer waits. End with a quick feet check: step back to gauge scale and protect your gear from spray.


