Cum să-ți schimbi adresa de facturare - Ghid pas cu pas
Actualizați acum adresa de facturare pentru a vă asigura că facturile ajung la cutia poștală corectă. În timp ce ajustați setările, confirmați că modificarea se propagă în toate sistemele conectate care urmăresc tranzacțiile și fluxurile de documente. Căutați pictograma din bara de sus și deschideți secțiunea Facturare pentru a începe.
Pasul 1: Colectați adresa nouă exactă, denumirea companiei, codul fiscal, dacă este necesar, și orice adrese de facturare secundare (utilizate pentru redirecționare). Pregătiți o notă scurtă pentru a însoți modificările, astfel încât colegii și furnizorii să înțeleagă solicitările de actualizare.
Pasul 2: În portalul principal de facturare, modificați adresa. Dacă sistemul dvs. acoperă mai multe produse, actualizați câmpul în fiecare zonă de produs. Utilizați pictograma de profil sau fila Facturare; dacă utilizați Microsoft sau alte platforme, repetați actualizarea acolo, astfel încât adresa să fie consecventă în toate plățile și înregistrările.
Pasul 3: Propagați și realizați legături între instrumente. Verificați dacă noua adresă este legată de depozitele de documente, cum ar fi netdocuments și semnăturile electronice precum lexsign. Actualizați orice câmpuri de adresă din fluxurile de lucru de colectare și din CRM-ul dvs., astfel încât acoperirea facturilor să rămână coerentă cu înregistrările clienților.
Pasul 4: Validați generând o factură de test. Examinați exemplul pentru a confirma că adresa apare în antet și în contactul de facturare. Dacă aveți deja facturi plătite în așteptare, verificați dacă aceste înregistrări afișează acum adresa actualizată; înregistrați orice probleme într-un instrument central de urmărire și direcționați-le prin comunicatorul dvs. pentru a asigura o rezolvare rapidă. Pentru mai multe departamente, atribuiți proprietari și stabiliți un timp țintă de finalizare.
Pasul 5: Notificați părțile interesate și actualizați șabloanele externe. Trimiteți o notificare scurtă clienților și furnizorilor prin e-mail sau prin instrumentul de mesagerie al sistemului dvs. Actualizați câmpurile de durată a limbajului pentru notificări pentru a vă asigura că alertele corespund noii adrese. Păstrați mementouri permanente pentru a verifica adresa în fiecare an, astfel încât să rămână actuală.
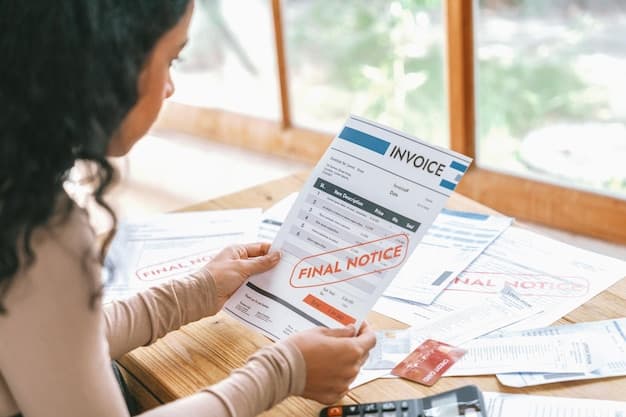
Verificați adresa de facturare actuală de pe ultima factură
Deschideți ultima factură din contul dvs. sau recuperați-o electronic, apoi comparați blocul de adresă de facturare cu înregistrările dvs. Această verificare rapidă este un tip de prevenire împotriva facturilor direcționate greșit și ajută la asigurarea faptului că factura ajunge la destinatarul potrivit. Păstrați note cu privire la orice discrepanță pentru referință și documentați modificarea pentru dosarul dvs.- Găsiți ultima factură: accesați portalul de facturare, selectați Facturi, apoi deschideți cea mai recentă factură. Rețineți numărul facturii și data pentru referință.
- Localizați secțiunea Adresă de facturare de pe factură. Confirmați că strada, orașul, județul, codul poștal și țara sunt corecte și nu sunt trunchiate. Dacă adresa nu reflectă locația dvs. actuală, actualizați-o urmând pașii de mai jos.
- Dacă puteți edita direct, faceți clic pe Editare lângă adresă, actualizați câmpurile și apoi salvați. Dacă trebuie să ajustați profilul, faceți acest lucru în Preferințe și setați noua adresă ca implicită pentru facturile viitoare.
- Apoi regenerați factura sau vizualizați-o din nou pentru a confirma că modificările se propagă în document. Dacă sistemul nu permite modificări directe, utilizați fluxul de configurare pentru a vă asigura că modificarea se aplică facturilor ulterioare; altfel, contactați asistența.
- Verificați efectele asupra facturii: orice ajustări sau note legate de adresă, note de depozit sau declarații legale. Verificați sumele și rândurile; dacă modificările sunt minore, funcțiile sistemului de facturare se vor aplica automat, altfel solicitați asistență.
- Salvați sau exportați o copie a facturii actualizate și stocați-o în înregistrările dvs. Înainte de a trece mai departe, ștergeți orice duplicat pentru a păstra referința curată și permanentă pentru auditurile viitoare. Acest lucru ajută în momentele în care trebuie să prezentați o dovadă a adresei.
- Verificați cine poate edita adresele: dacă mai mulți utilizatori accesează portalul, confirmați permisiunile și asigurați-vă că actualizările sunt urmărite în jurnalul de activități. Activați actualizările automate ale adreselor în Preferințe, dacă sunt acceptate, făcând din aceasta o configurație permanentă fiabilă.