
Punta Cana Airport Arrivals Information - A Practical Guide to Flight Arrivals, Terminal Details, and Arrival Tips


Plan your pickup at the arrivals hall for a smooth welcome in punta. For utmost convenience, book a transfer you can follow through the journey; arriving through PUJ becomes calmer when a driver is waiting. Have the essential documents ready at the ankunft desk, and know the times for immigration and baggage so you can arrive at the curb without rush. If you need to kaufen a local SIM, you can do that quickly after you haben your luggage, and stay updated on annulliert changes from airlines.
The terminal layout at Punta Cana International is straightforward: arrivals and baggage areas are in the same zone, with clear routes to ground transport. Follow the signs through the concourse to the exit doors, then head to the pickup zone just outside the curb. The parkplatz area is clearly marked, making a quick loop easy if your driver is still loading luggage. For late-night arrivals, the help desks stay open to assist with greetings that feel entspannt.
Choose auto, taxi, or private shuttle. Pre-booked rides arrive faster from the arrivals to your hotel in Bavaro, Cap Cana, or the resort belt. The pickup area near the arrivals exit is easy to find, and a quick call from your driver can avoid wandering. If you travel with a large party, some hotels offer pre-arranged shuttles; you can confirm through your hotel reise desk. The airlines desk at the terminal can help with special transport requests and keep your arrival process supported.
Arrival tips: settle into the line for immigration; times vary with season. After clearing immigration, proceed to baggage claim, then through customs to the arrivals exit. If a flight is annulliert or your schedule shifts, check the airline app for rebooking options and keep your receipts to claim refunds if needed. Have a backup plan and a direct contact for your driver or hotel to keep things entspannt.
To stay connected, kaufen a local SIM or eSIM; reise plans offer data for a week. Book a prepaid transfer and coordinate through the airline app or your travel planner. For car rentals, follow parkplatz signs; some lots provide shuttles back to the terminal. Map out visits to nearby orte such as Bavaro, Cap Cana, and Santo Domingo for a relaxed itinerary.
Typical flow from landing to exit takes 40–60 minutes on busy days; immigration lines may be longer at peak times. After you clear immigration, head to the baggage carousel and then to the arrivals curb for your chosen ride. If you have a tight connection, confirm your next flight with the airline, and use the transit time to refresh and plan the next steps; the setup is designed to be einfach to navigate for travelers arriving from any country.
Punta Cana Arrivals Flow: From Landing to Baggage Claim
Head to the arrivals information desk as soon as you land to grab a flyer with simple, einfach directions and the latest information for your arrival; this quick step sets up access and comfort for the rest of the flow.
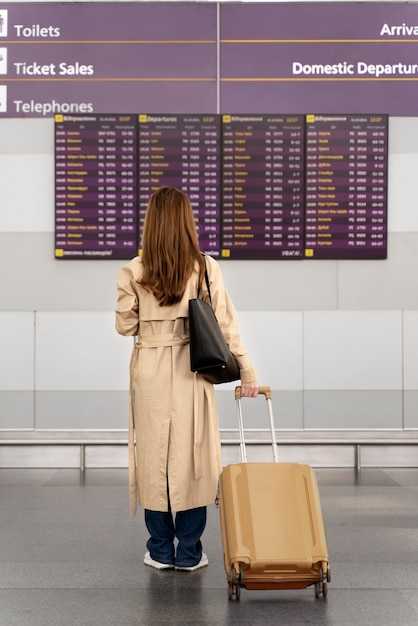
Follow the signs to Immigration, then proceed to Baggage Claim. Use the information screens to finden your carousel and keep your plans on track. If delays occur, check the boards or lassen a staff member know to get updates quickly. The process throughout the flughäfen is designed to be accessible and convenient for allen travelers arriving in punta.
Step-by-step flow
The sequence below covers landing to baggage claim with specific actions and typical times. Keep the flyer handy for easy reference and use it to stay on target for your arrival.
| Step | Action | Location | Typical Time | Tips |
| 1 | Disembark and follow signs to Immigration | Jet bridge to Immigration hall | 10–25 min | Have passport ready; check information boards; finden the right queue; einfach start |
| 2 | Immigration clearance | Immigration counters | 15–40 min | Present documents; use staff if lines are long; delays may occur, stay patient |
| 3 | Baggage Claim | Baggage hall, carousel area | 5–20 min | Match your bags to the flight info; if you need help, lassen a staff member know |
Practical tips for a smooth arrival
After baggage claim, you’ll exit toward the arrivals area where transportation options to your punta destinations are ready. If you plan to drive, you can mieten a car at nearby desks; look for günstigen rates and confirm the auto rental terms before leaving the hall. For quick access, carry your flight information and a copy of your plans; the information desk can provide specific guidance and further assistance to ensure a comfortable start in Punta Cana flughäfen–your arrival should be easy and straightforward.
Terminal Layout and Signage: What You’ll See on Arrival
Arriving at Punta Cana, head to the ground floor and follow the Arrivals signs toward the exit and your gate. If you’ve gelandet here, this direct route keeps you entspannt and moving quickly toward curbside pickup–perfect for first-time reis e readers navigating reise realities.
Signs use large arrows, clear pictograms, and bilingual labels in English and Spanish so you stay informed whether you’re arriving solo or mit der reise mit Familie. A flyer near the information desk offers a compact map and quick tips, and voraus pre-arrival information is posted at the entrance to help you plan.
On the ground floor, the main hall funnels toward baggage claim, exits, and pickup zones. Overhead panels show gate numbers and paths; Parkplatz signs help you locate the car park, and auto rental desks sit nearby for easy transitions.
Information desks stand at central nodes; staff are informed and ready to guide you with directions, a printed map, or a quick chat. If you’d like more hands-on help, besuchen the desk and an agent will walk you through the next steps, invite you to grab a flyer, and point you to the closest gate.
Additional resources include map panels and a concise flyer to improve satisfaction. The welt of Punta Cana arrivals is simplified by clear routes from arrive to gate, and the team is prepared to informieren (sich) themselves to assist whenever you need guidance.
Pickup Zones and Ground Transport: Taxis, Shuttles, and Rideshares
Go to the official pickup desk in the arrivals area; a fixed-rate taxi is delivering a hassle-free start to your Punta Cana trip.
Pickup zones are clearly marked outside the terminal. Signs guide you to zones A, B, C, and D, with dedicated lanes for taxis, shuttles, and rideshares. For allen welt travelers, signs and staff speak multiple languages; wenn you need help, staff can confirm the correct curb and guide you through the ground transport options.
Zones and Ride Options
Taxis operate from the fixed-rate desk; you receive a voucher with a set price to your resort area. Fees and surcharges are posted at the desk, and some routes have an airport fee that werden shown on your voucher. If the price seems off, compare with the rideshare estimate on your app before you board to ensure a smooth service.
Shuttles run on a scheduled cadence and frequently serve popular tourist zones. You can either book at the airport desk or through your hotel, and many options offer door-to-door service. Shuttles are often cheaper for groups, making them a practical option for frequent travelers who want to save money while staying on a tight plan.
Rideshares pick up from a designated curb near Zone B. Open your app, select Punta Cana PUJ, and confirm the driver, vehicle, and plate before you enter. Users can nutzen the app to compare options, and you can kaufen a seat on shared services if you’re traveling light. Prices are shown before you confirm, and the pickup area is designed for a fast transition from terminal to ride, helping you arrive on time.
Tips for a smooth arrival: plan ahead, have your hotel name and address ready, and give yourself extra time during peak hours. If you are first-time visitors, having printed or saved hotel details helps avoid misdirection. The airport information desk keeps up-to-date with the latest pickup zones, services, and fees; besuchen the desk for guidance, or ask your hotel concierge for a direct route so you arrive entspannt. источник
Luggage Storage in Punta Cana: Onsite Lockers, Left-Luggage, Fees, and Hours
Use onsite lockers to roam freely after landing or before departure. Lockers are located in the Arrivals area on the entry level, near the central corridor. Small units typically cost around $5, medium about $8, and large around $12 for a 24-hour window; extensions are usually available with additional time charged. The left-luggage counter offers a similar option, with a pickup tag issued at drop-off and retrieval requiring ID.
Pay options include cash or major credit cards; some lockers support contactless payments. Each locker uses a personal code; keep it secure and present it when you retrieve your bags. Do not leave valuables unattended, and remove sensitive items before leaving your belongings. If a refund is needed, check the desk policy, as refunds depend on the payment method and time since storage began.
Tips: arrive early on busy travel days to secure a unit; if all units are in use, ask at the help desk about alternatives for short storage. The process is straightforward, keeping your journey smooth and flexible. Always keep your receipt until you confirm all items are accounted for on pickup.
How to Use Luggage Storage: Required IDs, Confirmation, and Retrieval Process
Use the luggage storage service in the arrivals area right after gelandet to keep your hands free while you explore the cana coast and nearby hotels. This helps you enjoy a smooth, pleasant layover without carrying heavy bags, and it supports your plans, whether you have a long layover or a quick transfer to your next flight.
What to bring and what you’ll need for the check-in process
- Required IDs: carry a zugelassenen government-issued ID, typically a passport for arrivals; in some cases a second ID may be requested. Have the visum status handy if it relates to your travel route.
- Confirmation: if you booked in advance, present the confirmation number or barcode from your reservation. If you’re a walk‑in user, you’ll receive a temporary receipt at the counter.
- Other notes: bring proof of the flight arrival and any airline or service reference you received during check-in so staff can verify the block of luggage you’re storing.
How the step-by-step process works
- Find the luggage storage desk near the arrivals hall or Parkplatz area. The desk is clearly marked with service signage and the staff speak multiple languages, including help for travelers who want to discover local options.
- Present your ID (zugelassenen) and, if you have one, your booking confirmation. Choose the locker size that fits your bags and pay the rate for the time you’ll need.
- Receive a confirmation code and a receipt. Keep both in a safe place; they are necessary to retrieve your bags later.
- Return when you’re ready to pick up. Show the confirmation code and your ID, collect your bags, and sign off to complete retrieval. Verify the items before you leave the desk to ensure nothing is missing.
Pricing, hours, and practical tips
- Typical rates range from a few dollars per bag for short holds to higher fees for longer periods. Check the counter for the exact rate, duration limits, and any daily maximums to avoid surprises.
- Hours vary by location and season. If you have an ankunft window that overlaps with closing times, ask staff about extensions or late retrieval options to prevent delays.
- Avoid storing valuable items; keep wallets, electronics, and passports with you if possible. If you must leave valuables, separate them into a small carry bag that you can monitor more easily during your stay.
- Delays or changes: if your flight is delayed or you arrive later than planned, request an extension before the counter closes. Staff often can extend storage by a few hours for a small additional fee. This support helps you stay flexible during your arrivals phase and transition to your next step.
Extra tips to ensure a smooth experience
- Confirm the service’s exact location in the arrivals area (watch for signs near the terminal’s main entrance, Parkplatz entrances, and adjacent shops).
- Ask about item size limitations and any restrictions on large, fragile, or hazardous items to avoid last‑minute surprises.
- Rely on the staff for language help; they can connect you with translations or provide a quick walk‑through of the process so you can focus on your arrival and onward travel.
- If you’re planning a short visit to the city before your next departure, coordinate with your airlines or hotels to ensure your kept bags are accessible when you return to the airport area.
Источник tip: use the on‑site help desk for the most current rules and fees; the staff will share anything you need to know to keep your cansa, flights, and plans in alignment. Having this service on hand gives you peace of mind during ankunft, visum checks, and onward travel, while keeping your options open for a brief exploration of the welt around the airport.
Post-Landing Essentials: Connectivity, Currency, and Local Contacts
Grab a local SIM or pocket Wi‑Fi at the arrivals hall to stay connected within minutes of landing. Choose einen einfachen SIM-Option from a major carrier, or pick a user-friendly eSIM to manage data, calls, and texts, so jedes Moment stays entspannt. flughäfen information desks can guide you to the best value, and flightradarlive lets you monitor your flight status while you settle in. Airport services at the desk can also help you compare plans and complete the setup in minutes. This is einfach to understand.
Step 2: Currency and payments. Exchange a small amount at the airport for taxi fares and tip money, then use ATMs inside the terminal for larger withdrawals. Use reputable booths to avoid high fees, keep receipts, and date your transactions to track expenses across the first days. If you travel with companions, decide how to split costs so ihre hotel and taxi contacts remain covered.
Step 3: Local contacts and support. Save ihre hotel contacts and taxi numbers in your phone, and keep the airport service desks handy for quick help. The flughäfen service shares a vetted list of trusted drivers and city tips; if you hit an unbekannt area, ask the information desk and they werden guide you through with utmost commitment to your comfort. If you book a ride, confirm ihren Driver-ID before boarding. Enable flightradarlive for real-time arrivals and use a user-friendly map to explore through your plans. Invite a friend or family member to share your live status so your dates stay coordinated and your arrival feels hassle-free.


