


 Navegando pelo Aeroporto Sozinho – Um Guia para Viajantes de Primeira Viagem">

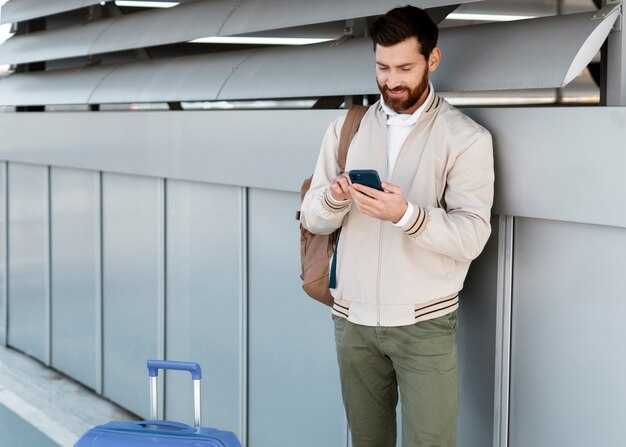
Travel with a single carry-on only for your first solo airport trip to save time and stress at security. Check allowances with your airlines before packing; most carriers classify a carry-on as up to 22 x 14 x 9 inches (56 x 36 x 23 cm) and require a separate item under the seat. Keep your liquids in containers of 100 ml or less and fit them into a caso inside a clear bag to speed the scan. If you arrived with more items than planned, shift essentials to the carry-on and keep the rest in a tote you can gate-check if needed.
In the moments before you join the line, run two quick exercises to steady your mind and body: breathing for four counts and a neck stretch. These moves help you stay focused when the queue moves slowly and you feel the pressure rise. youre more effective when you pace yourself, and a calm start keeps you ahead. Take a moment to assess your needs for the trip and pack accordingly.
Security checks demand a predictable track. Place your liquids bag in an outer pocket for quick removal if asked. Track your progress with a simple note on your phone and listen for gate announcements; if you miss a turn, ask a staff member politely for directions. The airlines offer on-site help counters and clear signage to cut confusion.
When choosing a route, favor direct flights to minimize changes and stress. Some airlines offer direct routes that save time; if you want to save, compare the total price of a carry-on only fare versus a checked-bag option, because expensive luggage fees add up fast. Before you book, review the full lineup of fees and restrictions across the route, and choose a fare with flexible rebooking if plans might shift.
youre going to want a practical checklist that fits in your pocket or phone. Helpful hints: keep your ID ready, store boarding passes in a digital wallet, and charge devices the night before. To stay organized, track your steps: arrived, security, gate, boarding. Look ahead to the next stage so you feel excited and the process stays exciting.
Pre-Trip Essentials for Solo Travelers: Documents, mobile passes, and a compact packing checklist
One clear recommendation: prepare digital and physical copies of key documents, set up check-in on your phone, and run a quick test showing passes at the desk. Monitor updates and news from your airline, hence you know where to go in each zone. Keep hand luggage light, use a close, separate pocket for essential items, and stay confident during the adventure from lounge to seats.
Documents and mobile passes
- Documents: passport or national ID, visas if required, travel insurance card, and hotel or car rental confirmations; keep separate hard copies and a digital copy in a secure app. Have a call number handy in case something isn’t right.
- Mobile passes: ensure check-in is completed, passes saved in the wallet of your phone, and a backup printout or interactive PDF available if you havent internet access. Show passes at the desk, at the gate, and in between steps to keep the flow moving.
- Handling and safety: store documents in a hidden sleeve or dedicated folder to prevent misplacement; separate essentials in a quick-access tiny bag for between tasks.
- Arrangements and comfort: keep a small backup paper itinerary and emergency contacts; these details raise confidence when plans shift in busy areas.
Compact packing checklist
- Clothes: 2–3 outfits plus a light jacket; roll fabrics to save space and use packing cubes to separate categories; aim for pieces that mix and match for adventure.
- Hydration and snacks: collapsible bottle, electrolyte packets, and a small snack pack to stay hydrated and alert during updates in new áreas.
- Toiletries and health: travel-sized items in a clear bag, special items you always use, medications in their labeled bottles, and a compact first-aid kit.
- Tech and accessories: phone, power bank, cable, universal adapter; store in an interactive organizer so cords stay tidy and between devices you can grab quickly.
- Documents and money: copies of your ID, a scanned backup, local currency, and cards you trust; paying with the right card helps you avoid extra steps.
- Personal items for comfort: small blanket or scarf, eye mask, and headphones for news updates or in-flight entertainment; keep these in a lounge-worthy area of your bag.
- Bag setup and security: a close, easily accessible pocket for your hand sanitizer and essential receipts; hidden pockets can hold a spare card and a few coins for emergencies.
- Business travelers: a slim folder for notes or a compact presentation USB; a change of shirt or blazer can boost confidence on a between-meet day.
Check-In to Boarding: A practical workflow for first-time flyers
Check-in online 24 hours before departure to speed up lines and secure your preferred seating. Having your boarding pass ready on your phone or printed copy saves time at the desk and reduces rush before security.
Build a simple, easy-to-follow checklist and keep it accessible: documents, carry-on within the latest size limits, liquids in a separate case, and any special services you may need. In case you travel with others, designate a retrieval plan for important items so you can retrieve them quickly at each step.
For carry-on, measure items at home and bring only what you truly need; if something doesn’t fit, consider another bag or checking it in to avoid delays. This approach helps you avoid last-minute rush and keeps your hands free for those down the corridor. Only carry-on items that meet size limits go through quickly.
Online check-in and documents
Online check-in lets you confirm details, pick a seat, and download the latest boarding pass. Have your passport or ID ready; store both in an accessible pocket for quick retrieval by staff or the hostess at the counter. Also keep a backup copy if you prefer.
If you can’t complete online, arrive early at the desk and ask for help to print a board pass or arrange services. There is typically a separate line for those needing assistance, and staff will guide you through the process.
At the airport: from arrival to boarding
Arrive with ample time to pass through security with ease. Put down any bag you can, separate liquids in a clear bag, and place electronics in the tray for inspection. Have your ID and boarding pass ready to speed retrieval by the hostess. Also check the latest gate information in the app, since gates can change and ports may be reassigned.
After you reach the gate, board when your group is called. Keep carry-on within reach and in the correct bin; some travelers prefer to board early to avoid a jam. If you encounter an unexpected delay, stay near the gate and talk with staff for options; they can help with services like seat changes or refreshments. Until the final boarding call, stay alert to any updates.
With this straightforward workflow, first-time flyers gain confidence, and the process feels easy and good. For travelers who typically rush, this plan slows down that rush and creates a great, exciting start to the trip. That approach also keeps you prepared for upsets.
Security Screening and ID: Required docs, quick prep, and what to expect

Carry your passport and a government-issued photo ID in an easily accessible sleeve to breeze through checkpoints.
O que ter pronto
- Passport for international trips, or a valid national ID for domestic flights, plus your boarding pass (printed or digital).
- Any visa or ETA, if required, and a backup copy of your status or travel authorizations.
- For traveling with others, carry consent documents if needed and keep them in a separate folder for on-site retrieval.
Quick prep tips
- Store everything in a clear, zipped pocket; keep a digital copy offline on your phone as backup; if possible, print a copy too.
- Liquids must be in containers up to 100 ml and placed in a clear bag; remove the bag and place it in a bin at the start of screening.
- Remove laptops and larger electronics from bags and place them in separate bins; belt and bulky jewelry may need to come off; wear slip-on shoes to speed things up.
- Have your boarding pass and ID ready before you reach the scanner to improve efficiency and retrieval time.
- Keep your plans in a simple note or app so you can adjust if a gate changes.
What to expect on-site
- Staff verify ID and ticket, then you pass through a metal detector or body scanner; you may be asked to remove outerwear or place items in bins for inspection.
- Place electronics, liquids, and small items in separate bins; retrieve them promptly and move to the next checkpoint.
- After screening, reassemble your belongings and head to your gate; if you miss a connection, ask the information desk for options and rebooking.
- During on-site checks, you’ll encounter lines that require quick retrieval of items and clear communication with staff to stay on track.
Tips for a great, stress-free experience
- Plan buffer times around peak periods; crowds can extend screening times.
- Use offline plans or airport apps to stay informed about directions and gate changes; if you have internet, keep screens updated with latest statuses.
- Between connections, take a moment for coffee and a quick rest, or download a few movies to pass time during waits.
- For singapore and other major hubs, follow staff directions and keep your documents handy to avoid delays.
- Keep devices charged and have a small portable charger for on-site use.
- This guide aims to make transitions smooth by sharing tips informed by experience, so traveling feels great and stresses stay low.
Gate Navigation and Boarding: Reading boards, finding your gate, and managing boarding groups
Begin with a quick action: read the large flight boards to confirm your flight, gate, and time, then use maps to plot the fastest route. Keep peace of mind by noticing any gate changes on the display and following the updated path; have your devices ready to show your boarding pass and any visas if international. Hydrate if you need, and carry a spare mask in your bag for safety in crowded spaces.
Reading boards and finding your gate
The boards update in real time: scan for your flight number and gate, then compare with the bank of maps nearby. If a gate moves, the screen highlights the new location; follow the highlighted path and listen for announcements. Use wi-fi to fetch live directions or your saved map, and check near the large information desks if you feel unsure. When you reach the gate area, window signage helps you pick the correct corridor and doors. If you feel overwhelmed, take a breath, hydrate, and keep peace of mind by moving calmly through the crowd. Earplugs can help if events or loud announcements arise.
Managing boarding groups and preparations
When your boarding group is announced, move toward the line with your bags and boarding pass ready for scanning. Maintain a steady pace, keep a safe distance from ones in front, and avoid blocking lanes at the door. If you need extra time or help, notify a crew member; they can arrange assistance and expedite arrangements. Charge your devices at a nearby outlet and keep plans for beyond the jetbridge in case you switch gates. For international flights, verify visas and travel documents before boarding; use checking counters if needed and stay prepared at the gate. In crowded spaces, feel free to mask or use earplugs to stay focused. After you board, you can feel great about handling a routine step with clear steps, whether you travel solo or with others, and without rush.
Corporate Travel Policy 2025: Core rules on approvals, allowances, and expense submission
Submit travel requests through the centralized portal at least 5 business days before departure to secure approvals. For domestic trips under $500, obtain direct supervisor approval in writing; for international trips above $1,500, route the request to the Travel Manager for real-time tracking and final sign-off. These steps usually save time and prevent budget shifts while keeping approvals fast.
Prepare documentation: itemized receipts, boarding passes, and the pre-approval reference. Stay organized, keeping all documents attached to the online form; keep your devices charged with a charger or spare battery, and rely on reliable internet to submit expenses in real-time.
Durante viagens, mantenha o equilíbrio mental: medite por 2 minutos antes de reuniões importantes; carregue protetores auriculares ou fones de ouvido com cancelamento de ruído para reduzir a fadiga; lanches açucarados são permitidos dentro dos limites de diárias para se manter alerta; durante a viagem, use o portal interativo para rastrear recibos e solicitar assistência, se necessário.
As atualizações de política surgem na central de ajuda interativa; os viajantes sem orientação atual devem verificar o portal regularmente. As alterações ocorrem normalmente em uma cadência trimestral, e você deve revisá-las antes de reservar. O objetivo permanece prático, fornecendo diretrizes que você pode seguir na estrada.
Fluxo de trabalho de aprovações
Submeta o pedido no portal; o sistema encaminha para o supervisor para um período de 2 dias úteis; após a aprovação, o Departamento de Viagens confirma a reserva e carrega o cartão corporativo; se surgirem alterações após a aprovação, é necessária uma nova aprovação.
Submissão e documentação de despesas
Submeta as despesas até 7 dias após a viagem; anexe recibos detalhados, passes de embarque e extratos de cartão de crédito; use o formulário online; o sistema rastreia as taxas de câmbio para despesas internacionais em tempo real; inclua detalhes da moeda e confirme a categorização.
| Aspeto | Regra | Documentation | Cronograma | Notas |
|---|---|---|---|---|
| Aprovações | Aprovações pré-viagem necessárias; viagens domésticas < $500 exigem aprovação do supervisor; viagens internacionais ≥ $1.500 exigem aprovação do Gerente de Viagens; encaminhadas no portal centralizado | Referência de aprovação, e-mail de confirmação | Envie pelo menos 5 dias úteis antes da partida; as aprovações devem ser concedidas antes da emissão dos bilhetes | Agilize as revisões via chat do portal se for urgente |
| Subsídios | Alojamento doméstico até $150/noite; alojamento internacional até $250/noite; passagem aérea econômica; refeições diárias domésticas $60, internacionais $90; transporte urbano até $50/dia | Recibos detalhados; justificativa de diárias | Aplicado automaticamente no envio | Mantenha-se dentro dos limites; lanches açucarados permitidos dentro do per diem |
| Submissão de despesas | Submeta dentro de 7 dias após a viagem; use o formulário online; atualizações de status em tempo real; conversão de moeda exibida | Recibos discriminados; passes de embarque; extrato de cartão de crédito; documentação de moeda estrangeira | Dentro de 7 dias | Certifique-se de que os recibos correspondem a cada item de despesa |
Colocando a política em prática: rotinas de execução, instruções de treinamento e rastreamento da conformidade
Recommendation: Implemente uma rotina de execução de 15 minutos que comece com uma lista de verificação designada e uma dupla verificação dos itens principais: trate dos vistos, confirme os detalhes do passaporte e verifique se o nome no bilhete corresponde. Ao longo do processo, verifique as necessidades de mobilidade, teste a conectividade e reveja as compras isentas de impostos para se manter dentro dos limites. Use mapas para planear rotas através de áreas seguras e mantenha os ecrãs grandes atualizados com o portão e o estado atuais.
Instruções de treinamento para a equipe: Use prompts de cenário que guiem os responsáveis pela resposta através do manuseio seguro, por exemplo: quando um viajante perder uma etapa, direcione-o para o balcão designado para recuperar documentos e concluir o processo. Inclua prompts para lidar com vistos e itens duty-free, e treine as equipes para registrar as ações no painel de políticas durante grandes reuniões.
Instruções para viajantes: Durante os checkpoints, lembre os viajantes de verificar novamente se os itens de bagagem de mão cumprem as regras da companhia aérea e se o plano de mobilidade permanece intacto. Quando a conectividade cair, mude para mapas offline e continue. Se algo parecer estranho, pare na mesa designada mais próxima e solicite a recuperação dos documentos necessários. Sempre faça uma pausa para relaxar e recarregar as energias, se necessário.
Monitoramento da conformidade: Use um registro leve para gravar as etapas concluídas: hora, nome do funcionário, local e resultado. Portanto, os gerentes podem revisar a conformidade durante grandes auditorias e em reuniões. O registro deve incluir campos para indicar se os itens verificados foram recuperados, se ocorreu alguma falha e qual ação corretiva foi tomada. Isso mantém as equipes alinhadas com a política e simplifica as auditorias.
Fluxo seguro para compras e dados: No terminal, encaminhe todos os pagamentos e recibos por faixas designadas e evite compartilhar dados fora de áreas seguras. Para companhias aéreas e viajantes frequentes, planeje pré-pagamentos para retirada ou impressão de documentos para minimizar os tempos de espera. Se os viajantes solicitarem algo fora do fluxo padrão, encaminhe-os para o balcão designado para recuperação e orientação. Mantenha sempre um registro seguro do que foi pago e onde os itens foram recuperados, incluindo quaisquer compras isentas de impostos.
Cadência operacional: Agende atualizações regulares com equipes em grandes terminais e realize briefings para revisar os prompts mais recentes. Compartilhe os resultados com as principais partes interessadas para melhorar a conectividade entre as zonas e mantenha os mapas atualizados para novas rotas e políticas. Essa cadência garante o alinhamento em toda a rede aérea e aeroportos e ajuda as equipes a se manterem atualizadas sobre as mudanças em vistos, taxas e zonas.
Resultado: Uma rotina prática reduz o atrito para os viajantes, apoia melhores decisões e mantém os passos verificados no caminho certo. Ao garantir que cada passo cobre manuseio de vistos, bagagem de mão e recuperação, as equipes evitam falhas, mantêm os grandes hubs em movimento e permanecem calmas durante as reuniões com a segurança e as operações. Aplique sempre esses prompts em todo o aeroporto para manter uma execução consistente da política.
Comentários