How to Get Around San Francisco - The Complete Guide to Transit, Biking, and Walking
Start with a Clipper card for every ride. Purchase a card before arrival and you will share the same tap to pay across muni, BART, Caltrain, and Bay Wheels. This setup really speeds traveling through parts of the city and keeps you flexible where you move between neighborhoods. kate joshi, a local transit advocate, notes that robotaxi pilots are expanding, but muni remains the backbone for most trips, and a human-driven approach often saves time and money.
Transit network you should know covers muni buses and light rail, BART for regional hops, and Caltrain on the peninsula. The industry is evolving into on-demand options, and robotaxi pilots sit alongside traditional services. Where you travel between districts, thats where you can start with a muni line, then bridge to BART for longer hops, and finish with a walk or bike ride. Real-time advisories on official apps help you adjust on the fly.
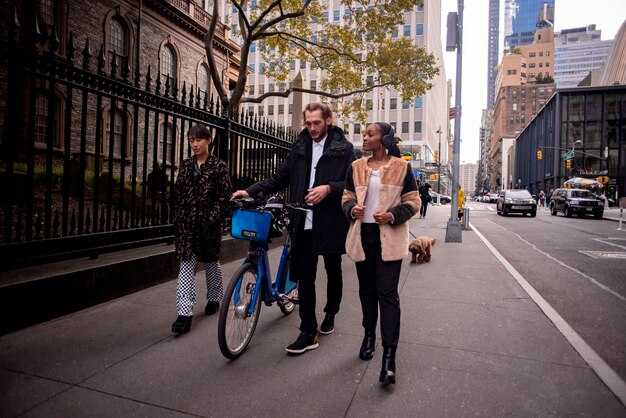
Bike options and routes Bay Wheels provides docked bikes across the city, with a purchase option for day or multi-day passes. Look for bike lanes on the Embarcadero, Market Street, and the Great Highway, and choose routes that connect parks and waterfronts. Riding is human-driven, but you’ll share the road with pedestrians and cars in busy corridors, so stay alert and use a bell at intersections.
Walkable hubs and smart planning Walking covers short hops in dense neighborhoods like SoMa to Chinatown. Walking is fast, cheap, and healthy, and it blends well with transit: you can walk to a station, ride part of a line, then walk again. The arrival of pedestrian-friendly upgrades helps make routes safer and more predictable for pedestrians.
Putting it all together A sample plan shows how these modes connect. Start with muni to a transit hub, switch to BART for a cross-town hop, then finish with a short walk or a Bay Wheels ride. This approach includes efficient combos that reduce wait time and improve reliability on busy days. For planning in real time, use map apps and check service advisories; that will help you compare arrival times and choose the best combo.
Transit Fundamentals: Understanding Muni, BART, and Caltrain routes, fares, and schedules
Recommendation: Get a Clipper card and enroll in the three official planners (MuniMobile, the BART app, and the Caltrain app) to pay fares and view schedules in one place. Load value ahead of time to avoid gate delays.
Muni basics: Muni operates city buses and streetcars. Use MuniMobile to buy a fare, tap on entry, and view next departures. If you need to switch modes, do it within the allowed window shown in the app. This helps you move through neighborhoods and downtown efficiently.
BART snapshot: BART serves the Bay Area, linking San Francisco with the East Bay and the Peninsula via the Transbay Tube. Trains run with high frequency during peak hours; later in the day, headways extend. Use the BART app to check live arrivals and plan connections to Muni or Caltrain. Pay with Clipper for a smooth multi-system ride.
Caltrain profile: Caltrain covers the Peninsula and Santa Clara Valley, with frequent weekday departures and a separate weekend pattern. Check the timetable for the station you plan to use. Caltrain accepts Clipper; fares depend on distance and time of day. Use the Caltrain app to see fare estimates before boarding.
Fare basics: Clipper card offers a single fare for Muni, and a tap-to-pay option for BART and Caltrain where supported. Muni uses a flat fare for local rides; BART and Caltrain use distance-based or zone pricing with a simple fare chart. A single paid trip can include multi-system transfers if you plan with the card. Load value ahead and enable auto-reload to prevent wallet gaps.
Smart planning tips: Compare a direct BART route with a Muni+Caltrain combo to find the faster option. Check weekend timetables when planning a trip. For hubs like Embarcadero or Montgomery, plan to stand near doors for quick exits. Always verify the latest status on the official sites or apps before starting your ride.
Cross-mode planning: Map your trip at core transfer points where Muni, BART, and Caltrain intersect, such as Embarcadero and 4th Street Station. The map tool in each app shows these joints and the best path to your destination. If you travel with a companion, coordinate near common stops and avoid long walks between segments.
Bottom line: With a Clipper card and the three planners, you can move quickly through San Francisco and neighboring areas. Use the official sources to confirm times, gate changes, and fares, and keep the plan flexible for delays or maintenance work.
Real-Time Travel Planning: Using apps and tools to plan trips and avoid delays
Start by installing a single real-time transit app on your phone and sign in; enable push alerts for your top routes so you see delays where you head out. This keeps you flexible and reduces wasted time.
In San Francisco, you can compare options across Muni, BART, Caltrain, and ride-shares, with connected options along county lines. If you're heading to the airport, set origin and destination to see the fastest path, and consider a mix of transit and a short ride-share for the final leg. For travelers from austin, the same workflow applies to reach downtown quickly. Choose routes where bikes are permitted, if you plan to ride. Some companys offer additional layers of data and group-sharing features.
When planning, keep your route simple: prefer options with fewer transfers, reliable on-time performance, and easy access from the front of stations. Those alerts help you cast a new plan in seconds if a line opens late or a detour appears. Using live data, you can adapt to a trail or bike-friendly path if needed.
Maximizing real-time awareness
Open the app, input origin and destination, and choose to keep updates on; if the route shifts, the app can launch a parallel path across the city, including options to continue along the same corridor or switch to a different mode. Comment on delays or signal changes to your group so theyre aligned before you leave.
For cross-county trips like san mateo county, you can compare combos that minimize wait time and keep the ride-shares option ready as a backup. The goal is to make decisions quickly, stay ahead of driving, and keep you moving rather than sitting stalled in traffic. Aged travelers especially benefit from clear, step-by-step directions and accessible entrances.
Bike Mobility in the City: Where to rent, best cycling corridors, and safety tips
Grab a Bay Wheels bike from a nearby station and you’ll be riding in minutes. If youve never rented before, the process is simple: find a station, scan the QR code, unlock, and ride. The posted maps show each dock and the available bikes, so you can plan your first ride without hassle.
Rentals and ride basics

- Where to rent: major Bay Wheels or station hubs include Fisherman’s Wharf harbor areas, Embarcadero, Mission Bay, and Golden Gate Park. Stations are clearly posted with maps and numbers for easy planning.
- Pricing and standard policies: the standard rate appears in the app and at kiosks; time charges accrue by ride length, with clear daily caps published at the station.
- Unlock steps: open the app, select a bike, scan the code, and the lock will disengage. Return the bike to any Bay Wheels station and listen for the green light to confirm the end of the ride.
- Safety gear and comfort: local shops sell helmets and locks nearby, and you can adjust the seat height before you start. Joshi from a nearby station advises checking the posted safety tips before your first ride.
- Return and end ride: park the bike, dock it, and wait for the confirmation. If you miss a dock, move to the next available bay so other riders aren’t delayed.
Best corridors and routes
- The Wiggle: a major, mostly flat corridor of 3–4 miles that links Hayes Valley to the eastern edge of Golden Gate Park. Expect 15–25 minutes of riding time, depending on traffic and stoplights.
- Embarcadero and the Ferry Building route: scenic waterfront lanes from Market Street to Fisherman’s Wharf, 2–4 miles, usually 10–15 minutes with light crowds in the daytime.
- Crissy Field to the Golden Gate Bridge: a coastal trail with bay harbor views; about 6–8 miles round trip, commonly 30–45 minutes, and it’s worth the slight detour for the panorama.
- Great Highway Trail to Ocean Beach: longer coastal ride, 8–12 miles one way; count on 40–60 minutes each way and gorgeous sea vistas.
- Golden Gate Park loop: 4–5 miles around the park, perfect for a relaxed circuit in 20–40 minutes, with plenty of shade and stops at iconic sites.
Stayed on major corridors and posted signs, you’ll find predictable pavement and clearer crossings. For visitors and first-time riders, these routes keep you close to shorelines, harbor inns, and popular sights, helping you maximize time and minimize stress during a single-day journey.
Safety tips for biking SF:
- Wear a helmet, set the seat correctly, and test brakes at a stop before you roll onto busy streets.
- Stay in bike lanes where available; yield to pedestrians on trails, and use hand signals when turning or stopping.
- Keep a safe distance from parked cars to avoid dooring; give oncoming riders and drivers at least a car-length of space.
- Use lights and reflectors at dusk or dawn; a bell helps alert pedestrians near popular routes like the Embarcadero and Crissy Field.
- Stay alert for sudden stops from vehicles in traffic and for pedestrians stepping onto bike paths from storefronts or hotel lobbies.
- Carry a small lock and spare tube; you can park a bike at standard stations or nearby bike racks if you need a quick break in a busy area.
- In case of an incident, move to a safe spot and call responders if needed; you can document the scene with video for reference, and report it to a nearby station staffer.
- Traveling with a group? Assign one rider as a lookout for oncoming traffic and watch for doors opening in parked cars along the harbor and waterfront areas.
- City services will continue to expand bike lanes and posted safety guidance; participate in surveys to share your feedback about ride quality and safety on different corridors.
- For first-time visitors, plan a shorter intro ride first, then extend to longer park loops or coastward trails as you gain confidence.
- Always stay aware of other road users; that acute awareness helps you respond quickly to unexpected moves from drivers, pedestrians, or wildlife along bike paths.
Walking the City: Practical routes, hill navigation, and pedestrian safety
Choose a flat, well-lit stretch along Market Street toward the Embarcadero for your first walk. The Ferry Building to Fisherman’s Wharf route stays mostly level, with frequent crosswalks and cafés that invite quick breaks. in june, temperature ranges from about 55°F in the morning to around 70°F in the afternoon, so bring a light layer and water. There’s plenty of shade and benches, and post signs keep you oriented without hassle. If you set out in the early hours, you’ll enjoy lighter foot traffic and crisper air. A small water bottle is needed for longer strolls.
Hill navigation: When a route includes acute inclines, choose gentler blocks. Stick to waterfront corridors where grades stay low and sidewalks widen, and avoid steep climbs toward Nob Hill. If you encounter an acute ascent, pause at a curb ramp or switch to a taxi for the short leg. For longer hops, plan transfers between lines in advance; many routes connect by bus or cable car, and you can map them online. If you took a longer path, you might have missed a view, but the flat segments reward you with steady walking. however, some days are windy, so adjust your route accordingly.
Pedestrian safety: Jaywalkers cause delays and hazards, so cross only at signals and marked crosswalks. There are very walkable segments between the Embarcadero and North Beach. Whether you walk alone or with company, stay alert and keep to the right on crosswalks to let faster pedestrians pass on the left. At dusk, wear white or bright clothing to stay visible. If crowds spike, use the outer edge of the sidewalk and give space to people with strollers or wheelchairs. Stay alert for bikes; bikes operate in dedicated lanes and riding on sidewalks is not permitted in many zones. Human-scale signals help pace crossings and keep the flow smooth.
Transit and gear tips: If you need to continue beyond walking, taxi or rideshare is handy and typically available within minutes. Fares are posted at stops and on apps; passes can be purchased online or via the sfos app. For planners, heres how to map routes: plenty of lines offer transfers and shuttle options. Bicycles can be carried on some ferries or buses when permitted; check posted rules before boarding. Buses run frequently and mostly stick to reliable schedules, and harbor cruises add scenic options when the harbor is calm.
Parking in San Francisco: Meter rules, garages, street parking tips, and permit zones
Start with a concrete plan: pay at the meter or via a mobile app before you park. This reduces tickets and makes getting around easier for most visitors. If you work downtown, this plan helps you avoid last-minute hunts for spots. There are many city-owned garages near Union Square and Civic Center that provide flat daily rates, making weekends less stressful. Being mindful of posted signs saves money and time.
Meter rules vary block by block; currently posted signs show the hours and max stay. These blocks have different rules, so read signs to see if parts of the block have shorter limits. Most meters accept credit cards or mobile payments; the signage will confirm. If you need to stop briefly, find a pause point and watch for restrictions. If you overstay, you may receive a ticket, so plan a quick exit or move to a new block. Since rules change, always double-check before you leave the car.
Garages come in city-owned facilities and private company locations. Many garages are owned by local operators. Compare standard daily rates, which may include a flat max for the day. On weekends, some garages offer lower rates or extended hours; the entrance menu at each lot shows current rates and hours. If you’re hiring a car for work or leisure, a garage with a predictable price is a big plus, and theyre a reliable option when you need to park for several hours. Some places open early and close late, while others may close after midnight.
Street parking tips: observe curb colors and posted restrictions, read every sign, and watch for loading zones. Red curbs generally prohibit stopping; white curbs are typically for passenger pickup and drop-off with time limits, while other colors carry their own rules. Always stop briefly for a quick pickup and then move or feed the meter. If you need to stop for a rider, taxis and ride-shares often drop off on nearby blocks, reducing the search. In many neighborhoods, there are 2-hour limits–weekends can differ, so re-check the signs if you’re staying in the area. These habits help you avoid tickets and stay on the move.
Permit zones: The Residential Parking Permit Zones require a permit for parking on designated blocks during posted hours. There are often different rules by block, so check the sfos map or the city’s official site for details. If you’re visiting for a week, you may arrange a guest pass or rent a private space from a resident via a local company. When you exit the zone, you can move to a different block with free parking outside permit hours. There is also visitor parking options in some areas, but verify the signage before you park.
Practical notes: the mayor has promoted clearer signage and more consistent enforcement, and you’ll see advertisements reflecting these changes. If you went downtown to a garage, the menu shows open spots and rates, helping you decide quickly. The standard goal is to keep traffic moving, and sfos sensors plus national apps help you compare spots in real time. Theyre handy when you need a fast answer about where to park, especially near Woods Street and other busy corridors. This approach makes it easier to get around without circling endlessly or missing your next appointment.


