Add, Update, or Usuń a Payment Method - A Quick Guide to Managing Your Metody płatności
Usuń nieużywaną metodę płatności przed dodaniem nowej. As the owner konta, masz uprawnienia do zarządzania metodami płatności. Jeśli nie możesz tego zrobić, skontaktuj się z administratorem przed wprowadzeniem zmian. Takie czyszczenie zmniejsza zamieszanie i utrzymuje twoje charges accurate. Before kontynuuj, sprawdź, czy metoda nie jest używana dla nadchodzących faktur.
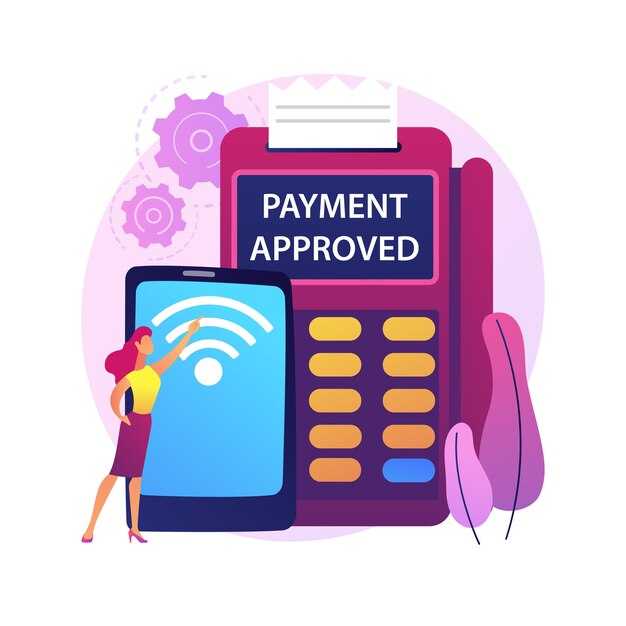
Open the menu in your Stripe panel sterowania, wybierz customer, a następnie przejdź do Metody płatności zakładce. Możesz dodać nowa metoda with the button, choose the types metod, których potrzebujesz (karta, konto bankowe, karta przedpłacona, itp.) i wprowadź wymagane cyfry bezpiecznie. Interfejs użytkownika pokaże tylko supported opcje dla twojego regionu i pojawią się one na liście dla łatwego wglądu.
Aby zaktualizować: wybierz metodę, użyj Update opcji i potwierdź. Jeśli zaktualizujesz kartę, system może wymagać nowych kroków weryfikacyjnych i zastąpić zapisaną cyfry dla przyszłych opłat. Upewnij się, że dostosujesz wszystkie tasks lub subskrypcje, które polegają na tej metodzie.
Aby usunąć: najpierw odłącz metodę od wszelkich aktywnych subskrypcji, jeśli to konieczne, a następnie kliknij delete akcja w Metody płatności lista i potwierdź. Ty nie można usuń metodę, która jest nadal używana przez zbliżającą się fakturę; najpierw musisz przejść na inną metodę. Otrzymasz message potwierdzenie usunięcia, a wprowadzenie zmiany może potrwać kilka days do propagowania we wszystkich rekordach.
Wskazówki, jak zachować porządek w pracy: zweryfikuj cyfry które usuwasz, nie są potrzebne, zachowaj lokalny zawiera lista metod i przegląd charges polityki, jeśli jesteś w india lub użyj portfeli regionalnych. Zaplanuj kroki, aby zapewnić płynny proces i monitoruj message z systemu po każdej akcji. Takie podejście utrzymuje twoje types zgodne z potrzebami Twojej firmy i zmniejsza tarcie dla Twoich klientów.
Jak dodać nową metodę płatności na komputerze i urządzeniu mobilnym
Otwórz stronę Płatności, zaloguj się i kliknij Dodaj metodę płatności, aby rozpocząć. Przed rozpoczęciem przygotuj dane karty lub konta bankowego oraz adres rozliczeniowy. Wybierz typ metody i przejdź do wprowadzenia wymaganych danych na następnym ekranie.
Desktop: dodaj nową metodę płatności

W prawym górnym rogu otwórz menu konta i wybierz Płatności. Kliknij Dodaj metodę płatności, a następnie wybierz Karta kredytowa, Konto bankowe lub Karta wirtualna. Wprowadź numer karty, datę ważności i kod weryfikacyjny; w przypadku kont bankowych wprowadź numer rozliczeniowy i numer konta. Wprowadź adres rozliczeniowy zgodny z danymi wystawcy, w tym adres ulicy, miasto, stan i kod pocztowy. Możesz użyć karty jednorazowej do pojedynczego zakupu lub zapisać wybraną metodę do pełnego wykorzystania we wszystkich zamówieniach. W razie potrzeby podaj swój numer telefonu i adres e-mail do weryfikacji; pomaga to zapobiegać oszustwom. Kliknij Zapisz, aby potwierdzić; jeśli brakuje jakiegoś pola lub karta straciła ważność, formularz wyświetli niespełnioną walidację i należy poprawić dane i spróbować ponownie. Nie możesz zapisać metody z nieprawidłowymi informacjami. Po zapisaniu możesz pobrać potwierdzenie pliku i zobaczyć nową metodę na stronie Płatności. Od aktualizacji sierpniowej obsługiwane są karty wirtualne i możesz w dowolnym momencie wymienić starą metodę bez dodatkowych kosztów. warstwa zabezpieczeń Azure szyfruje dane podczas przesyłania, aby chronić Twoje informacje.
Mobile: dodaj nową metodę płatności
Otwórz aplikację, przejdź do Ustawienia > Płatności i dotknij Dodaj metodę płatności. Wybierz te same typy co na komputerze, a następnie wypełnij wymagane pola: numer lub dane rozliczeniowe, data ważności, adres rozliczeniowy i dane weryfikacyjne, jeśli zostaniesz o to poproszony. Wprowadź swój numer telefonu i adres e-mail, aby zakończyć weryfikację, gdy zostanie ona zaoferowana. W przypadku niektórych użytkowników szybka, jednorazowa weryfikacja działa; nie martw się ponownym wprowadzaniem danych, jeśli dodajesz zapisaną metodę. Po zapisaniu nowa metoda pojawi się na liście Płatności i możesz wybrać ją do przyszłych zakupów lub wymienić ją później. Jeśli napotkasz problemy, spróbuj rozwiązać je, sprawdzając ponownie numery, adres i datę ważności lub spróbuj ponownie w innej sieci. Możesz otrzymać e-mail z potwierdzeniem lub zobaczyć załącznik z danymi. Ten proces zapewnia płynne działanie klientów i partnerów dzięki bezpiecznej ochronie opartej na platformie Azure.
Jak zaktualizować dane karty (numer, data ważności, CVV i adres rozliczeniowy)
Zaktualizuj dane karty w portalu, aby utrzymać aktywność subskrypcji bez zakłóceń. Jeśli zarządzasz wieloma profilami, możesz je zaktualizować ze swojego konta i utrzymać wszystkie subskrypcje aktywne.
- Sign in to your account and open the portal's Billing or Metody płatności section.
- Wybierz metodę płatności, którą chcesz zastąpić, lub kliknij Dodaj nową kartę. W przypadku zastąpienia, stary wpis może zostać usunięty, aby mieć jedną aktywną metodę dla wszystkich subskrypcji.
- Wprowadź nowy numer karty, datę ważności i kod CVV. Jeśli używasz karty Mastercard lub innej sieci, upewnij się, że cyfry zgadzają się z tymi wydanymi przez wystawcę. W przypadku kart wirtualnych wprowadź numer wirtualny zgodnie z tymi samymi zasadami dotyczącymi daty ważności i kodu CVV.
- Zaktualizuj adres rozliczeniowy, jeśli uległ zmianie od czasu ostatniego powiązania tej karty. Użyj dokładnego adresu, jaki Twój wystawca ma w ewidencji, aby uniknąć blokad preautoryzacyjnych lub późniejszych odrzuceń.
- Przejrzyj informacje i potwierdź. Pełna aktualizacja pojawi się w portalu jako Aktywna i w razie potrzeby możesz ustawić ją jako domyślną dla subskrypcji. Następnie kliknij Zapisz lub Zakończ.
- Jeśli zostaniesz o to poproszony, możesz zobaczyć wstępną autoryzację lub niewielką opłatę testową. Zwykle zostanie ona cofnięta; zobaczysz krótkie okienko z kwotą na wyciągu, ale nie wpłynie to na Twoje aktywne subskrypcje.
Porady i wskazówki dotyczące płynnej aktualizacji
- Zachowaj aktualizację w następnym oknie rozliczeniowym, aby zapewnić odnawianie subskrypcji bez zakłóceń.
- If a card was issued recently, allow a few minutes for the new details to propagate in the system.
- If a payment method is declined, check that the card is active, has sufficient funds, and that the billing address matches the issuer records. You can add an alternate card to cover subscriptions.
- For multiple subscriptions, review each profile and ensure the correct method is assigned to active ones; use tags to distinguish personal versus business cards if you manage several profiles.
- If you prefer, you can replace a card with a virtual card provided by your bank; many portals accept virtual numbers as long as the network is supported.
- There’s no extra fee to update payment methods, and you can send a confirmation notification to yourself after saving the changes.
How to set or change your default (primary) payment method
Set your default payment method by opening your profile, then the Payments section, and selecting a different card. The chosen card becomes the primary option and is used automatically for renewals and new charges. This change takes effect immediately and remains until you switch it again. If the default is changed, subscriptions update accordingly.
In the Payments page you’ll see two sections: Cards and Linked methods. The Cards section shows each card’s last four cyfry, issuer, and the owner name; use the option to set as default. When you click the control, the panel opens and you confirm your choice. They can update the default anytime from the same area, and you must confirm the change in the dialog.
If you manage subscriptions across different services, choose the primary card that matches your most frequent charges, including chinese vendors or cloud services like azure and microsoft. If you expect to pay for months ahead, keep a valid card on file and ensure the owner name matches the card records.
To prevent failed payments, update the default before expiration, keep a backup method, and set renewal reminders. Next, you can add a different card and set it to automatically switch if the primary is declined. After you change, test by triggering a small renewal or by entering test data in a sandbox profile. Set a reminder to renew before the next cycle.
For cost visibility, check related subscriptions and usage with cost management tools at httpsconsoleawsamazoncomcostmanagement; heres a quick tip to audit linked accounts within your profile and ensure they remain linked as you renew.
How to securely delete a payment method and confirm removal
Sign in to your account, open the Payments section, select the selected method you want to delete, then click Remove and confirm with your password or a one-time code.
Verify there are no pending charges or active subscriptions tied to this method before removing. If there is a pending payment or a past-due invoice, settle it first. Only proceed if there are no pending obligations, as this step is likely to prevent service interruption. If the method changed recently, ensure the new current method is selected to avoid mismatch and update your records accordingly.
Have a back-up plan by keeping a backup method available and adding it if needed, then set it as current to prevent disruption. This approach applies even when you switch providers or platforms; for stripes and other processors, you may see a provider-specific confirmation screen. The process is similar in india and for microsoft accounts.
After removal, you should receive a message confirming the akcja w dashboard or via email. Confirm the change by rechecking the list of methods and ensuring the new current method is updated. Within a few minutes, you will see the updated information reflected in your account, and you can monitor the next invoice to ensure no charges originate from the deleted method. If you still encounter issues, review the details and retry if necessary.
Prerequisites
Ensure you have access to the account, a backup method available, and the necessary two-factor authentication ready. Note the last four cyfry of the card and the information on file to identify the correct method. The steps are the same in india and for microsoft accounts, and you may need adding a new backup method before you begin.
Kroks to delete securely
| Krok | Akcja | Expected Result |
|---|---|---|
| First | Login to your account, navigate to Payments > Metody płatności, select the method to delete, and click Remove. | Method is highlighted and ready for removal; the system prompts for verification. |
| Then | Enter your password or a one-time code and confirm. | Removal proceeds with verification completed. |
| Next | Review any active subscriptions or pending charges tied to this method. | No active ties remain, or you have a clear plan to update. |
| Then | If offered, select a new default method and save changes. | New default is set; there is no disruption to ongoing charges. |
| Finally | Check the confirmation message or email and re-check the list in your dashboard. | Removal is confirmed and reflected in the method list. |
Tip: keep information on file handy for audit trails and use the interface message to track changes. If you are using stripes as a payment provider, complete the provider page prompts to finalize. If you travel or switch regions, such as moving to india, repeat the steps in the local language to ensure clarity.
How to verify a newly added payment method with authorization or microcharges
Start verification by issuing a small authorization or microcharge through Stripe, PayPal, or your processor. The typical amount is between $0.50 and $1.00, and the charge is currently pending or authorized in the dashboard. This step is necessary to confirm ownership and prevent fraudulent use.
Open the customer’s session in the management console and locate the nowa metoda entry. The record zawiera numbers and a charge id; the status should be pending until the customer confirms the amount.
Ask the customer to check their bank statements and confirm the exact microcharge amount. If the amount matches, the customer can respond via the message channel to meet the verification requirement and move the method forward.
Mark the method as active once verification succeeds. The card or account becomes usable, and the value of the customer’s profile increases. If you’re dealing with virtual cards, the process stays the same because the verification happens on the processor side, not in your file.
Store verification notes in a file and tighten uprawnienia so only the necessary roles can view them. The file should contain the date, amount, result, and any identifiers; uprawnienia help protect sensitive data and track accountability, and you can reference current procedures in your guidelines.
If the charge remains pending or you see mismatches, check under the account notes and review the time window for authorization. Otherwise, retry with a new microcharge or switch to another verification method to help the process complete.
Keep customers informed: send a short message saying the verification is in progress, and that the process is standard and secure. This approach aligns with how microsoft documentation and popular providers like Stripe and PayPal describe checks, and it helps you meet expectations without raising concerns.
Best practices include using a single verification session, avoiding multiple charges, and maintaining an audit trail in a file. Establish clearly defined roles and uprawnienia so the team that manages payment methods can operate efficiently, yet stay compliant with data protections and customer trust. If a verification step opens a new session, ensure the session remains active only for the necessary time and that all steps are documented for future reference.
How to troubleshoot common payment method failures (expired cards, declines, mismatched info)
First, check the card expiration date and replace the card if it is expired; a valid card within its expiry window reduces failure risk. Confirm the card number, CVV, and billing address match the bank’s records and the agreement terms in your profile. After updating, run a small authorization to verify the card remains usable.
Declines may stem from different causes, such as insufficient funds, a flag on the card, or a temporary block by the issuer. Review the decline message in your bank app or statement; ensure the current status is not inactive. If the card is marked as inactive, contact the bank to lift the restriction and re-enable online payments. If a condition on the card requires action, replace it or add a different method to keep your payment flow smooth.
Mismatched information triggers a verification challenge: verify the name on the card, the billing address, and the phone number match the bank records. Update any miscopied cyfry, and confirm the country and currency align with the merchant setup. If you locate an inconsistency, correct it within your profile and re-run the verification.
Within your account, open the menu and locate Metody płatności. The current method should show as added and active; if it appears as left, deleted, or inactive, remove it and re-add. When re-adding, provide the exact details, select the correct method, and test a small charge to confirm the selection works as expected.
paypal offers a simplified alternative: if you choose paypal, ensure youre signed in and authorize the payment. paypal appears as a separate option in the method list; verify the linked bank or card is valid and the account is current. This path can help you avoid regional or card-specific declines.
Verification steps include checking the statement for a pending or completed charge, confirming the last four cyfry, and ensuring the expiration date matches. If verification passes, the transaction proceeds; if not, review the bank condition and any fraud checks, then retry after updating the method. Keep an eye on the added method status and confirm it shows as active.
Note the action you take: replacing a card, re-adding a method, or switching to paypal; keep the record within your notes and ensure the changes are reflected in the statement. If the problem persists in june, escalate to support with a current screenshot of the menu and the statement to verify there’s no hidden restriction or deleted method lingering in your account.
How to manage multiple payment methods for subscriptions and one-time payments
Start by adding multiple payment methods to your profile and set a default method for subscriptions. This keeps monthly renewals smooth and lets you handle one-time payments without interruption.
In the upper-left corner, open your profile and go to payment methods to see all options. They appear as visible entries you can detach, delete, or move.
To add a method, click Next i postępuj zgodnie z instrukcjami; system obsługuje prepaid karty i inne popularne opcje. Jeśli karta jest niezweryfikowane, pozostaje oflagowane, dopóki nie potwierdzisz szczegółów.
Zmiana podstawowej metody aktualizuje sposób generowania faktur i ścieżkę routingu używaną do obciążeń. Zmiana dotyczy opłat za następny miesiąc i wszelkich bieżących subskrypcji.
Odłącz metodę, której już nie chcesz, wybierając Odłącz; możesz wtedy move poniżej lub delete jeśli już go nie potrzebujesz.
Aby całkowicie usunąć metodę, użyj Usuń; note że usunięcia nie można cofnąć w przypadku aktywnych subskrypcji. Jeśli będziesz go jeszcze potrzebować, możesz go ponownie dodać i zastosować do przyszłych opłat.
Sprawdź swój profil, aby upewnić się, że aktualnie widoczna metoda jest tą używaną do subskrypcji. System generuje faktur z aktywnej metody i możesz close okno po potwierdzeniu konfiguracji i kolejnych opłat.
Rozwiązywanie typowych problemów przez checking the routing płatności i weryfikacji danych karty. Jeśli zawiodą, sprawdź ponownie wprowadzone dane, move do innej metody lub dodaj nową. they pomogą Ci utrzymać porządek w dokumentacji i przygotować ją do miesięcznego uzgodnienia.
Kropki statusu wskazują, która metoda jest aktywna; wykonaj poniższe kroki, aby zweryfikować i utrzymuj listę w porządku, aby uniknąć nieprawidłowych opłat.
wskazówka dla współtwórców: utrzymuj tę listę w porządku, aby uniknąć nieprawidłowych obciążeń.


