
How To Pay Your Fare - A Quick Guide to Payment Methods

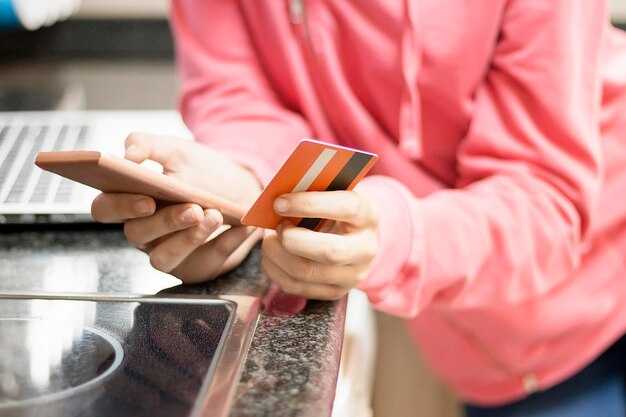
Pay at the pick-up with a contactless card to speed up your trip. A single tap grants access and avoids cash queues. This direct action works even if you only have a phone or wallet handy.
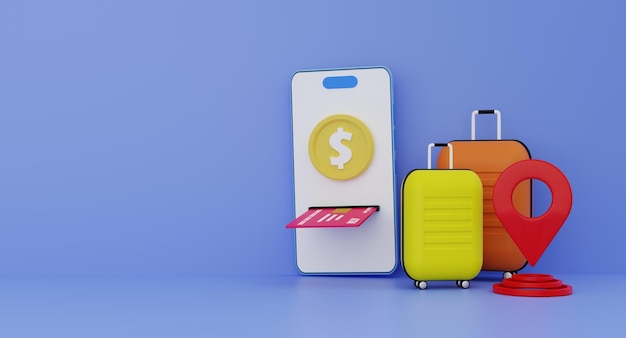
Options include mobile wallet, contactless card, or a loaded o-train card. where to pay depends on station layout, but most gates accept the same tap action. For entertainment districts with queues, a quick tap at the pick-up keeps you moving. You can make payments like a pro by choosing your default method in the app settings.
Prices and discounts appear in the app's price section. A typical trip price is around $2.75; discounted monthly passes may cost $70–$100, and a daily cap might be $6–$9 depending on the city. If you have a loaded prepaid card, the discount applies automatically, and you see the discounted amount at checkout.
how-to set up your payment method is simple: add a card or link a wallet, enable auto-load, and choose your default setting. In the payment section, pick your method and confirm the setting for auto-pay. If you travel daily, a month plan keeps price predictable and adds convenience.
Before you head out, verify the balance and possible issues at the pick-up. In a minute you'll be ready to tap. If the o-train line offers a discount policy, apply it; check your eligibility for student or senior discounts in the section where you pay. This keeps your price predictable and your trip smooth.
Set a Default Payment Method in the Uber App
Set debit as the default payment method now to speed up every ride. On your phone, tap the top-left profile icon, go to Payments, then add a debit card if needed. Under Default method, select the debit card and tap Set as default. This change takes effect immediately for the next ride, and on some devices it appears within a minute. It avoids entering card details again, saving time and keeping money moving smoothly.
If you want FarePay or another option as default, choose it in the same menu. If you prefer farepay, set farepay as default. You can switch later if your needs change. The app will remember your history of payments and apply the selected method to future trips, including rides to a station, a mart, or a vineyard area, and to any drop-off. This setting works always across trips and applies through the ride flow, including connections like o-train. The next order will reflect the default method automatically.
Eligibility matters: some cards may not support certain features, or you may see changes in how FarePay is processed. If you cannot add a card due to eligibility, review your card type and contact your bank. In some regions, you may need to verify the method by a small charge; the amount is a few cents. If a corporate policy or officer supervision applies, follow the guidance to ensure compliance.
Receipts and tracking: your payment history shows charges and time stamps. If you prefer, you can have receipts mailed to your email or saved to a Microsoft account for expense tracking. You can monitor and adjust your settings anytime, and you can remove an old method if you update the card details at a later date. If you switch methods, the system will guide you through the steps.
Add a Card, Debit, or Wallet to Uber: Step-by-Step
Open the Uber app, go to your center profile, and start with Payment to add a card, debit, or wallet in three quick steps.
- Open the app, tap your profile icon, then go to Payment in the center of the screen.
- In Payment, tap Add Payment Method. Use the drop-down to choose Card, Debit, or Wallet, then enter the required details and accept the terms before tapping Confirm.
- Enter details for the chosen method and confirm; depending on the method you may need a one-time code. They will show as active when verified, and you can go through checkout right away on all platforms.
- Store the method securely by enabling tokenized payments, and for each method set a default mode if you ride often. This express setup keeps payments fast at checkout.
- Check the card's status: if it is expired, suspend it and choose another method; you cannot use an expired card, so update it to avoid declines.
- If a payment issue occurs, open a support ticket to get possible fixes and guidance to transition onto a working method.
Note: This flow works near you in utah and across entertainment platforms on iOS, Android, or web.
Switch Payment Methods Before Each Ride
Always switch payment methods before each ride to ensure the fare matches your intent. The process begins on the screen when you open the app; go to the payment section to review options and pick the right one for this trip. If you are unsure whats accepted in your location, the screen lists accepted methods and tells you what will be charged. Also rising ride volumes mean you should set the method before pickup.
Before you ride
In your profile, verify the method you want to use is loaded and accepted. If you need to switch, tap activate on the new option and confirm the transfer. The inspector in the app will indicate what will be charged and the time until pickup. Their saved options may appear, but you should verify your own current choice in your profile.
What to watch for and quick fixes
If you notice a mismatch on the screen, check your settings and verify that the payment method is loaded with funds and has not been transferred to another account. If the amount seems lower than expected, compare it to the ticket total and adjust before you ride. If a change is needed after the pickup begins, you can switch, but expect a short delay while the system updates and rechecks your location. Usually the system will apply the right method automatically, but staying proactive saves time and reduces surprises. After checkout, review the online receipt to confirm the work was completed and keep the ticket handy for records.
Manage Your Payment Methods: Edit, Remove, or Update Details
Update your primary payment method now to ensure smooth rides across metro lines, bee-line buses, and express transit modes. In your browser, open the panel under your account and begin editing your current method; after you save, the change begins processing immediately for upcoming trips. The change applies to every line you ride, so you stay prepared.
From the list of methods, you can edit, remove, or add details. If youve saved a method like google Pay or a metrocard, you can switch to another option with a couple of clicks. The panel shows supported options, and you can choose a method that works in utah or any other region. After saving, your current method stays active and will be used for the next ride. If you need help, support is available to guide you through the steps.
Quick steps to manage
Edit: click Edit on the desired method and update fields such as card number, expiry, or billing address. Remove: click Remove to delete a saved option. Add New: choose Add New and enter the new method details. You can also change the default mode so that every ride uses that payment option.
Tips for fast pay: use scan at gates that support contactless payments; some readers accept a camera-based code, and you can always switch to a discounted option when available. If youre riding frequently, you might keep metrocard linked in the list for convenience. Be sure your setup is current before a ride, and remember to test after changes to keep your entertainment and transport costs predictable along the line.
Troubleshooting: What to Do When a Payment Fails or is Pending
Open the fare app, go to Registration, then Payment, and click Pay Now with your preferred mode. If the transaction fails, switch to a lower-cost option or try a different mode and re-submit in the current session, plus review the error message for clues.
Verify the current source (источник) of funds and ensure the selected mode matches your method. Check the card or wallet status, confirm you have sufficient funds, and verify the card hasn’t been reported stolen. If you see a message about reduced-fare eligibility, update your registration so you stay in the correct services. Reading the on-screen guidance helps you understand required fields; whats next is to follow these steps. The screen may also show a short advertisement; ignore it and rely on official instructions. Only use the official payment screen, not any advertisement or third-party link. If you spot a charge unrelated to transit, such as a drugstore payment, contact support.
Immediate steps if a payment fails
Take these concrete actions now: confirm the card isn’t expired, refresh the app, re-enter the details, and try again. If the failure persists, click Support to start a ticket and provide your registration, current trip details, and the last four digits of the method. Have your contact information ready so support can reach you; if you suspect a stolen card, stop using it and contact your issuer immediately.
What to do when a payment is pending
Pending can happen while the bank verifies the transaction. Through the next 10–15 minutes, monitor the status in the app; if it remains current and pending, you may proceed with a backup payment method. If the pending status lasts longer than 15 minutes, contact support with the current trip, station, and route details, and ask to activate a temporary authorization if available. In some cases, a reduced-fare registration on file can help ahead of your ride; the agent will verify near your station or lake-side route and adjust as needed. If a station inspector checks you, have the receipt ready and show the digital proof of payment; support will have your back and can guide you through the next steps. If you travel near the lake or through a valley route, note this when contacting support so they can prioritize the review.


