


 터미널 팁") 멕시코 시티 공항 안내 - 베니토 후아레스(MEX) 터미널 팁">
멕시코 시티 공항 안내 - 베니토 후아레스(MEX) 터미널 팁">
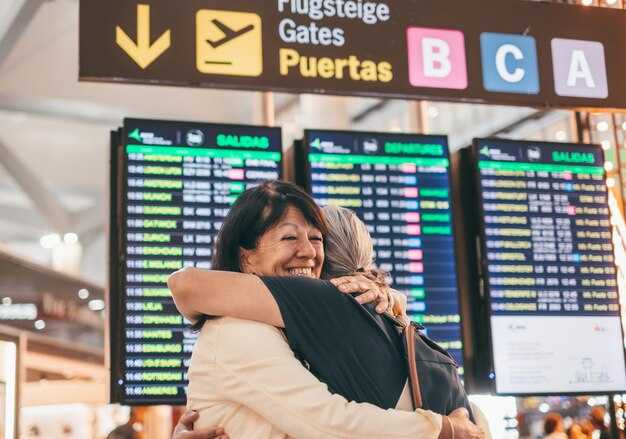
Time Saver: Book a pickup or hotel shuttle to the arrivals curb—this helps you sidestep taxi queues and gate confusion. If you prefer public transit, the metro is the budget-friendly choice, but keep in mind you’ll need a short transfer from the airport area and some extra travel time.
Terminal Layout for Travelers: Terminal 1 and Terminal 2 each have separate check-in zones, but clear signs guide travelers toward security and gates. In both terminals you’ll find large food courts, reliable Wi-Fi, and easy access to baggage claim. The placement of escalators and seating areas helps you move efficiently, and staff can point you to the right airline counter if you need assistance. Your travel route depends on your arrival time.
Baggage and Reservations: Use self-check kiosks to reserve seats or lounge access; there are several great options in both terminals, including quiet zones near the gates. Keep essential items in a small bag next to your carry-on so you’re not searching during security, and take advantage of the large duty-free selection that opens early.
Getting Around After Landing: Rideshares and authorized taxis line up at the curb; many travelers rely on them for predictable pricing. From the Buenavista station, you can catch the metro to reach central Mexico City. The route passes the Zócalo area and other historic districts; plan for traffic, especially during peak hours, whether you’re traveling solo or with family.
Today’s Reality: Many travelers arrive with reservations in hand but still need to locate their vehicles or rideshare pickups. If you’re visiting Mexico City, consider a short stroll along the coastal-inspired cafés near Reforma before your next flight.
MEX Terminal 1: Check‑in, security lanes, and baggage drop
Arrive 3 hours before international flights and 2 hours before domestic ones at MEX Terminal 1. Use self-service kiosks to print boarding passes and bag tags, then head to baggage drop to minimize queuing. This smart and practical approach saves time and keeps you moving through the terminal; knowing what to expect helps you stay calm, and it’s doable even on busy days. This plan offers plenty of comfort for travelers.
Check-in and Bag Tagging
Here are three steps to speed up the process. Self-service kiosks line the central hall on Level 1, beneath the glass roof. If you have a card linked to your airline profile, you can pull up your booking in seconds and print a bag tag. If you need help, counters are staffed, but expect longer lines during busy hours. The advantage of kiosks is speed and flexibility; check-in is faster during off-peak times. After tagging your bag, place it on the conveyor belt and proceed to security.
Security Lanes
The security area is along the main corridor; expect long lines during peak and popular hours. Have your liquids packed in a single clear bag, remove laptops, and keep your passport and boarding pass handy. On busy weekday mornings, queues can be long; at other times, you’ll get through faster. If your airline offers a dedicated or expedited lane, you can use it; otherwise, standard lines apply. The area is lively—a bustling hub of people moving toward the gates. Stay steady and move with purpose. Before security, prep your items to speed things along.
Baggage Drop
After check-in, head to the baggage drop zone near the main hall. Staff will scan your bag tag and route bags onto the conveyors. If you’re traveling carry-on only, you can skip this step. For larger bags, arrive at least 60 minutes before international departures or 45 minutes before domestic flights to ensure your luggage makes it on board. If you’re traveling tomorrow, plan accordingly and allow extra time for possible queues. At the information desk, staff can point you to the correct baggage belt and answer questions. For today’s travelers, this path saves time and helps you reach your gate stress-free—with careful planning and a calm pace. This option is sure to help many travelers.
MEX Terminal 2: Check‑in, security lanes, and baggage drop
Arrive at Terminal 2 at least two hours before domestic departures and three hours before international flights. With your ticket in hand, head to your airline’s designated check-in zone and use the self-service kiosks to print boarding passes and attach luggage tags. From there, you can proceed to the luggage drop and check any bags you don’t want to carry through security. Signs are clearly posted in English and Spanish, and staff are available at every step to assist you. If you’re traveling with others, consider making a quick plan to split up and tackle different lines to save time—especially on Sundays, when crowds tend to grow. Have your information ready to keep queues moving smoothly, and you’ll breeze through this part of your trip with minimal stress.
Check‑in flow
Enter Terminal 2 and choose the counters or kiosks marked for your airline. The best option for speed is to use the self-check-in kiosks—use them if you have a ticket or e-ticket. Have your passport or ID, ticket, and any visas ready. At the counters, present your boarding pass and confirm your seat; if you’re traveling with others, you can coordinate with the agent to check in everyone’s documents in one go, saving you valuable minutes. If you need to keep certain items in your carry-on, be aware of restrictions and dispose of any prohibited items before you reach security to avoid delays. After check-in, in most cases you’ll proceed directly to the luggage drop or the security corridor, depending on where your airline directs you. Flight information and current queue lengths are displayed, so you can estimate how long the process will take.
Security lanes and baggage drop
There are three main security lanes at the Terminal 2 entrance: standard, priority for premium passengers, and a lane optimized for families with children; their frequency adjusts based on passenger volume. At security, present your boarding pass and ID, remove large electronics, and place your carry-ons on the conveyor belt. Use the bins to dispose of any prohibited items, and keep bulky items out of your pockets to speed up the process.
There is a dedicated baggage drop near the security area for checked luggage, and you can see the belt number on the screen before you proceed. If you’re arriving or departing by car, you can use the clearly marked drop-off and pick-up lanes at the curb, which include separate zones for taxis and ride-hailing services. These routes help you avoid unnecessary detours, allowing you to get through the drop-off area in just minutes.
Before moving on, make sure you have all essential documents and any additional information handy to share with staff if needed—this helps reduce back-and-forth and keeps things flowing smoothly. On Sundays, crowds can make lines longer, so try to arrive early and take advantage of faster lanes when available.
Interterminal Transfer: Walking routes and transfer times between T1 and T2
Take the Interterminal Connector as your first option between T1 and T2. This amazing, affordable walking route keeps you inside the airport, so you avoid external transport and extra fees. The path is airport-operated, well marked, and takes about 15 minutes at a comfortable pace—10 to 12 minutes for brisk walkers and up to 20 minutes if you’re traveling with heavy luggage or lots of bags. This route is well known by frequent travelers for its consistency and ease, making it ideal for next-day connections or quick transfers when timing is tight. See the details below to plan your transfer and to explore the two practical routes available along with their conditions.
- Route overview: Start at T1 in the central concourse, follow the Interterminal Transfer signs toward the connector, and walk the flat, covered corridor to T2. The distance is around 1.2 km, with clear floor signs and occasional seating along the way.
- Route options: Route A goes straight via the main Interterminal Connector corridor; Route B adds a short detour through a secondary concourse area to enjoy brighter lighting and additional rest spots. Both routes end in T2’s departures hall.
- Estimated times: About 12–18 minutes at a normal pace; 10–12 minutes if you move briskly; up to 20 minutes with family or lots of luggage (a lot of equipment).
- Practical notes: The walk works well even with big crowds, offers ample shade inside the connector, and is accessible for strollers and wheelchairs. Also, some wayfinding decals include Puebla area references to help with orientation.
What to expect on the interterminal walk
Signs clearly indicate “Interterminal Transfer” and guide you along a single, straight corridor. The atmosphere is well known for its predictable conditions: clean, well-lit, and staffed with helpful personnel if you need assistance. This method reduces transfer times and offers a stress-free experience—ideal for travelers who want to quickly see their options between T1 and T2. If you’re early, you might enjoy a calm journey with little wait; if you’re tight on time, move briskly and check the details on the signs to avoid hesitation. For a closer look at the route, keep an eye on nearby signs and the location markers near the Puebla area displayed on the floor maps.
Practical tips and timings
- No ticket is required for this interterminal transfer; you stay within the airport’s internal transfer zone.
- Remember to allow extra time in your planning (around 5–10 minutes more) if you’re traveling with kids or heavy bags; this helps you stay on schedule and prevents stress during your journey.
- If you need assistance, Frida and Felipe at the information desks are known to help quickly with directions and signage; they can point you toward departures and well-known locations in each terminal.
- During busy periods, be prepared for crowding near peak times; otherwise, the estimated travel time remains stable, and the route stays safe and very convenient for transferring.
Location details: Start at Terminal 1 central concourse, follow the Interterminal Transfer signage, and end in Terminal 2 departures or arrivals depending on your next gate. Conditions such as weather do not affect the covered connector; however, brief open-air segments may influence comfort if you take a short detour for photos. This well-known and widely used option offers an efficient and familiar experience for many travelers; watch for signs for directions and details, and don’t forget to plan for tomorrow or early the next morning depending on your schedule and plans.
Ground Transportation: Getting to the city, rideshares, and taxis
Official taxis and fixed rates
Take an official taxi from the airport’s fixed-rate desk to the city center; it’s the simplest and most predictable option with upfront pricing. At Terminals 1 and 2, follow signs to the Authorized Taxi counters; an agent assigns a driver and prints tickets with the exact fare. The desks—located near baggage claim—display the fare for each zone. Typical fares to the Centro Histórico range from MXN 250–320; to Polanco, MXN 320–420. Rates are zone-based and shown at the desk, not influenced by traffic conditions. You can pay with cash or card where accepted, and keep the ticket until you arrive.
If you’re heading directly to a specific destination, tell the desk your direction and address, and they’ll confirm the best route. For comparing fares across locations, data-destination-countrymexique helps align quotes; you can reserve a ticket or arrange a simple transfer. Your ticket is printed at pickup, and if you like, you can grab a quick dessert at a café on the way.
Rideshares and alternatives
Rideshare apps—maybe Uber, DiDi, Beat—offer curbside pickup at the arrivals area. Open the app, enter your destination (for example, Centro Histórico, Roma, or Condesa), and compare price estimates and ETAs. Typical prices to Centro Histórico range from MXN 180–300; to Polanco, MXN 260–450. Surge pricing may apply during busy times. Thanks to live tracking, you can see the car approaching and won’t worry about getting lost; if needed, you can re-route mid-trip. Always verify the car’s license plate and driver’s name in the app before getting in.
예측 가능한 옵션을 원하시면 호텔이나 평판이 좋은 업체를 통해 개인 교통편을 예약하세요. 티켓은 종종 미리 발급되며 고정된 시간에 예약할 수 있습니다. 하루 종일 시간이 있다면 운전기사에게 가는 길에 레스토랑이나 흥미로운 장소에 들르도록 요청할 수 있습니다. 경로에서 볼 만한 흥미로운 것들로는 간단한 디저트 가게와 유서 깊은 웅장한 대로 경치가 있습니다. 거리에 따라 다르지만 간단한 간식 비용은 1인당 약 MXN 20~60 정도 예상해야 합니다.
지도를 휴대하고 data-destination-countrymexique 필드를 사용하여 여러 사이트의 비용을 비교하고 최상의 옵션을 선택하세요. 나중에 마야 유적지를 방문할 계획이라면 여정을 계획하여 되돌아가는 것을 최소화하고 일정을 간단하고 효율적으로 유지하세요. 도시의 인상적인 건축물과 역사 덕분에 탐험할 준비가 된 상태로 도착할 수 있습니다.
식음료: 터미널별 최고의 선택 및 간단한 간식
터미널 1의 퀵 서비스 카운터에서 부리토 볼을 드세요. 가격도 괜찮고 짧은 경유 시간 동안 빠르고 든든하게 시작할 수 있는 가장 저렴한 선택입니다. 팁을 드리자면 12번 게이트 근처의 카운터에서 간편하게 테이크 아웃할 수 있으며 직원들이 빠른 미소로 여러분을 맞이합니다.
터미널 1은 간단합니다. 부리토 볼, 토르타, 엠파나다, 따뜻한 페이스트리, 그리고 믿을 만한 커피 바가 모두 가까이에 있습니다. 중앙 아트리움 근처에는 빠르게 제공되는 카운터가 줄지어 있습니다. 위치는 명확하게 표지판으로 안내되어 있으며, 카드나 현금으로 결제할 수 있습니다.
터미널 2는 커피 카운터, 신선한 주스, 간단한 타코, 그리고 가벼운 식사를 위한 볼을 제공하여 비슷한 속도를 제공합니다. 휴대폰의 지도 앱을 사용하면 몇 초 안에 콘코스를 탐색할 수 있습니다. 인쇄된 메뉴가 필요한 경우 직원에게 문의하십시오. 그들은 대개 영어를 할 수 있으며 선택을 도와줄 수 있습니다.
타이밍 팁: 게이트 사이의 시간은 대략 12~18분으로, 간식을 먹을 시간이 주어집니다. 커피, 페이스트리 또는 테이크 아웃 식사를 위해 줄을 서면 시간이 더 오래 걸립니다. 일반적인 식사 시간은 짧으므로 앉아서 잠시 휴식을 취하고 싶다면 오랜 환승 시간을 계획하세요.
기타 포인터: 비행기에서 먹을 빵집 간식을 모으고 있다면 가장 저렴한 옵션을 먼저 확인하세요. "가장 저렴한"이라고 표시된 영역을 찾아보세요. 경유 시간이 길다면, 세노테 여행을 계획하거나 근처 숙소를 예약하여 쉽게 접근할 수 있도록 위치를 염두에 두세요. 터미널 외부 옵션으로 빠르게 이동하려면 지정된 택시 승강장에서 택시를 이용할 수 있습니다. 안내 데스크에 문의하면 게이트에서 편안하게 가까운 거리에 있으면서 시간을 최대한 활용할 수 있는 빠른 계획을 세울 수 있습니다.
편의 시설 및 연결성: Wi-Fi, 충전, 라운지, 화장실
도착 후 몇 분 안에 무료 MEX Wi-Fi에 접속하고 휴대폰으로 로그인하여 검색을 시작하세요. 이 편리한 네트워크는 게이트 사이를 이동할 때 여행객의 연결을 유지해 줍니다. 영어와 스페인어로 된 표지판과 명확한 아이콘은 대기 구역 근처의 콘센트, 화장실, 라운지를 찾는 데 도움을 주며, 이 시스템은 모든 공항 구역에서 작동합니다. 기본 세션은 60분 동안 지속되며, 필요한 경우 시간마다 추가 시간을 위해 다시 연결할 수 있습니다. 이 간단한 설정은 다양한 여정에 적합하며 안정적인 연결성 덕분에 안심할 수 있습니다. 속도를 높이고 싶다면 게이트 근처의 충전소를 찾아 대기하는 동안 기기의 전원을 켜두세요.
Wi-Fi 및 충전 기본 사항
대부분의 좌석 공간에 충전 콘센트가 마련되어 있습니다. 소형 보조 배터리를 휴대하고 USB-C 또는 USB-A 케이블을 사용하여 경유 시간 동안 장치를 충전 상태로 유지하세요. 프리미엄 구역에서는 더 많은 콘센트와 테이블 근처에서 USB-C 고속 충전을 찾을 수 있습니다. 방법은 간단합니다. 플러그를 꽂고 충전 표시등을 확인한 다음 몇 분 안에 활동을 재개하십시오. 표지판은 명확한 글꼴과 아이콘을 사용하여 모든 여행자가 쉽게 연결할 수 있도록 여러 언어로 지침을 제공합니다. 필요한 경우 몇 번의 클릭만으로 온라인 시간을 추가할 수 있습니다.
라운지, 화장실, 내비게이션
라운지는 훌륭한 편안함과 조용한 공간을 제공합니다. 이용 옵션으로는 일일 이용권, 항공사 멤버십 또는 유료 라운지 입장 등이 있으므로 출발 전에 반드시 옵션을 비교해 보세요. 화장실은 두 터미널 전체에 걸쳐 있으며, 가족 구역에는 아기 기저귀 교환대가 있고, 교통량이 많은 구역에는 비접촉식 설비가 있습니다. 길 안내는 공항 지도에서 확인하거나 공항 직원에게 문의하세요. 펠리페와 같이 친절한 안내원을 만나면 가장 가까운 콘센트나 화장실을 안내받을 수 있습니다. 피크 시간에는 파란색 서비스 표지판을 따라가면 여유 시간을 두고 게이트에 도착할 수 있으며, 이동을 더욱 쾌적하게 만들어주는 편의 시설을 즐길 수 있습니다.
내비게이션 팁: MEX의 지도, 표지판, 안내 데스크
베니토 후아레스 역 근처 안내 데스크에서 지도를 구한 다음, 웹사이트의 디지털 사본을 사용하여 빠르게 방향을 잡으세요.
MEX의 지도 및 표지판
도착, 출발 및 환승을 안내하는 이중 언어 표지판을 이용하십시오. 지역 지도에는 터미널 1과 터미널 2의 위치가 표시되어 있으며, 경로 계획을 돕기 위해 세 개의 구역으로 나뉘어져 있습니다. 안내 데스크에서 지도를 받고 웹사이트에서 오프라인 사본을 다운로드하는 것이 가장 좋습니다. 항공편이 목요일에 도착하거나 게이트 변경이 있는 날에는 화면이 몇 분마다 업데이트됩니다. 툴룸 또는 다른 목적지로 여행을 떠날 경우, 지도에는 가장 가까운 역과 기차 또는 메트로버스 연결을 위한 최적의 경로가 강조 표시되어 있습니다. 멕시코 표지판은 종종 색상으로 구분된 구역을 사용합니다. 올바른 중앙 홀을 가리키는 명확한 화살표에 주의하십시오. 웹사이트를 사용하더라도 인쇄된 사본을 주머니에 보관하여 수하물이 없거나 터미널 간 이동을 빠르게 해야 할 때를 대비하십시오. 항공편의 경우, 올바른 위치로 가는 방향을 따르고 화살표를 읽어 경로를 확인하십시오.
헬프 데스크 및 실용적인 팁
확신이 서지 않으면 도착장이나 보안 검색대 근처의 안내 데스크에 문의하십시오. 그곳의 이중 언어 구사 직원이 지도를 인쇄하거나, 레이아웃을 설명하거나, 길찾기 안내를 이메일로 보낼 수 있습니다. 게이트 구역 지도를 요청하십시오. 이렇게 하면 특정 경로를 더 쉽게 탐색할 수 있습니다. 수하물 없이 가볍게 여행하는 경우 터미널을 더 빨리 이동할 수 있지만, 여권과 탑승권을 준비하십시오. 시간과 게이트 변경은 빠르게 바뀔 수 있습니다. 현재 출발 시간은 웹사이트를 확인하고 필요한 경우 게이트를 변경할 준비를 하십시오. 툴룸과 같은 목적지의 경우 기차, 메트로버스 또는 택시와 같은 세 가지 경로를 빠르게 검토하면 시간과 비용을 절약할 수 있습니다.
| Resource | 위치 | 참고 |
|---|---|---|
| 지도 | 안내 데스크, 도착, 보안 구역 | 인쇄 및 디지털; lutiliser를 사용하여 오프라인 사본을 다운로드하십시오. |
| 표지판 | T1 및 T2 전체에 걸친 머리 위 및 벽 표지판 | 영역별로 색상 코딩됨; 화살표를 따라 장착 위치로 이동 |
| 헬프 데스크 | 안내 카운터, 터미널 1 & 2 | 영어/스페인어 지원; 운영 시간은 유동적이며, 목요일에 업데이트됩니다. |
| 교통 연결 | 기차 및 메트로버스 정류장 지역 | 도시로 가는 세 가지 옵션 중에서 선택하세요. 시간표는 사이트를 확인하세요. |
| Vols guidance | 출발장 근처 게시판 | Vols를 찾아보세요. 다음 여행과의 연결을 계획하세요. |
댓글