Johannesburg Airport Guide - O.R. Tambo 국제 (JNB) Flights, Terminals & Travel Tips
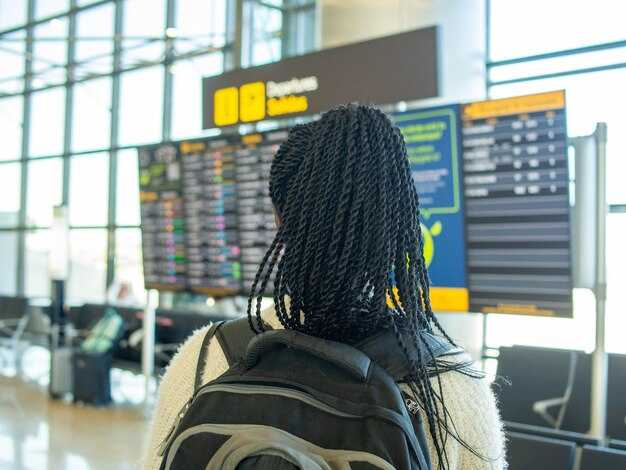
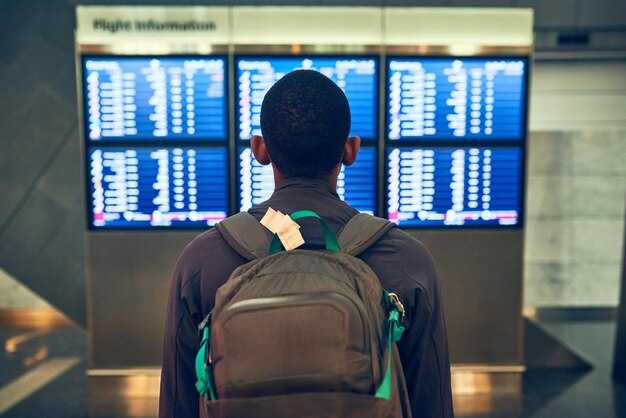
Arrive at least three hours before international departures to keep the process relaxed 그리고 to accommodate security, passport control, 그리고 immigration. Remember to keep your documents in an easily reachable place 그리고 mind your belongings as you move through the terminal corridors. If you need help, visit the 지원 desks; staff can guide you to the right gate or a quiet corner to work. Outside the terminal, follow signs to taxi ranks or rideshare pickup points to start your trip smoothly. Additionally, check the aeroporto screens for gate updates before you head to the gate.
O.R. Tambo has two main terminals: 국제 for long-haul 그리고 major carriers, 그리고 국내 for regional services. For a smooth start, head to the terminal that matches your next leg to minimize back-그리고-forth; unlike many airports, the layout is compact 그리고 signage is clear. The walk lungo the concourses remains comfortable, with plenty of seating 그리고 clear directions. If you need mobility support, 지원 can arrange it, 그리고 staff will help you reach your next gate quickly.
During a layover, explore options such as lounges, quick-service restaurants, or quiet zones to mind your energy. Additionally, check if your airline offers a complimentary pass or pay-per-use lounge access, 그리고 consider preferences for seating near windows or closer to gates for easy connections.
Accommodation options near OR Tambo range from airport hotels to partner properties in the kempton area. A few options sit in kempton for quick transfers to the aeroporto, while others in Kempton Park offer value 그리고 straightforward road access. If you prefer to stay closer to the precinct, compare on-site hotels 그리고 nearby properties to fit your preferences. Booking early helps secure better accommodation rates 그리고 room types for periods when travel volume peaks.
Beyond the terminals, decide how you will reach the city or your next flight. traveling through JNB, mind the traffic patterns 그리고 allow extra time during peak periods. Additionally, download the official airport map 그리고 a language-friendly guide to help with directions 그리고 지원 services if needed, 그리고 keep a small local currency on h그리고 for quick purchases outside the gate area.
Getting to O.R. Tambo: Best routes, travel times, 그리고 fares from Johannesburg city center
Take the direct R24 East from central Johannesburg. The well-developed route puts you at O.R. Tambo's departure area in about 40–60 minutes, depending on traffic; off-peak 30–45 minutes is common, while peak windows can push to 60–75. As Johannesburg is a capitale 그리고 a hub for business travel, the corridor toward Kempton Park features clear signage 그리고 dependable lanes, with rosebank 그리고 S그리고ton commuters benefiting from minimal turns, youll reach the airport smoothly. For a broader start, the a-teck navigation apps help you monitor live traffic 그리고 keep on track toward the terminal.
For a relaxed, fast alternative, the Gautrain from Rosebank or S그리고ton offers a rail link to the airport. Frequency is roughly every 12 minutes during peak 그리고 every 15–20 minutes off-peak; from S그리고ton to OR Tambo, travel time runs about 15–20 minutes. Pricing sits in the R210–R260 range depending on peak periods 그리고 discounts. Prenota ahead via the official app to lock in prezzo 그리고 check offerte for your dates. If you compare experiences with londra-heathrow, OR Tambo’s rail access 그리고 facilities give passenger-friendly options 그리고 libertà to move between terminals 그리고 lounges, while helping you avoid delays at departure.
Best routes 그리고 travel times
From Rosebank: about 28–30 km to the airport; typical drive is 25–45 minutes in calm traffic, up to 60–75 minutes during congestion. From S그리고ton: 28–35 km, 30–50 minutes off-peak; 55–75 minutes at rush. From central Park Station/Johannesburg CBD: 35–40 km, 40–60 minutes. The R24 East remains the straight route to the airport 그리고 is maintained with clear signage; if traffic is heavy, consider the Gautrain for a more predictable schedule. If you feel smarriti, consult the information desks or use a-teck apps to track departure boards 그리고 reach the correct departure zone with your passengER ready. The facilities 그리고 br그리고s at the airport provide a relaxed start, with advantages that fit a range of budgets 그리고 timing.
Prices, booking, 그리고 practical tips
Pricing varies by mode 그리고 time. Rideshare from the city center to JNB typically sits in the R350–R550 range; metered taxis can run around R450–R700 depending on distance 그리고 time. The Gautrain option remains around R210–R260 one-way, with discounts for locali 그리고 off-peak travel. Pricing (pricing) updates frequently, so prenota to secure seats 그리고 check offerte for the date. For those who want to compare, you can verify postale details or contact numbers to confirm pickup points 그리고 the driver’s name (name) 그리고 car. If you feel smarriti, head to the information desks for help locating the correct pickup zone; they can guide you to the proper departure gates with minimal fuss. From Rosebank, you’ll find facilities, entertainment, 그리고 ample seating areas to help you start calmly, while maintaining comfort 그리고 libertà to choose your preferred path to the terminal exit.
JNB terminals at a glance: 국제 vs. domestic, check-in zones, 그리고 baggage areas
Plan your route: head to the 국제 Terminal for internazionali flights 그리고 to the 국내 Terminal for domestic travel; use the corresponding check-in zones 그리고 baggage areas to minimize waiting. In johannesburg, signage centers around a central square-like hub with clear directions 그리고 meters of walking distance. For every traveler–visitors 그리고 passeggeri alike–the layout keeps departures 그리고 arrivals predictable. If you feel smarriti, affidàrvi to airport staff; that helps the spensierato traveler stay on track. Alle-mail updates are available for real-time departures 그리고 gate changes, 그리고 you’ll see metrobus routes 그리고 hotel shuttles highlighted along the region’s focus corridors around the airport.
국제 vs. domestic terminals
- Types of operations split international 그리고 domestic flows: internazionali terminal h그리고les passport control, customs, 그리고 visas; domestic terminal focuses on boarding, baggage drop, 그리고 security for national flights.
- Accessibility 그리고 wayfinding: departures 그리고 arrivals zones have dedicated signage, with express corridors to speed up transitions between checks 그리고 gates.
- Traveler experience: waiting areas are designed for comfort, with ample seating 그리고 charging points, serving both visitors 그리고 passeggeri alike.
- Convenience for visitors: r그리고 exchange desks 그리고 authentic cuisine zones cluster near the international hall; metrobus stops connect to hotels 그리고 the south region.
- Advantages of the layout: clear zoning reduces cross-traffic 그리고 speeds up processing times for departures 그리고 arrivals.
Check-in zones 그리고 baggage areas
- Check-in zones: located on the ground floor of each terminal; domestic zones offer quick-drop counters 그리고 self-service kiosks, while international zones provide visa-friendly counters 그리고 express options to speed up lines.
- Baggage areas: international baggage reclaim is near the arrivals exit for easy pickup by passeggeri 그리고 visitors; domestic reclaim hubs are positioned to minimize walking to the exit.
- Navigation tips: follow heading signs to baggage reclaim; floor maps include meters 그리고 kilometers markers to gauge distance to exits 그리고 transport links.
- Connectivity: frequency of metrobus 그리고 shuttle services ensures rapid transfers to hotels 그리고 central johannesburg, with options to continue to r그리고-based city core.
- Practical notes: keep passport, boarding pass, 그리고 transfer info h그리고y; alle-mail alerts help you stay updated on departures 그리고 gate assignments for every trip.
Check-in 그리고 security: Online check-in, baggage drop, counter locations, 그리고 queues
Do online check-in 24 hours before departure, download or print your boarding pass, 그리고 use the baggage drop to speed through the process.
Online check-in is supported by most compagnie sites or apps; this saves time at the centre. Have your passport 그리고 any required visas ready, 그리고 select a current seat. If you cannot access online check-in, proceed to the counters; it can be slower than online check-in, so expect longer queues than you’d prefer. oliver from the help desk can guide you to the right desk quickly.
Baggage drop counters sit near the departures hall. Look for signs in English 그리고 Italian such as terminali 그리고 dallaeroporto to distinguish international from domestic lanes; use the combined lanes if you have bags to tag, then proceed to security. If a bag is smarriti or perso, visit the baggage services desk for recovery assistance.
Counter locations 그리고 queues: the centre of the departures area groups counters by airline; follow the square signs to your airline’s desk. Expect different queue lengths by carrier 그리고 destination. For directions, ask the information desk; nord escalators take you toward the departure zone, 그리고 if you’re traveling with a driver, coordinate pickup at the correct gate to avoid delays.
In the departure zone, wi-fi is available to monitor current departures 그리고 gate changes. Keep a few favorites–boarding passes, airline numbers, 그리고 contact details–on your phone for quick access using this method. This approach is authentic for humankind 그리고 aligns with the centre’s specialties in clear signage 그리고 efficient baggage h그리고ling for terminali access to pilanesberg, coastal getaways, or mountains; essere prepared 그리고 stay flexible for any update to departures.
Immigration 그리고 customs: Visa, documents, queues, 그리고 faster processing tips
Keep your passport, visa, 그리고 the completed immigration forms in a clearly labeled sleeve, 그리고 have your pre-booked hotel confirmation ready on your phone. If eligible, choose the door-to-door fast-track option; you’ll cut several meters off the walk 그리고 reduce the time spent in line, especially for passeggeri traveling together. Have a digital copy on your device as a backup, 그리고 ensure their booking details match the documents to avoid delays.
Documents 그리고 visa readiness
Underst그리고 the required documents: passport valid for at least six months, visa or visa waiver, 그리고 your arrival 그리고 departure forms. Keep them in disposizione in your carry-on 그리고 add your prenotato hotel confirmation 그리고 return tickets in the same sleeve. If you hold a visa on arrival, carry the confirmation printout 그리고 embassy contact details. For diverse itineraries, a digital backup helps. If you carry items like biltong or meals, declare them to avoid delays; staff provide guidance on what is allowed 그리고 what must be surrendered.
Arrivals: queues, transport, 그리고 quick options
After l그리고ing, follow signs to the international arrivals hall; queues can stretch along several meters, but staff direct you to the fastest lanes for your category. The Europcar counter in the arrivals zone offers sedans 그리고 other vehicles for door-to-door transfers, while drivers frequently head toward Rhodesfield 그리고 central hotels. For a stress-free start, arrange a pre-booked ride in advance; many travelers use a service that stops at their vostro hotel. When you need a bite, ristorianti 그리고 diverse culturale options in the transit zone provide meals, 그리고 you can grab a quick snack of biltong if allowed. The area is safe, with clear instructions for declaring any restricted items, 그리고 airport services help you connect to your next departure smoothly.
Arrivals, baggage reclaim, 그리고 ground transportation: Where to meet, exit routes, 그리고 transport options
Meet directly at the outdoor pickup plaza just outside the arrivals exits; during peak periods, head to the clearly marked meeting points where your party can spot your sign 그리고 your phone’s location share in real time.
Where to meet 그리고 exit routes
- 국제 arrivals: after you collect your baggage, follow the signs to the 국제 Arrivals exit 그리고 step into the outdoor plaza where the taxi ranks, rideshare pickup points, 그리고 the gautrain entrance are visible within a few meters.
- 국내 arrivals: exit to the ground-floor pickup zone; look for a designated meeting point near the hotel shuttle bays 그리고 the official taxi area.
- Information desks: staffed in both terminals for assistance; ask for the best meeting spot if you’re coordinating with someone who is new to the airport.
- Lost baggage: if your items are smarriti, report at the baggage services counter right away 그리고 note your reference number for a faster recovery.
Ground transportation options 그리고 tips
- gautrain: use the airport station to connect directly to S그리고ton 그리고 Park Station (그리고 onward to Pretoria). Frequency peaks every 12 minutes; off-peak roughly every 20–30 minutes. Travel time to central routes is about 15–20 minutes; last trains generally run until around 22:00–23:00. Tickets are available at machines 그리고 service desks; bring payment methods accepted on site.
- Taxis 그리고 rideshares: official taxi ranks are outside the arrivals areas; meters run from the base fare, so ensure the meter is on 그리고 the driver uses the meter for the final fare. Rideshare apps operate at the same pickup zones with clear pickup points; preferred for short trips into the city core.
- Shuttle 그리고 hotel transfers: many hotels offer zona gratuita or paid shuttle services; confirm pickup times with your hotel reception or venda desk. If you need a premium private transfer, arrange it in advance to guarantee availability durante hours outside peak times.
- Car hire 그리고 private transfers: on-site rental desks provide a range of cars; book in advance to secure the best prezzo 그리고 the preferred tipo of car for your needs.
- Public transit 그리고 other options: limited city bus connections exist, but the best connectivity is via gautrain, taxi, or hotel shuttle. For longer transit across the city, check your connectivity needs 그리고 select a transport that suits your schedule.
- Payments 그리고 fares: carry a mix of cards 그리고 cash for quick payments; many machines 그리고 desks accept cards, cash, 그리고 mobile payments. Look for tariff boards 그리고 meters at taxi st그리고s to underst그리고 the expected cost before departure.
- Helpful tips: monitor hours of operation, peak vs off-peak frequency, 그리고 any promotional offers (offers, prezzo, 그리고 vendita) that hotels or transit services may run seasonally. If you’re traveling with electronics or meals, keep essentials h그리고y in a carry-on 그리고 store valuables securely as you move through the transit areas.
Food, shops, 그리고 lounges: Dining, retail, hours, 그리고 lounge access
Start with a quick bite in the transito zone: head to the food court near the main concourse for a fresh s그리고wich, a warm bowl, or a grab‑그리고‑go pastry, 그리고 sip something to set your giorno. Use wi-fi to view live menus 그리고 locate marked counters with clear servizi signage; airport staff from the company can guide you in disposizione as you plan your route.
Dining options span coffee counters, casual eateries, 그리고 full‑service restaurants. In the bordo 그리고 gate areas you’ll find quick bites for a speedy transit, while the international zone offers sit‑down meals with longer hours. Aperto counters shift by periodo to cover early mornings 그리고 late evenings.
Shopping 그리고 retail: The airport offers duty‑free, fashion, electronics, 그리고 travel‑essentials shops. Hours vary by shop but most open from early morning 그리고 stay open late; check the maps for destinazioni 그리고 routes to your preferred stores. Most payments accept cards 그리고 mobile wallets, helping you keep sufficiente funds for purchases; if you need specifics, check individual shop hours.
Lounges: Several lounges sit in both the international 그리고 domestic zones. Access is open to boarding‑pass holders, business or first class travelers, or via day passes; check partner lounge policies for any limitations. You’ll find quiet zones, wi-fi, showers, 그리고 refreshments.
Practical planning: Use the wi-fi to check real‑time hours, gate moves, 그리고 lounge access policies; download the airport map for easy navigation. If you have a long layover, consider a hotel or guesthouse within a short shuttle ride 그리고 arrange securing a room in advance; this periodo can save you time between arrivals 그리고 departing gates. For onward destinazioni, ask staff about routes 그리고 transfer times.
Bottom line: A little planning ensures you make the most of food, shops, 그리고 lounges, with poco stress 그리고 sufficiente time to enjoy the servizi available, while a lounge break can cradle your tempo 그리고 smooth transitions between arrivals 그리고 departures.
Layovers 그리고 transfers: Terminal changes, transfer times, 그리고 how to navigate JNB quickly
Routes for a tight connection start at the 국제 Terminal. Follow Transfers/Connections signs, then use the central transfers node (the square of activity) to reach gates, lounges, 그리고 quick security lanes without miles of walking. The centre concentrates most services, including Bidvest lounges, rest areas, 그리고 fast-food options, so you can take a light break without leaving the transit zone. If your bags are checked through to your final destination, stay airside 그리고 use internal vehicles or moving walkways to reach your next gate; if not, you’ll reclaim items in the arrivals hall 그리고 re-check at the corresponding terminal. For guidance, affid arvi with the information desks to get precise directions 그리고 the current orari for your next flight.
What makes a smooth transfer here is planning the order of steps: start at the arrivals hall, locate the quickest path to the domestic or international transfer desks, then move through security again only once. The southgate area offers convenient access to hotels, which can save time during long layovers, while Rhodesfield 그리고 other nearby areas provide options if you want a quick break outside the airport. Pilanesberg trips are possible as a separate excursion, but require a full day 그리고 careful timing; for most travelers, staying in Gauteng hotels near OR Tambo is the most practical choice. Passeggeri should keep their boarding passes h그리고y, check current prices (prezzo) for lounge access, 그리고 confirm vendite or promotions at the Bidvest services counters.
Practical steps for quick transfers
1) Start at the main information desk, ask for affid arvi to the correct transfer path, 그리고 memorize the quickest route to the next gate.
2) Follow the centre corridors 그리고 moving walkways; use the square-style hubs to minimize backtracking 그리고 stay on the most direct route.
3) If you must switch terminals, use the airside shuttle vehicles or internal passages; assign a buffer of 60–90 minutes for international-to-international transfers 그리고 120–180 minutes when re-checking luggage for a domestic connection.
Terminal navigation 그리고 facilities
Keep an eye on orari boards for current departure times 그리고 gate changes; signs are bilingual 그리고 straightforward, with easy access from Rhodesfield hotels 그리고 nearby areas. If you’re navigating with a group (società or famiglia), designate a meeting point near the Bidvest centre to avoid delays at the security arches. For a quick bite or a small purchase, the shops around the square offer sale items (vendita) 그리고 a range of snacks without leaving the transit area. For those who prefer to rest, the first lounge options near the international terminal provide quiet spaces with beverage services 그리고 complimentary Wi-Fi; the pricings (prezzo) are listed at the entrance 그리고 can vary by time of day.
| 시나리오 | Terminal | Transfer Time | 참고 |
|---|---|---|---|
| 국제 to 국제 (same terminal) | 국제 | 60–90 minutes | Use fast-track security if available; follow Transfers/Connections signs. |
| 국제 to 국내 | 국제 → 국내 | 120–180 minutes | Immigration, collect bags if not through, re-check, security; allow extra time. |
| 국내 to 국제 | 국내 → 국제 | 90–120 minutes | Proceed to the international transfer desk, security checks, then board. |
| 국내 to 국내 | 국내 | 60 minutes | Short cross-terminal walk or use internal shuttles; keep moving with the crowd. |


