Denver Airport to Beaver Creek - Easy Transfers, Routes, and Tips
Book a direct transfer from DIA to Beaver Creek as soon as you land to cut transit time and keep baggage handling simple for guests. This approach minimizes delays during winter weather and gets you on the slopes faster.
There are several ways to reach Beaver Creek from Denver: a direct shuttle, a private transfer, or a rental car. The route runs over I-70 with the turn toward Avon and Beaver Creek Village, covering roughly 120 miles. Typical drive times are about 2 hours 15 minutes in good conditions, climbing to 3 hours or more during night snowfall or peak weekend traffic.
For budget travelers, shared shuttles from DIA to Beaver Creek offer solid value. Expect from 60 to 100 USD per person, depending on season, with years of operation behind trusted providers. If you traveled with equipment, confirm the space available for skis or snowboards and request a setup that keeps baggage organized.
Additionally, private transfers provide door-to-door service with flexible pickup times, ideal for long-distance trips from the airport to Beaver Creek. They cost more, but reduce the risk of missed connections, and let you set a comfortable pace during the ride. If you plan to explore surrounding resorts, a rental car gives you space for gear and personal items, including a small carry-on, and lets you stop for lunch or a quick photo at your chosen spots.
Be prepared at DIA: head to the ground transportation signs to pick up a shuttle, private transfer, or car rental, and confirm the pickup spot with your provider to avoid delays during busy periods. For guests staying at Beaver Creek resorts, check if the property offers a shuttle from DIA or a private pickup; this can significantly reduce walking with baggage after a night flight and save space in your carry-ons.
DEN to Beaver Creek: Shuttle vs Private Car vs Rental Options
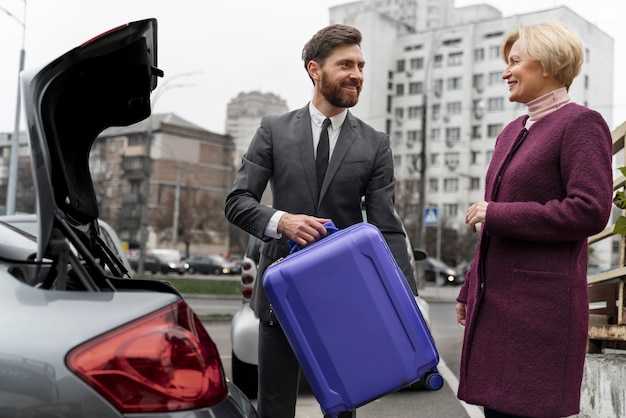
Private car transfer is the simplest option for families seeking a seamless start, offering door-to-door service from the terminal to your lodging with minimal stops and a clean, comfortable interior. This choice reduces risk of delays and keeps gear secure, providing an unparalleled start to your Beaver Creek stay and accessible transport from the moment you land.
Shuttles provide a budget-friendly path for solo travelers or the first leg of a longer trip, with drop-offs near Beaver Creek access points. Expect a pickup at the DEN Ground Transportation Center, then several stops on the way to the resort depending on seating. Travel times typically run 2 to 2.5 hours, influenced by weather and traffic. Drawbacks include shared seating and longer total travel, but the price per person remains attractive for those avoiding a private ride. If you’re visiting other destinations along I-70, shuttles can still be a convenient option with one booking.
Renting a car at DEN gives maximum flexibility. Pick up at the Car Rental Center, drive along I-70 with scenery along the way, and drop off at your Beaver Creek lodging. In winter, ensure your vehicle has snow tires or chains and monitor road conditions; plan for parking costs at the base and at the hotel. A rental suits families or visitors who want to set their own schedule and make short stops for sightseeing or groceries on the way back.
Taxis are available at the terminal exit. They provide direct door-to-door transfer with upfront pricing you’ll know at booking. Expect a higher price than a shared shuttle, but the convenience is unmatched when timing is tight, late or early arrivals, or luggage is plentiful. At peak ski season, arrange a pickup in advance to avoid waits at the terminal, and clarify any extra charges for gear or heavy snow conditions.
Practical tips: compare a few providers for a fixed quote and a window for arrival, and check parking at your lodging–some properties include parking, others charge a daily fee. If your crew includes a family, verify child seats and racks for ski equipment, and confirm that the vehicle type has enough space to keep all bags secure. For accessibility, ask about curbside assistance and the driver's location tracking to reduce stop times. When you land, head to the terminal’s Ground Transportation Center, avoid private pickups in restricted zones, and keep a clear plan for Beaver Creek or nearby stops.
DEN-Beaver Creek Route: I-70 path, alt routes, and typical driving times
First, take I-70 West to Beaver Creek; it's the direct, economical option from denvers to the resort. In ideal conditions, plan about 2 hours 15 minutes from downtown denvers to avon-beaver creek, with the last miles on local roads. In winter, allow 2 hours 45 minutes or more, especially when closures on Vail Pass slow traffic. Use navigation to monitor live closures and weather spikes; denvers-area weather can shift quickly. Carry a small equipment kit, a full tank, and warm layers. Look for a spot to fuel up before the approach to the valley, and be prepared for limited parking near peak times. For the family, this route stays straightforward, and taxisride-sharing is common near avon to reach the resort doors with minimal hassle; youll have several vehicle options, including economical sedans and larger SUVs.
I-70 Path: Direct to Avon-Beaver Creek
From denvers, stay on I-70 West toward the Vail valley; you pass through the Eisenhower Tunnel and continue to the avon/beaver creek exit. The distance is roughly 110–125 miles depending on your start point in denvers, and typical driving times range from 2 hours 15 minutes in clear weather to 2 hours 45 minutes or more in snow. Once you exit I-70, follow signs toward avon, then beaver creek; the resort entrances are clearly marked and the base area is about 15 minutes from the highway. If you encounter winter storms, expect slower speeds and plan for occasional holds at tolls or chain-up areas; even a short delay can shift your arrival window by 20–40 minutes. This direct route offers the most reliable access to the resort on most days, with the fewest transfers between vehicles, and it remains the ideal choice for most travelers.
Alt routes and practical tips
Use alt routes only when I-70 is closed or heavily congested. The main detours run along the I-70 corridor but bypass peak mountain segments; Loveland Pass (US-6) is a seasonal option and Berthoud Pass (CO-40) can connect you to I-70 if closures occur. Some locals joke that the gods of winter smile on travelers who pick the straightforward I-70 path. This route serves many destinations along the valley, including avon and the base area, so you’ll find spots for food and rest along the way. Check closures in real time via navigation to avoid extended delays. If you choose an alternate, budget an extra 30–60 minutes and factor that into your plans. For the final legs, avon offers a compact set of parking lots near the resort entrances and a few drop-off points close to the doors. If you’re traveling with kids or gear, consider pre-booking a taxi or using taxisride-sharing; it simplifies the transfer from the airport or denvers hotels to your spot at the resort. When you arrive, follow the signs to your destinations and enjoy a smooth entry to the village and gondola area. Between route choices, stay flexible, use navigation, and keep an eye on closures so you can adjust your plan on the fly. Youll appreciate the scenery and the straightforward access to the resort.
PrimeTime shuttle: Services for Denver to Colorado Springs and how to book
Book your seat online now to secure a spot on PrimeTime shuttle from Denver to Colorado Springs; the e-ticket is made instantly and you’ll know your pickup location in advance. Like many travelers, you’ll appreciate the direct route and predictable schedule. PrimeTime offers a unique value with a simple booking flow.
PrimeTime operates a straightforward, budget-conscious service between Denver Union Station and Colorado Springs Station, with designated pickups at the terminals. The number of daily departures typically ranges from six to eight, starting in the morning and continuing into the evening. Departing times follow a fixed schedule, so you can determine which option best fits your plans. In winter, weather can affect travel times, so confirm your departure on the day of travel and allow extra time for navigating snowy roads.
Booking steps
- Open PrimeTime's official booking page.
- Set origin to Denver Union Station and destination to Colorado Springs Station.
- Choose date and number of passengers.
- Pick a time from the schedule and review the price.
- Enter passenger details, select ticket type, and confirm the booking.
- Receive your e-ticket by email or SMS and save it on your device.
Travel tips and day-of guidance

- Arrive at least 15 minutes before departing; follow signs to the designated pickup area at the terminal.
- Carry your photo ID and the e-ticket; the driver will verify them at the station.
- Boarding procedure: follow the posted instructions, and listen for a staff announcement to board the correct shuttle.
- If you need to adjust plans, contact the provider ahead of departure; some changes may incur a small fee.
- Check the weather forecast; winter conditions can impact driving times and station navigation.
- Budget-conscious travelers may save by booking online and selecting the most economical fare on the schedule.
- Navigating the station is straightforward: look for the PrimeTime waiting area and use staff direction to reach the correct terminal area.
- Confirm your boarding time the day before travel to avoid missing the departing shuttle.
- Terminals: PrimeTime operates from designated terminals at both ends of the route for easy pickup.
- Make sure you head to the right pickup area; signs and staff will guide you to the correct terminal zone.
- Cons: limited luggage capacity and no onboard amenities.
Booking Guide: Steps to reserve a transfer, required details, and price checks

Book online now to lock a fixed fare and confirm pickup details for Denver Airport to Beaver Creek. For this route, you’ll see taxisride-sharing options, shuttles, and private cars; compare schedule windows to pick a ride that fits your arrival time.
Choosing a provider starts with your group size and luggage. For a family with ski gear, a shuttle or private car often delivers the best value and predictable pickup. If you travel solo or with a small bag, taxisride-sharing can be quicker, but confirm pickup zones to avoid delays at the terminal.
Pickup locations are listed by terminal and gate, and located within easy walking distance to baggage claim. Some services offer meet-and-greet at the arrivals level, which helps those new to the area.
Schedule and price flow together: select your date, the time window, and the vehicle type. Initial options show available drivers, then you’ll see your pick, and you can tweak the schedule if flight times shift. If you’re coming from virginia or other distant locations, you may need an additional flight to Denver; many providers support long-haul itineraries and cater to transfers across time zones.
What you’ll need to pick and reserve: full name, mobile number, email, flight number, estimated arrival time, party size, luggage count, accessibility needs, and any child-seat or booster requirements. For Beaver Creek, note your pickup point (main curb or rideshare zone) and whether you want a curbside drop-off or a ski-friendly route. Be sure to add special requests so the driver can cater to your needs.
Price checks help you compare value: open at least two or three operators and look for the same service level (private car vs shuttle) on the same date. Fares are often shown with taxes and fees upfront; check if there’s a surge or peak-time surcharge and whether a child seat incurs an extra fee. Weve found that several reputable providers publish transparent rates, making it easy to pick the lowest price without sacrificing reliability. Denvers routes frequently include a base fare plus per-mile or per-minute charges, so calculate total expected cost for the full trip.
Step-by-step booking
Step 1: Choosing the right option means comparing schedule windows, vehicle types, and accessibility features. For family trips, a shuttle or private car often provides the best value and space for gear.
Step 2: Gather details: flight number, arrival time, party size, luggage count, and any accessibility needs. If you require a booster seat or a wheelchair lift, note it in the request.
Step 3: Reserve: select Denver Airport to Beaver Creek, pick your date and time, choose the vehicle, and add notes for pickup location and any curbside instructions. Attach your contact number and email for instant confirmation.
Step 4: Verify and confirm: review the price, taxes, and any surge charges. You’ll receive a confirmation with a pickup window and driver details; save the reference for changes or cancellations.
Price checks and what to verify
Compare at least three providers on the same date and route to ensure you’re getting the best value. Look for transparent fares that include fees and airport charges. If a quote seems low, check what’s included: luggage limits, meet-and-greet, curbside pickup, and child seats. Some operators in denvers area list flat rates, while others use a per-mile model; calc your total for the full transfer to Beaver Creek to avoid surprises. If you’re traveling with a family, choose options that cater to families with extra space and quick, friendly service. For longer trips, consider taxisride-sharing accounts that bill by the route rather than hourly rates, which can save you money. For accessibility, confirm the car type and driver readiness; several services advertise accessible vehicles with ramps or lifts.
Pickup and Drop-off Points: Where to meet at DEN and common Beaver Creek drop-offs
Meet at the DEN baggage claim curb on Level 5, outside the rideshare area. This guarantees the fastest pickup and minimizes walking distance. Look for the illuminated information boards and the rideshare stands; your driver will confirm your name on a sign and the stand number to locate you quickly. Have your ticket handy so the information can be checked fast. If you have a limited arrival window, request a pre-booked pickup to secure a smooth handoff.
For a luxurious start, opt for a private-car transfer that caters to your schedule. Your chauffeur will meet you curbside, providing door-to-door service, which suits your timing and reduces distances. If you bring extra luggage, this option improves quality and comfort. The driver can track your flight information and adjust pickup times, potentially reducing wait times; this solution wont require you to chase a driver down the curb.
Beaver Creek drop-offs
Beaver Creek drop-offs commonly occur at the Village Center or near the main resort entrance. The driver will choose the best route based on current conditions and closures, ensuring a smooth handoff to your accommodations. From DEN to Beaver Creek, expect distances around 110–125 miles and 1 hour 45 minutes to 2 hours 15 minutes of driving under normal light conditions; during winter storms, weather can extend trips by 15–30 minutes or more. For visitors from Virginia and other states, particularly tourists taking a morning transfer, plan for longer times in peak windows and be prepared for multiple routes. The mountains feature rock-strewn canyons and rocky outcrops; the track will be adjusted to give you the fastest, most comfortable journey. Drop-offs can occur at multiple stands, including the Beaver Creek Resort Entrance and Village Center; the driver will confirm which stands will best serve your hotel or condo for a seamless arrival. This approach provides a high-quality experience even if traffic or minor closures occur, providing one clear route and a reliable solution for travelers; taking a single, well-communicated plan helps everyone stay on schedule.
| Point | Details | Estimated time |
|---|---|---|
| DEN pickup curb | Outside baggage claim, rideshare/taxi area; follow signs; stand number provided | 10–15 minutes after landing |
| Beaver Creek Village Center drop-off | Near gondola entrance and shops; best for Village-area hotels | 2 hours 10 minutes to 2 hours 30 minutes |
| Beaver Creek Resort Entrance drop-off | Direct curb for base-area access; convenient for lodges on the western side | 2 hours 15 minutes to 2 hours 45 minutes |
Winter and Peak-Season Tips: Weather, traffic patterns, luggage, and contingencies
Choose a stress-free plan: book a well-served transfer from DEN to Beaver Creek and depart at least 2.5 hours before your final leg. A fixed-ticket transfer or private shuttle that operates in winter reduces wait times and avoids last-minute scrambles.
Weather on i-70 shifts quickly in winter; snow squalls, wind, and icy patches near the Eisenhower Tunnel are common. Check hourly forecasts, and rely on источник weather alerts (источник CDOT) for real-time road conditions. Carry traction devices if your rental or transfer may require them, and confirm with the operator whether equipment is included or rented at pickup. Be prepared to walk a short distance between airport curbside pickup and the vehicle in snow or slush.
Expect traffic patterns to tighten during peak days. On Fridays after work and Sundays when skiers return, grip on i-70 tightens and travel times lengthen. Build in 60–90 minutes of extra time for the Denver-to-Beaver Creek leg if you depart in late afternoon or encounter a winter weather advisory. Use live traffic updates to re-route before you reach the tunnel area, and consider an earlier departure window if you see congestion building.
Pack luggage for cold, variable conditions. Keep day essentials and ski gear in a carry-on or accessible bag, and allocate space for extra layers, hats, and gloves. Confirm ski bags or oversized items with your transfer provider to avoid surprises at pickup; label bags clearly and secure loose items. For equipment, use protective covers and keep wax and small tools in a separate pouch to simplify handling during transfers.
Contingency options keep plans viable. If i-70 closes or weather worsens, consider alternative routes via Eagle County Regional (EGE) or, less frequently, Montrose (MTJ) and arrange a local transfer to Beaver Creek. Choose tickets that allow rescheduling or flexible dates, and keep a backup plan for an overnight stay near Vail or Estes Park if delays stretch into a second day. If you must switch plans, opt for a provider offering clear final departure options and reliable communication channels.
Ticketing and reliability matter. Verify departing times, pickup points, and luggage limits ahead of time, and confirm space for ski equipment and winter gear. Working with a provider that lists specific routes and operates during peak holidays helps maintain a stress-free flow from southbound arrivals to the Beaver Creek area. Stay aware of the latest advisories from источник transport services and CDOT for any sudden changes.


