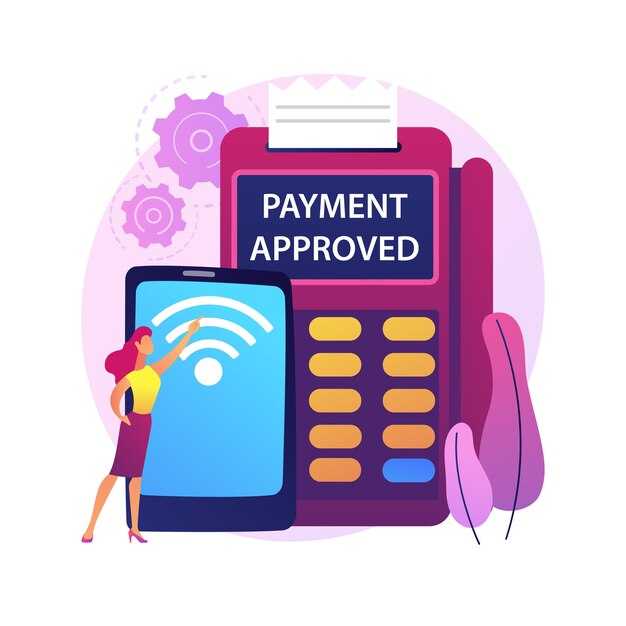
Add, Update, or 삭제 a Payment Method - A Quick Guide to Managing Your 결제 방법
삭제 an unused payment method before adding a new one. As the owner of the account, you have the permissions to manage payment methods. If you cannot, contact the administrator before making changes. Such a cleanup reduces confusion and keeps your charges accurate. Before you proceed, verify the method isn’t used for upcoming invoices.
Open the menu in your Stripe dashboard, select the customer, then go to the 결제 방법 tab. You can add a new method with the button, choose the types of methods you need (card, bank account, prepaid, etc.), and enter the required digits securely. The UI will show only supported options for your region, and they will appear in the list for easy reference.
To update: pick the method, use the Update option, and confirm. If you update a card, the system may require new verification steps and replace the stored digits for future charges. Ensure you adjust any tasks or subscriptions that rely on this method.
To delete: detach the method from any active subscriptions first if required, then click the delete action in the 결제 방법 list and confirm. You cannot delete a method that is still in use by an upcoming invoice; you must switch to another method first. You will receive a message confirming removal, and the change may take several days to propagate in all records.
Tips to stay organized inside your workflow: verify the digits you remove are not needed, keep a local contains list of methods, and review the charges policy if you are in india or use regional wallets. Plan your steps for a smooth process and monitor the message from the system after every action. This approach keeps your types aligned with your business needs and reduces friction for your customers.
How to add a new payment method on desktop and mobile
Open the Payments page, Sign in, and click Add payment method to begin. Before you start, gather the card or bank details and the billing address. Choose the method type and proceed to enter the required details on the next screen.
Desktop: add a new payment method

In the top-right corner, open the account menu and select Payments. Click Add payment method, then pick Credit card, Bank account, or Virtual card. Enter the card number, expiry date, and the verification code; for bank accounts, enter routing and account numbers. Enter the billing address that matches the issuer’s records, including street address, city, state, and ZIP. You can use a one-time card for a single purchase or save a selected method for full use across your orders. If prompted, provide your phone number and verification email; this helps prevent fraud. Click Save to confirm; if a field is missing or the card is expired, the form shows unmet validation, and you need to fix the details and retry. You cannot save a method with incorrect information. After saving, you can download a file receipt and see the new method listed in your Payments page. As of August update, virtual cards are supported, and you can replace an old method anytime without extra cost. azure security layer encrypts data in transit along the way to protect your information.
Mobile: add a new payment method
Open the app, go to Settings > Payments, and tap Add payment method. Choose the same types as desktop, then fill in the required fields: number or routing details, expiry, billing address, and verification data if prompted. Enter your phone and email to complete verification when offered. For some users, a quick one-time verification works; dont worry about re-entering details if you are adding a saved method. After you Save, the new method appears under your Payments list and you can select it for future purchases or replace it later. If you encounter problems, troubleshoot by rechecking the numbers, address, and expiry, or try again on a different network. You may receive a confirmation email or see a file attachment with the details. This flow keeps customers and partners moving smoothly with secure, Azure-backed protection.
How to update your card details (number, expiry, CVV, and billing address)
Update your card details inside the portal to keep your subscription active without interruption. If you manage multiple profiles, you can update them from inside your account and keep all subscriptions current.
- Sign in to your account and open the portal's Billing or 결제 방법 section.
- Choose the payment method you want to replace or click Add new card. If you replace, the old entry can be removed so you have a single active method for all subscriptions.
- Enter the new card number, expiry date, and CVV. If you use a mastercard or another network, ensure the digits match what your issuer issued. For virtual cards, enter the virtual number with the same expiry and CVV rules.
- Update the billing address if it has changed since you last linked this card. Use the exact address your issuer has on file to avoid preauthorization holds or later declines.
- Review the information and confirm. A full update will appear as Active in the portal, and you can set it as the default for subscriptions if needed. Then click Save or Complete.
- If prompted, you may see a preauthorization or small test charge. This will usually be reversed; you’ll see a brief window with the amount on your statement, but it won’t affect your active subscriptions.
Tips and checks for a smooth update
- Keep the update inside the next billing window to ensure subscriptions renew without interruption.
- If a card was issued recently, allow a few minutes for the new details to propagate in the system.
- If a payment method is declined, check that the card is active, has sufficient funds, and that the billing address matches the issuer records. You can add an alternate card to cover subscriptions.
- For multiple subscriptions, review each profile and ensure the correct method is assigned to active ones; use tags to distinguish personal versus business cards if you manage several profiles.
- If you prefer, you can replace a card with a virtual card provided by your bank; many portals accept virtual numbers as long as the network is supported.
- There’s no extra fee to update payment methods, and you can send a confirmation notification to yourself after saving the changes.
How to set or change your default (primary) payment method
Set your default payment method by opening your profile, then the Payments section, and selecting a different card. The chosen card becomes the primary option and is used automatically for renewals and new charges. This change takes effect immediately and remains until you switch it again. If the default is changed, subscriptions update accordingly.
In the Payments page you’ll see two sections: Cards and Linked methods. The Cards section shows each card’s last four digits, issuer, and the owner name; use the option to set as default. When you click the control, the panel opens and you confirm your choice. They can update the default anytime from the same area, and you must confirm the change in the dialog.
If you manage subscriptions across different services, choose the primary card that matches your most frequent charges, including chinese vendors or cloud services like azure and microsoft. If you expect to pay for months ahead, keep a valid card on file and ensure the owner name matches the card records.
To prevent failed payments, update the default before expiration, keep a backup method, and set renewal reminders. Next, you can add a different card and set it to automatically switch if the primary is declined. After you change, test by triggering a small renewal or by entering test data in a sandbox profile. Set a reminder to renew before the next cycle.
For cost visibility, check related subscriptions and usage with cost management tools at httpsconsoleawsamazoncomcostmanagement; heres a quick tip to audit linked accounts within your profile and ensure they remain linked as you renew.
How to securely delete a payment method and confirm removal
Sign in to your account, open the Payments section, select the selected method you want to delete, then click Remove and confirm with your password or a one-time code.
Verify there are no pending charges or active subscriptions tied to this method before removing. If there is a pending payment or a past-due invoice, settle it first. Only proceed if there are no pending obligations, as this step is likely to prevent service interruption. If the method changed recently, ensure the new current method is selected to avoid mismatch and update your records accordingly.
Have a back-up plan by keeping a backup method available and adding it if needed, then set it as current to prevent disruption. This approach applies even when you switch providers or platforms; for stripes and other processors, you may see a provider-specific confirmation screen. The process is similar in india and for microsoft accounts.
After removal, you should receive a message confirming the action in the dashboard or via email. Confirm the change by rechecking the list of methods and ensuring the new current method is updated. Within a few minutes, you will see the updated information reflected in your account, and you can monitor the next invoice to ensure no charges originate from the deleted method. If you still encounter issues, review the details and retry if necessary.
Prerequisites
Ensure you have access to the account, a backup method available, and the necessary two-factor authentication ready. Note the last four digits of the card and the information on file to identify the correct method. The steps are the same in india and for microsoft accounts, and you may need adding a new backup method before you begin.
단계s to delete securely
| 단계 | 행동 | Expected Result |
|---|---|---|
| First | Login to your account, navigate to Payments > 결제 방법, select the method to delete, and click Remove. | Method is highlighted and ready for removal; the system prompts for verification. |
| Then | Enter your password or a one-time code and confirm. | Removal proceeds with verification completed. |
| Next | Review any active subscriptions or pending charges tied to this method. | No active ties remain, or you have a clear plan to update. |
| Then | If offered, select a new default method and save changes. | New default is set; there is no disruption to ongoing charges. |
| Finally | Check the confirmation message or email and re-check the list in your dashboard. | Removal is confirmed and reflected in the method list. |
Tip: keep information on file handy for audit trails and use the interface message to track changes. If you are using stripes as a payment provider, complete the provider page prompts to finalize. If you travel or switch regions, such as moving to india, repeat the steps in the local language to ensure clarity.
How to verify a newly added payment method with authorization or microcharges
Start verification by issuing a small authorization or microcharge through Stripe, PayPal, or your processor. The typical amount is between $0.50 and $1.00, and the charge is currently pending or authorized in the dashboard. This step is necessary to confirm ownership and prevent fraudulent use.
Open the customer’s session in the management console and locate the new method entry. The record contains numbers and a charge id; the status should be pending until the customer confirms the amount.
Ask the customer to check their bank statements and confirm the exact microcharge amount. If the amount matches, the customer can respond via the message channel to meet the verification requirement and move the method forward.
Mark the method as active once verification succeeds. The card or account becomes usable, and the value of the customer’s profile increases. If you’re dealing with virtual cards, the process stays the same because the verification happens on the processor side, not in your file.
Store verification notes in a file and tighten permissions so only the necessary roles can view them. The file should contain the date, amount, result, and any identifiers; permissions help protect sensitive data and track accountability, and you can reference current procedures in your guidelines.
If the charge remains pending or you see mismatches, check under the account notes and review the time window for authorization. Otherwise, retry with a new microcharge or switch to another verification method to help the process complete.
Keep customers informed: send a short message saying the verification is in progress, and that the process is standard and secure. This approach aligns with how microsoft documentation and popular providers like Stripe and PayPal describe checks, and it helps you meet expectations without raising concerns.
Best practices include using a single verification session, avoiding multiple charges, and maintaining an audit trail in a file. Establish clearly defined roles and permissions so the team that manages payment methods can operate efficiently, yet stay compliant with data protections and customer trust. If a verification step opens a new session, ensure the session remains active only for the necessary time and that all steps are documented for future reference.
How to troubleshoot common payment method failures (expired cards, declines, mismatched info)
First, check the card expiration date and replace the card if it is expired; a valid card within its expiry window reduces failure risk. Confirm the card number, CVV, and billing address match the bank’s records and the agreement terms in your profile. After updating, run a small authorization to verify the card remains usable.
Declines may stem from different causes, such as insufficient funds, a flag on the card, or a temporary block by the issuer. Review the decline message in your bank app or statement; ensure the current status is not inactive. If the card is marked as inactive, contact the bank to lift the restriction and re-enable online payments. If a condition on the card requires action, replace it or add a different method to keep your payment flow smooth.
Mismatched information triggers a verification challenge: verify the name on the card, the billing address, and the phone number match the bank records. Update any miscopied digits, and confirm the country and currency align with the merchant setup. If you locate an inconsistency, correct it within your profile and re-run the verification.
Within your account, open the menu and locate 결제 방법. The current method should show as added and active; if it appears as left, deleted, or inactive, remove it and re-add. When re-adding, provide the exact details, select the correct method, and test a small charge to confirm the selection works as expected.
paypal offers a simplified alternative: if you choose paypal, ensure youre signed in and authorize the payment. paypal appears as a separate option in the method list; verify the linked bank or card is valid and the account is current. This path can help you avoid regional or card-specific declines.
Verification steps include checking the statement for a pending or completed charge, confirming the last four digits, and ensuring the expiration date matches. If verification passes, the transaction proceeds; if not, review the bank condition and any fraud checks, then retry after updating the method. Keep an eye on the added method status and confirm it shows as active.
Note the action you take: replacing a card, re-adding a method, or switching to paypal; keep the record within your notes and ensure the changes are reflected in the statement. If the problem persists in june, escalate to support with a current screenshot of the menu and the statement to verify there’s no hidden restriction or deleted method lingering in your account.
How to manage multiple payment methods for subscriptions and one-time payments
Start by adding multiple payment methods to your profile and set a default method for subscriptions. This keeps monthly renewals smooth and lets you handle one-time payments without interruption.
왼쪽 상단 모서리에서 프로필을 열고 결제 방법으로 이동하여 모든 옵션을 확인하세요. 분리, 삭제 또는 이동할 수 있는 항목으로 표시됩니다.
메서드를 추가하려면 클릭하세요 Next 프롬프트를 따르세요. 시스템에서 지원합니다. prepaid 카드 및 기타 일반적인 옵션. 카드가 있으면 확인되지 않음, 세부 정보를 확인할 때까지 플래그 상태가 유지됩니다.
기본 결제 수단을 변경하면 송장 생성 방식과 요금에 사용되는 라우팅 경로가 업데이트됩니다. 변경 사항은 다음 달 요금과 진행 중인 모든 구독에 적용됩니다.
더 이상 원하지 않는 메서드를 선택하여 분리하십시오. 분리; 그런 다음 move 아래에 있습니다. delete 더 이상 필요하지 않다면 삭제하세요.
메서드를 완전히 제거하려면 다음을 사용하세요. 삭제; note 활성 구독에 대해서는 삭제를 취소할 수 없습니다. 나중에 다시 필요하면 다시 추가하여 향후 청구에 적용할 수 있습니다.
현재 표시되는 방법이 구독에 사용되는 방법인지 확인하려면 프로필을 검토하십시오. 시스템 생성합니다 활성 방법의 송장이며 다음을 수행할 수 있습니다. close 설정 확인 후 다음 요금을 확인하는 창입니다.
일반적인 문제를 해결하는 방법 checking the routing 결제를 처리하고 카드 세부 정보를 확인합니다. 실패할 경우 입력을 다시 확인하십시오. move 다른 메서드로 이동하거나 새 메서드를 추가하십시오. they 월말 조정에 대비하여 기록을 정리하고 준비하는 데 도움이 됩니다.
상태 점은 어떤 방법이 활성 상태인지 보여줍니다. 다음 단계를 따라 확인하고 오청구를 방지하기 위해 목록을 정리하십시오.
기여자 팁: 오청구를 방지하려면 이 목록을 깔끔하게 유지하세요.


