


 Terminal Tips")
Time Saver: Book a pickup or hotel shuttle to the arrivals curb—this helps you sidestep taxi queues and gate confusion. If you prefer public transit, the metro is the budget-friendly choice, but keep in mind you’ll need a short transfer from the airport area and some extra travel time.
Terminal Layout for Travelers: Terminal 1 and Terminal 2 each have separate check-in zones, but clear signs guide travelers toward security and gates. In both terminals you’ll find large food courts, reliable Wi-Fi, and easy access to baggage claim. The placement of escalators and seating areas helps you move efficiently, and staff can point you to the right airline counter if you need assistance. Your travel route depends on your arrival time.
Baggage and Reservations: Use self-check kiosks to reserve seats or lounge access; there are several great options in both terminals, including quiet zones near the gates. Keep essential items in a small bag next to your carry-on so you’re not searching during security, and take advantage of the large duty-free selection that opens early.
Getting Around After Landing: Rideshares and authorized taxis line up at the curb; many travelers rely on them for predictable pricing. From the Buenavista station, you can catch the metro to reach central Mexico City. The route passes the Zócalo area and other historic districts; plan for traffic, especially during peak hours, whether you’re traveling solo or with family.
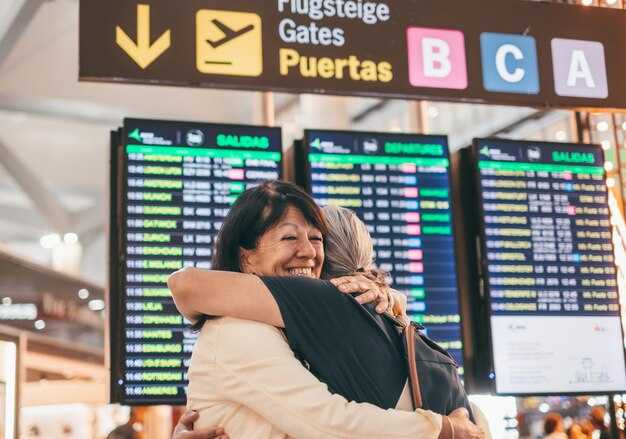
Today’s Reality: Many travelers arrive with reservations in hand but still need to locate their vehicles or rideshare pickups. If you’re visiting Mexico City, consider a short stroll along the coastal-inspired cafés near Reforma before your next flight.
MEX Terminal 1: Check‑in, security lanes, and baggage drop
Arrive 3 hours before international flights and 2 hours before domestic ones at MEX Terminal 1. Use self-service kiosks to print boarding passes and bag tags, then head to baggage drop to minimize queuing. This smart and practical approach saves time and keeps you moving through the terminal; knowing what to expect helps you stay calm, and it’s doable even on busy days. This plan offers plenty of comfort for travelers.
Check-in and Bag Tagging
Here are three steps to speed up the process. Self-service kiosks line the central hall on Level 1, beneath the glass roof. If you have a card linked to your airline profile, you can pull up your booking in seconds and print a bag tag. If you need help, counters are staffed, but expect longer lines during busy hours. The advantage of kiosks is speed and flexibility; check-in is faster during off-peak times. After tagging your bag, place it on the conveyor belt and proceed to security.
Security Lanes
The security area is along the main corridor; expect long lines during peak and popular hours. Have your liquids packed in a single clear bag, remove laptops, and keep your passport and boarding pass handy. On busy weekday mornings, queues can be long; at other times, you’ll get through faster. If your airline offers a dedicated or expedited lane, you can use it; otherwise, standard lines apply. The area is lively—a bustling hub of people moving toward the gates. Stay steady and move with purpose. Before security, prep your items to speed things along.
Baggage Drop
After check-in, head to the baggage drop zone near the main hall. Staff will scan your bag tag and route bags onto the conveyors. If you’re traveling carry-on only, you can skip this step. For larger bags, arrive at least 60 minutes before international departures or 45 minutes before domestic flights to ensure your luggage makes it on board. If you’re traveling tomorrow, plan accordingly and allow extra time for possible queues. At the information desk, staff can point you to the correct baggage belt and answer questions. For today’s travelers, this path saves time and helps you reach your gate stress-free—with careful planning and a calm pace. This option is sure to help many travelers.
MEX Terminal 2: Check‑in, security lanes, and baggage drop
Arrive at Terminal 2 at least two hours before domestic departures and three hours before international flights. With your ticket in hand, head to your airline’s designated check-in zone and use the self-service kiosks to print boarding passes and attach luggage tags. From there, you can proceed to the luggage drop and check any bags you don’t want to carry through security. Signs are clearly posted in English and Spanish, and staff are available at every step to assist you. If you’re traveling with others, consider making a quick plan to split up and tackle different lines to save time—especially on Sundays, when crowds tend to grow. Have your information ready to keep queues moving smoothly, and you’ll breeze through this part of your trip with minimal stress.
Check‑in flow
Enter Terminal 2 and choose the counters or kiosks marked for your airline. The best option for speed is to use the self-check-in kiosks—use them if you have a ticket or e-ticket. Have your passport or ID, ticket, and any visas ready. At the counters, present your boarding pass and confirm your seat; if you’re traveling with others, you can coordinate with the agent to check in everyone’s documents in one go, saving you valuable minutes. If you need to keep certain items in your carry-on, be aware of restrictions and dispose of any prohibited items before you reach security to avoid delays. After check-in, in most cases you’ll proceed directly to the luggage drop or the security corridor, depending on where your airline directs you. Flight information and current queue lengths are displayed, so you can estimate how long the process will take.
Security lanes and baggage drop
There are three main security lanes at the Terminal 2 entrance: standard, priority for premium passengers, and a lane optimized for families with children; their frequency adjusts based on passenger volume. At security, present your boarding pass and ID, remove large electronics, and place your carry-ons on the conveyor belt. Use the bins to dispose of any prohibited items, and keep bulky items out of your pockets to speed up the process.
There is a dedicated baggage drop near the security area for checked luggage, and you can see the belt number on the screen before you proceed. If you’re arriving or departing by car, you can use the clearly marked drop-off and pick-up lanes at the curb, which include separate zones for taxis and ride-hailing services. These routes help you avoid unnecessary detours, allowing you to get through the drop-off area in just minutes.
Before moving on, make sure you have all essential documents and any additional information handy to share with staff if needed—this helps reduce back-and-forth and keeps things flowing smoothly. On Sundays, crowds can make lines longer, so try to arrive early and take advantage of faster lanes when available.
Interterminal Transfer: Walking routes and transfer times between T1 and T2
Take the Interterminal Connector as your first option between T1 and T2. This amazing, affordable walking route keeps you inside the airport, so you avoid external transport and extra fees. The path is airport-operated, well marked, and takes about 15 minutes at a comfortable pace—10 to 12 minutes for brisk walkers and up to 20 minutes if you’re traveling with heavy luggage or lots of bags. This route is well known by frequent travelers for its consistency and ease, making it ideal for next-day connections or quick transfers when timing is tight. See the details below to plan your transfer and to explore the two practical routes available along with their conditions.
- Route overview: Start at T1 in the central concourse, follow the Interterminal Transfer signs toward the connector, and walk the flat, covered corridor to T2. The distance is around 1.2 km, with clear floor signs and occasional seating along the way.
- Route options: Route A goes straight via the main Interterminal Connector corridor; Route B adds a short detour through a secondary concourse area to enjoy brighter lighting and additional rest spots. Both routes end in T2’s departures hall.
- Estimated times: About 12–18 minutes at a normal pace; 10–12 minutes if you move briskly; up to 20 minutes with family or lots of luggage (a lot of equipment).
- Practical notes: The walk works well even with big crowds, offers ample shade inside the connector, and is accessible for strollers and wheelchairs. Also, some wayfinding decals include Puebla area references to help with orientation.
What to expect on the interterminal walk
Signs clearly indicate “Interterminal Transfer” and guide you along a single, straight corridor. The atmosphere is well known for its predictable conditions: clean, well-lit, and staffed with helpful personnel if you need assistance. This method reduces transfer times and offers a stress-free experience—ideal for travelers who want to quickly see their options between T1 and T2. If you’re early, you might enjoy a calm journey with little wait; if you’re tight on time, move briskly and check the details on the signs to avoid hesitation. For a closer look at the route, keep an eye on nearby signs and the location markers near the Puebla area displayed on the floor maps.
Practical tips and timings
- No ticket is required for this interterminal transfer; you stay within the airport’s internal transfer zone.
- Remember to allow extra time in your planning (around 5–10 minutes more) if you’re traveling with kids or heavy bags; this helps you stay on schedule and prevents stress during your journey.
- If you need assistance, Frida and Felipe at the information desks are known to help quickly with directions and signage; they can point you toward departures and well-known locations in each terminal.
- During busy periods, be prepared for crowding near peak times; otherwise, the estimated travel time remains stable, and the route stays safe and very convenient for transferring.
Location details: Start at Terminal 1 central concourse, follow the Interterminal Transfer signage, and end in Terminal 2 departures or arrivals depending on your next gate. Conditions such as weather do not affect the covered connector; however, brief open-air segments may influence comfort if you take a short detour for photos. This well-known and widely used option offers an efficient and familiar experience for many travelers; watch for signs for directions and details, and don’t forget to plan for tomorrow or early the next morning depending on your schedule and plans.
Ground Transportation: Getting to the city, rideshares, and taxis
Official taxis and fixed rates
Take an official taxi from the airport’s fixed-rate desk to the city center; it’s the simplest and most predictable option with upfront pricing. At Terminals 1 and 2, follow signs to the Authorized Taxi counters; an agent assigns a driver and prints tickets with the exact fare. The desks—located near baggage claim—display the fare for each zone. Typical fares to the Centro Histórico range from MXN 250–320; to Polanco, MXN 320–420. Rates are zone-based and shown at the desk, not influenced by traffic conditions. You can pay with cash or card where accepted, and keep the ticket until you arrive.
If you’re heading directly to a specific destination, tell the desk your direction and address, and they’ll confirm the best route. For comparing fares across locations, data-destination-countrymexique helps align quotes; you can reserve a ticket or arrange a simple transfer. Your ticket is printed at pickup, and if you like, you can grab a quick dessert at a café on the way.
Rideshares and alternatives
Rideshare apps—maybe Uber, DiDi, Beat—offer curbside pickup at the arrivals area. Open the app, enter your destination (for example, Centro Histórico, Roma, or Condesa), and compare price estimates and ETAs. Typical prices to Centro Histórico range from MXN 180–300; to Polanco, MXN 260–450. Surge pricing may apply during busy times. Thanks to live tracking, you can see the car approaching and won’t worry about getting lost; if needed, you can re-route mid-trip. Always verify the car’s license plate and driver’s name in the app before getting in.
予測可能なオプションとしては、ホテルまたは評判の良い旅行代理店を通じてプライベート送迎を予約してください。チケットは事前発行されることが多く、固定時間で予約できます。丸一日時間がある場合は、運転手に途中のレストランや興味深い場所にいくつか立ち寄ってもらうことも可能です。途中で見る価値のあるものとしては、手軽なデザート休憩や、歴史豊かな壮大な大通りの景色などがあります。距離にもよりますが、軽食代として一人当たり約20〜60メキシコペソかかる見込みです。
地図を携帯し、data-destination-countrymexiqueフィールドを使用して、サイト全体の費用を比較し、最適なオプションを選択してください。後でマヤ遺跡を訪問する予定がある場合は、引き返す回数を最小限に抑え、スケジュールをシンプルかつ効率的にするためにルートを計画してください。街の印象的な建築と歴史のおかげで、探索する準備ができて到着するでしょう。
飲食:ターミナル別の最適なオプションと軽食
第1ターミナルのクイックサービスカウンターでブリトーボウルをどうぞ。手頃な価格で、乗り継ぎの際の早くてお腹いっぱいになる一番安い選択肢です。ヒント:12番ゲート近くのカウンターは、手軽に持ち帰ることができ、スタッフは笑顔で迎えてくれます。
ターミナル1はシンプルさを重視しています。ブリトーボウル、トルタ、エンパナーダ、温かいペストリー、そして信頼できるコーヒーバーがすべて手の届くところにあります。中央アトリウムの近くには、手早く食事を提供してくれるカウンターが並んでいます。場所は明確に表示されており、カードまたは現金で支払うことができます。
ターミナル2は同様のスピードで、コーヒーカウンター、フレッシュジュース、軽食に最適なクイックタコスやボウルを提供しています。スマートフォンの地図アプリを使えば、コンコース内を数秒で移動できます。印刷されたメニューが必要な場合は、スタッフにお声がけください。通常、英語を話すことができ、メニュー選びをサポートしてくれます。
タイミングのヒント: ゲート間の時間は、軽食を取るのに約12〜18分を与えてくれます。コーヒー、ペストリー、または持ち帰り用の食事に並ぶ場合は、さらに時間がかかります。典型的な食事の時間は短いので、座ってリラックスしたい場合は、長い乗り継ぎを計画してください。
その他のポインタ: 飛行機に乗るためにお菓子を集めているなら、まず一番安いものからチェックしましょう。「一番安い」と表示されているエリアを探してください。乗り継ぎ時間が長い場合は、セノーテへの旅行を計画したり、近くの宿泊施設を予約したりできます。場所を考慮して、アクセスしやすいようにしましょう。ターミナル外へのアクセスには、指定されたタクシー乗り場にタクシーがいます。インフォメーションデスクで尋ねれば、時間を最大限に活用するための簡単な計画を立てることができます。ゲートの近くで快適に過ごせます。
アメニティと接続性:Wi-Fi、充電、ラウンジ、トイレ
到着後数分以内に無料のMEX Wi-Fiに接続し、携帯電話でサインインしてブラウジングを開始できます。この便利なネットワークにより、ゲート間を移動する際に旅行者は接続を維持できます。英語とスペイン語の標識と明確なアイコンは、待合エリアの近くにあるコンセント、トイレ、ラウンジを見つけるのに役立ち、システムは空港のすべてのゾーンで機能します。基本的なセッションは60分間続きます。必要に応じて、1時間ごとに再接続して追加の時間を得ることができます。このシンプルなセットアップは、さまざまな旅程に最適で、信頼性の高い接続により安心感を提供します。スピードアップしたい場合は、ゲートの近くにある充電ステーションを探し、待っている間にデバイスの電源を入れてください。
Wi-Fiと充電の基本
ほとんどの座席エリアに充電用コンセントがあります。コンパクトなモバイルバッテリーを携帯し、USB-CまたはUSB-Aケーブルを使用して、乗り継ぎ中にデバイスを充電してください。プレミアムゾーンでは、より多くのコンセントがあり、テーブルの近くにUSB-C急速充電がある場合もあります。方法は簡単です。プラグを差し込み、充電インジケーターを確認し、数分以内にアクティビティに戻ります。標識は、明確なフォントとアイコンを使用しており、すべての旅行者にとって接続が便利になるように、複数の言語で手順が記載されています。より多くの時間が必要な場合は、数回クリックするだけでオンライン時間を追加できます。
ラウンジ、化粧室、ナビゲーション
ラウンジは快適で静かな空間を提供します。利用方法としては、1日パス、航空会社の会員資格、有料でのラウンジ利用などがありますので、事前にオプションを比較してください。トイレは両方のターミナルに点在しており、家族エリアにはおむつ交換台、交通量の多いエリアには非接触型の設備が設置されています。道順については、空港マップを確認するか、空港スタッフにお尋ねください。もしフェリペのような親切な案内係に出会えたら、最寄りのコンセントやトイレの場所を教えてくれるでしょう。ピーク時には、青いサービスサインに従うと、数分の余裕を持ってゲートに到着し、移動をより快適にするアメニティを楽しむことができます。
ナビゲーションのヒント:MEXの地図、標識、およびヘルプデスク
ベニート・フアレス駅近くの案内所で到着時に地図を入手し、ウェブサイトのデジタルコピーを使ってすぐに位置を確認してください。
MEXの地図と標識
到着、出発、乗り換えを案内する二か国語表示の案内板をご利用ください。エリアマップには、ターミナル1とターミナル2の場所が示されており、3つのゾーンでルートを計画できます。最良の方法は、案内所で地図を入手し、ウェブサイトでオフラインコピーをダウンロードすることです。フライトが木曜日に到着する場合、またはゲートの変更がある日は、画面が数分ごとに更新されます。トゥルムやその他の目的地へのエクスカーションには、最寄りの駅と、電車またはメトロバスの接続に最適な経路がマップにハイライト表示されます。メキシコの標識は、色分けされたゾーンを使用することがよくあります。正しいコンコースを指す明確な矢印に注意してください。ウェブサイトに依存している場合でも、印刷されたコピーをポケットに入れておくと、荷物がない場合やターミナル間をすばやく移動する必要がある場合に備えてバックアップになります。フライトの場合は、正しい場所への案内に従い、矢印を読んでルートを確認してください。
ヘルプデスクと実用的なヒント
迷ったときは、到着ロビーまたは保安検査場近くのインフォメーションデスクにお越しください。バイリンガルスタッフが地図を印刷したり、レイアウトを説明したり、道順をメールで送ったりできます。ゲートエリアの地図を依頼すると、特定の経路をナビゲートしやすくなります。手荷物なしで身軽に旅行する場合は、ターミナル内をより早く移動できますが、パスポートと搭乗券をすぐに取り出せるようにしておいてください。時間やゲートの変更はすぐに変わることがあります。ウェブサイトで現在の出発時刻を確認し、必要に応じてゲートを変更できるように準備しておきましょう。トゥルムのような目的地へは、電車、メトロバス、タクシーの3つのルートを簡単に確認することで、時間とお金を節約できることがよくあります。
| Resource | 所在地 | 備考 |
|---|---|---|
| マップ | 案内所、到着ロビー、保安検査場 | 印刷物とデジタル版があります。オフラインコピーをダウンロードするには、lutiliserを使用してください。 |
| 案内標識 | T1およびT2全体の頭上および壁の標識 | エリアごとに色分けされています。矢印に従って配置してください |
| ヘルプデスク | 案内カウンター、ターミナル1&2 | 英語/スペイン語のサポート;時間は変動、木曜日に更新 |
| 交通機関 | 列車とメトロバスの駅周辺エリア | 市内へのアクセスは3つのオプションから選択できます。時刻表はサイトでご確認ください。 |
| Vols guidance | 出発便案内板 | Volsを探して、次の旅行への接続を計画してください |
コメント