How Early Should You Really Get to the Airport? Practical Arrival Tips

Two hours ahead for domestic flights and three hours ahead for international flights is your clear, concrete rule. Knowing this helps you set a reliable schedule and prevents last‑minute rush when delays happen to people waiting in lines; use this guideline for either trip type.
Before you head out, verify the check‑in window and security wait times. If you need to reach the gate comfortably, plan to pass through screened lanes with minimal friction. A mobile boarding pass and an empty carry‑on may shave minutes, while wearing shoes that are easy to remove and removing belts prepares you for faster screening.
If you travel with family or a group, set a schedule that everyone follows and rely on a dedicated check‑in spot so getting through the line is smoother; this keeps the whole party moving and makes it easier to please everyone with minimal stress.
If you book through a travel brokerage, the agent provides a bonus checklist and up‑to‑date airport tips. This keeps you knowing what to expect, whether you fly often or just once.
Packing light helps protect your belongings; use a compact pouch for protection of electronics and mobile batteries. Keep liquids screened and provided by airport rules. If something happens, you can just adjust your schedule and stay flexible so you can still reach the gate on time.
Domestic vs International: When to Arrive Based on Flight Type
Plan to arrive 90 minutes before domestic departures and 180 minutes before international ones.
Domestic travel hinges on speed through check-in and security. Use mobile boarding passes, check in online, and pull up an airline account on the app to view flight details. If you have things to drop or a bag to check, head to dedicated counters early; security lines vary, but having a boarding pass ready and a clear carry-on helps you pass through faster. Alisha, a frequent flyer, keeps things organized, uses premium cards for lounge access when available, and follows these steps to stay smooth.
International trips add passport control, visas, and customs checks, so build in more buffer. Go to open counters early if you need help; have printed documents handy or keep them accessible on a mobile device. Screened areas can slow down families with carry-ons, so pack lightly and keep the line moving by placing liquids in permitted bags. Your account and digital boarding pass still help, but you should expect longer waits and plan accordingly. If there is a tight connection to another aircraft, add extra buffer, and ensure the required documents are ready. Innovation in screening and boarding continues to improve throughput, but planning remains essential.
Rideshare is often the fastest option to avoid parking delays, especially in peak times. Open the app, set a pickup zone, and allow extra time for traffic; if you travel with kids or lots of things, allocate a bit more cushion. For travelers with premium accounts or corporate travel cards, you may access dedicated lanes or early boarding; budgets matter, but the goal remains to arrive early enough to avoid stressing about the line. Giving yourself extra time reduces stress and helps you manage lines.
Guidelines for both flight types emphasize preparedness: screeners require documents ready, counters open at specific times, and travelers should not rush the process. Spend time wisely by planning to have a mobile device ready, cards handy, and the account up to date so you can fly through pre-departure tasks. The key is to choose a time that fits your travel style and daily schedule.
| Flight Type | Recommended Arrival | Key Steps | Notes |
|---|---|---|---|
| Domestic | 90 minutes before departure | Online check-in; mobile boarding pass; bag drop at dedicated counters; be ready for security screening | Factor in peak times; use self-service options |
| International | 180 minutes before departure | Passport/visa checks; customs; separate lines; documents ready | Arrive earlier if a connection exists or visa issues |
Estimated Arrival Windows by Airport Size: Small, Medium, Large
Recommendation: Arrive 60–90 minutes before domestic departures at small airports, 90–120 minutes at medium airports, and 120–150 minutes at large airports; for international travel, extend to 2–3 hours (small), 3–4 hours (medium), and 4–5 hours (large) for both domestic and international.
Small airports typically offer faster checks but longer walking distances to gates; domestic travelers should plan 60–90 minutes and international travelers 2–3 hours. If you have luggage to check or you’re traveling with kids, lean toward the upper end. Allow an extra dash for security and boarding, and consider a quick transfer between terminals if available, especially when timing is tight.
Medium airports handle more flights and longer lines during peak windows. Domestic plan 90–120 minutes, international 3–4 hours. If you’re relying on a transfer between terminals, add 20–40 minutes for walking or shuttle rides. For luggage check, using online check-in reduces time by rate; another tip is to drop bags at curbside when possible, which can be a big win if you’re pressed for time.
Large airports require the most cushion. Domestic travel calls for 120–150 minutes, international travel for 4–5 hours. Use a longer buffer if you’ll connect to another flight; transfer lines and customs can extend beyond baseline. Plan extra time for long security corridors, dash to the gate, and potential gate changes; especially at peak periods, you might need more minutes to reach the next terminal.
Formula to tailor these windows: Time = security block + luggage drop + transfer + buffers. Start with security (60–90 minutes domestic, 90–120 international at larger airports), add luggage drop (15–30 minutes if you have luggage to check), and include an extra 15–60 minutes for transfer and gate changes. Adjust by airport size: small (60–90 / 2–3), medium (90–120 / 3–4), large (120–150 / 4–5). This helps you maintain balance and avoid rushing, and it works as a practical guide for every trip you plan domestically or internationally.
Case studies from elina and alisha at terradriftcom show how a well‑timed arrival window improves focus and health. They note that planning with health in mind prevents fatigue and keeps you alert for transfer points. If you’re staying near the airport, consider hotels with early breakfast and remote pick‑ups; this include a clear transfer plan, a strategic dash to the terminal, and steps to travel without depending on digital tools. For added context, farbstein and other voices highlight the value of hydration and light snacks to stay sharp when delays occur.
Remember: every airport presents a different pattern, so stay flexible. If you travel domestically, please review the schedule against peak times and dont rely on a single window–have another backup plan. Always show your boarding documents when asked, and consider both digital and paper formats to keep you covered, especially if a device fails or you’re traveling remote locations. Please use these windows as a practical baseline and adjust as needed for your specific flight, gate layout, and personal pace.
Check-In, Security, and Boarding Timelines: A Step-by-Step Schedule
Arrive at least 2 hours before domestic flights and 3 hours before international flights. During holidays, add 60 minutes. Use your mobile boarding pass from the albarin app, and keep images of your travel documents accessible in your wallet. This plan helps anyone, including families, and lowers stress by delivering a clear start to each step. The intro section outlines the layout of the airport and the checkpoint flow, from door to plane; just plan ahead to avoid delays and never underestimate peak times.
Before you leave home
- Confirm your destination and flight number in your account; download or fill the form if requested by the airline, and set a reminder for the start of check-in.
- Prepare documents and digital copies; store passport/ID, boarding passes, and travel images on your mobile; keep a dedicated folder for quick access.
- Pack carry-on items you will spend time retrieving at security; keep liquids in a clear bag and know your bag size limits.
- Bundle the family: include snacks, small games, and a plan for strollers; note the gate layout in your notes. If you’re joining a group, coordinate via a single contact in your circle, just in case.
- Be prepared with a quick plan if you’re traveling alone or with someone who needs extra help; having a simple checklist reduces stress at the airport.
In the airport: flow and timing
- Two hours before a domestic departure, three hours before international, head to the check-in area; if you already have a mobile boarding pass, you can proceed directly to bag drop or security. For holidays, expect longer lines; Just plan for extra time, and never rely on signage alone during peak periods.
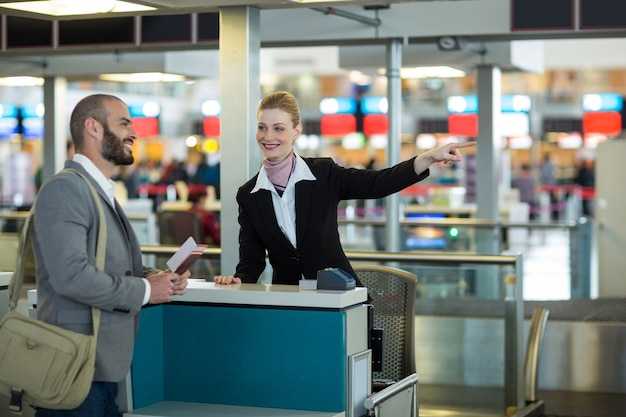
- Bag drop and check-in: present your ID and flight details at the desk or kiosk; print or load your boarding pass if needed; verify your baggage tag weight if you have a bag to check.
- Security checkpoint: remove belts, watches, and laptops; place electronics in bins; proceed through the X-ray; follow staff directions and keep moving to avoid holding up the next passenger.
- Walk to your gate: follow the airport layout on signage or your mobile map; count on 8–12 minutes for a typical terminal, with 5–10 minutes extra if you have kids or mobility devices.
- Boarding: per airline policy (pursuant to posted rules), boarding usually starts 30–40 minutes before departure; groups or zones begin in sequence; have your boarding pass ready at the door; be prepared if you’re traveling with strollers or a mobility device; if you miss your window, speak with gate staff immediately; board the plane through the correct door.
- If you have a connecting flight: check transfer times at the information desk and plan extra time to walk between terminals; use nearby gates if the incoming flight arrives late.
- Ending the process: after you board, settle in, store cabin items in the overhead bin, keep seat belts fastened during taxi and take-off, and listen for final calls.
Real-Time Security Waits: How to Check and Plan Around Delays
Check live security waits now and set your arrival target to 60–90 minutes before you head to the airport for domestically scheduled flights. This upfront move keeps you prepared and gives you extra margin if waits climb.
Use the airport's official app or website to view current wait times by lanes, and refresh on the way. Some airports show averages for PreCheck vs standard lines, so compare the view across lanes to decide where to move through security.
Should waits show longer than 20 minutes, switch to the fastest option: use PreCheck lanes if you have privileges, or consider Global Entry since major airports host most traffic domestically. If you arent enrolled in programs, stay in the standard line and plan around the delay with a lighter load.
Have verification ready: license or passport, and your boarding pass on your phone. If you used remote check-in, you can skip lines at the ticket counter and head straight to security.
Travel lighter: larger bags slow you at security and on the way to gates; keep the important things in a small bag and consider carry-on only if possible, which lets you keep moving and reduce the risk of missed bags.
From a planning view, prepare several backup options: leave earlier to catch an earlier flight, switch to a different terminal, or use curbside bag drop; for business travelers, a fallback plan helps every trip run smoother.
Walking through the terminal is smoother when you know the route and use lanes efficiently; keep a simple map in view and head to the fastest security entrance on arrival, then follow signage for the gate.
Carry-On Strategy: What to Pack and What to Leave Behind
Pack a compact premium carry-on with one spare outfit, a small electronics kit, and travel-size essentials; this setup typically covers a two- to three-day trip without checking a bag. Aim for 7–9 kg max to keep maneuvering through lines effortless. Getting through security faster is part of this plan. This start-to-trip approach keeps you flexible and speeds you through security and boarding.
Keep the bag lean by filling it with versatile layers, compact toiletries, and a charging kit. This depends on your climate and itinerary, but it reduces last-minute purchases and guards against baggage delays. Use a single, organized pouch for cords and devices to simplify navigating security and boarding. Label cords with tags so they keep their items organized.
What to Pack
Choose a color palette that mixes and matches to reduce the number of pieces you bring, and fill every inch with usable items. Put a lightweight jacket, two tops, two bottoms, and one compact dress or smart-casual outfit. Include a compact travel umbrella, a microfiber towel, and a small laundry line if you plan longer trips.
Electronics: bring a single power bank, one charging cable per device, and a universal adapter if traveling internationally. Pack a phone, e-reader, and a compact earphones set; keep the items in a dedicated pouch to simplify security checks and boarding. megan notes that labeling cords with tags saves time on repeat trips.
What to Leave Behind
Leave behind bulky outfits, multiple pairs of shoes, and heavy creams in favor of travel-size versions. If an item costs more than you can comfortably replace at your destination, consider buying there or borrowing. Avoid bringing valuable cards or documents unless necessary; instead, rely on digital copies stored securely in a cloud or password manager. Depending on the trip, you may find you can leave behind 1–2 accessories to keep the bag light.
источник data shows that travelers who pack light save time and stress, and you’ll have room for a premium carry-on, a souvenir, or ride-ready essentials on day one. Your approach may vary by season and destination, and you can refine it with example checklists from trusted sources and your membership programs. Note a single point of contact in your bag for emergencies, and keep a small index card with emergency contacts and a key reference in reach. For quick access to information, this simple setup helps you start each trip without friction. That keeps the ride from curb to gate smooth.
Wear, Belongings, and Handling Tips for Faster Screening
Slip-on shoes speed screening by eliminating shoe-removal delays. We recommend wearing them with no metal accents and keeping a light belt to minimize checks. Typically, this simple change reduces your screening time and helps you move toward the departures area faster.
Place liquids and electronics into a single transparent bag, and keep your laptop or tablet accessible for quick removal if requested. Select a bin near your area, and arrange items with liquids first, followed by devices and cables. This setup minimizes handling and speeds your path to the checkpoint.
Keep valuables like your passport and wallet in a dedicated, easily accessible pocket or pouch so you can present them on request to the authority without unpacking the entire bag. This keeps the line moving and reduces fumbling.
Know where to go: check-in counters, curbside drop-off, and departures lanes are clearly marked, with available staff to answer questions. Plan your route from home to the airport so you reach the security area with enough time.
Choose select travel products designed for screening: compact bags, slip-on footwear, and low-metal accessories. This approach improves your rating by the agents and reduces the need for rechecking. Generally, travelers who use well-organized packing earn smoother processing.
Maintain a steady pace: move calmly through the line, avoid consuming large meals just before you leave, and stay aware of instructions. This isnt about rushing; its about keeping content organized and complying with the requirement to show items quickly. Another tip: keep a plan on your phone with departure times and boarding windows to anticipate the flow.
Documents, Apps, and Programs That Speed Up Your Path Through Security
Enroll in Global Entry or TSA PreCheck to shave minutes off security screening. Have your passport and driver’s license ready, and carry your known traveler number provided during enrollment in a slip-on card sleeve for quick access. Global Entry requires fingerprints and a photo at enrollment, and it includes TSA PreCheck benefits for domestic travel. In the world of travel, these programs save time and reduce stress, even on days with variable crowds, including tuesdays when lines can fluctuate.
Programs and apps that speed up screening
- Global Entry – for international travel; expedited processing on return to the U.S.; fingerprints and photo are required at enrollment; you gain access to TSA PreCheck lanes for every domestic flight; estimated wait times drop noticeably at many airports.
- TSA PreCheck – domestic-friendly option with shorter lines; select the dedicated lanes; requires a background check; five-year validity; provided you stay eligible, the savings accumulate across trips.
- CLEAR – biometric verification speeds entry at participating airports; premium service offered where available; faster queueing after identity verification; you can pay with bank cards; rate varies by airport and region.
- Mobile Passport Control (MPC) – free app to submit basic data to CBP before landing; data is stored securely and speeds processing on many routes; combine MPC with your passport and other required items to save time.
- CBP One – app that pre-screens travel data before arrival; not required everywhere, but can speed inspection where supported; add travel details and required documents to stay ahead of the line.
- Points and perks – some premium programs and bank cards offer points or miles that can be redeemed later; check partner offers to maximize value without slowing you down.
Practical steps to implement
- Download the apps you’ll use (MPC, CLEAR, and the airline wallet tools) and provided data to your profiles; add your KTN or PASSID so lanes are automatically suggested.
- Gather required documents: passport, driver’s license, and any travel cards; store them in a slip-on holder for quick access during screening; ensure your bank cards used for premium benefits are ready if offered at your airports.
- At the checkpoint, select the appropriate lanes (PreCheck, CLEAR, or MPC) when available; stay aware that not every airport supports every program; the right choice can shave minutes off every screening.
- Keep your fingerprints current in the enrollment records if you participate in programs that require biometrics; maintaining up-to-date data helps avoid delays at security.
- Stay proactive about updates: program rules and participating airports can change; adding your travel details in the apps helps you prepare for the day of travel and reduce last-minute surprises.


