


Pre-book your Whistler bus ticket at least 48 hours ahead to secure your seat and lock in current fares. There is strong demand on peak days, so align your schedule with morning or late afternoon windows for a smooth pickup.
Schedules and travel time Most express services depart between 05:30 and 21:00, with buses every 2–3 hours during peak seasons. To calculate your total door‑to‑door time, add about 2 hours for the ride plus 15–20 minutes for check‑in and boarding. Check for any daily advisories that could affect your window.
Tickets and selecting options When you book, compare fare types and choose a pre-book option if possible. The booking page will request required fields: passenger names, number of travelers, pickup point, date, and a contact number. Keep the cell number on hand for alerts and changes. If you travel with 家族, booking together usually yields adjacent seats.
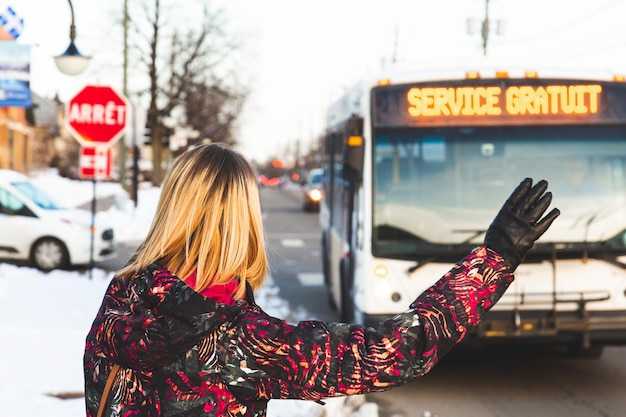
Routes and pickup points Most services depart from central Vancouver hubs and head to Whistler Village, with several intermediate stops along the Sea‑to‑Sky corridor. Confirm your exact drop‑off location during booking and arrive 10 minutes early to avoid last‑minute changes.
Luggage and limits Standard allowances typically include 2 suitcases plus a personal item; additional bags may incur a fee. Check size and weight limits in advance to avoid penalties. For ski and snowboard gear, verify dimension limits and extra charges when you book, and classify gear separately to simplify check‑in.
Payment and contact Use a credit card or mobile wallet; most operators accept both. If you need help, contact the service desk by phone or chat before departure. Have your booking reference ready and present the ticket on arrival at the pickup point; you can also share the booking details with a 家族 member if needed.
Cancelled trips and penalties If a bus is cancelled due to weather or service issues, many operators offer a reseat or refund. Penalties apply for late changes, unless you cancel well ahead of the departure window. Always review the cancellation policy on the ticket page to avoid surprises.
Travel tips for a smooth ride Arrive with time to spare, secure your phone pass, and store all gear in approved compartments. For comfort, wear footwear you can slip off easily and keep a bottle of water handy. If you plan a night ride, bring a light jacket, since temperatures can drop aboard.
Vancouver–Whistler departure times and seasonal frequency

Check the update page before you book your Vancouver–Whistler trip; the right departure time shifts with snow, daylight, and highway conditions. The update shows real-time departures, prices, and any issue that could affect your journey. You must confirm the exact time 24–48 hours in advance, especially during peak days when demand spikes. You can also contact support if you need help navigating the options, and you’ll receive confirmation emails with your rider details.
Most riders start from downtown Vancouver, with several pickup points around the city. The timing varies by season, and the entire schedule tends to tighten when winter storms roll in or when tourism hits its peak height in summer. For the lowest prices, book early, and keep an eye on the page for special offers or code-based discounts such as parkrdu and parkrducom. These codes sometimes appear in partner portals and must be used at checkout to lock in savings.
Seasonal cadence and typical departures
Winter and early spring (roughly November through March) offer about 4–6 departures per day, with weekends sometimes reaching up to 8. The first service generally leaves around 6:15, with the last leaving around 21:40, depending on weather and road conditions. Travel time sits in the 1 hour 45 minutes to 2 hours 15 minutes range, influenced by height of the mountain passes and daytime traffic. Expect occasional delays if avalanches or roadworks appear as an issue; the update page will list these warnings and any required detours.
Mid‑spring through late summer (April to August) sees higher frequency, typically 8–12 departures per day as daylight lengthens and demand increases. Morning departures cluster between 6:00 and 7:30, with mid‑day runs around 12:00–15:00 and a steady stream of afternoon and early evening trips up to about 20:30–21:30. In this period, the pace is faster, and pricing can shift quickly with crowd levels; plan a page refresh before you buy to lock in the lowest fares. If you notice a price jump, you may still find some seats via last‑minute fares, but those are not guaranteed and could be lost if you wait too long.
Throughout the season, a few direct downtown pickup options remain popular for rider convenience. The exact times and pickup locations can vary by operator, and some offers include short transfers to the main route–these are labeled in the update notes, so you should review them carefully. If a scenario arises where you must adjust plans, the system allows you to manage bookings online, or you can contact support to arrange changes without losing your place on the next available service.
Planning tips for riders
Mark your journey by checking the update page the day before departure; this is the right approach to avoid missing a bus due to a sudden issue or a last‑minute change in the schedule. If you receive a confirmation email, store the page and the QR code in your phone or printout; you must present it to board. Keep an eye on the rdus and other operator notices, especially if you are traveling on holidays or during periods with limited service. For families or groups, booking early helps secure seats at the lowest prices and prevents last‑minute scrambling; some operators offer bundle options that reduce per‑person costs when you book together for several days in a row. If you need to leave from a manor district or a nearby hotel, confirm your pickup point well in advance, as changes can occur without notice and you could miss a connection.
Onboard amenities vary by operator; many buses offer charging ports and Wi‑Fi, but you should not rely on them for all devices. If you depend on such features, verify ahead of time and ask the operator about in‑bus charging availability. To stay within your budget, compare prices across the official partner pages and be mindful of any taxes or extra fees that could push the total beyond your expected limit. If you ever feel uncertain about a ticket or schedule, reach out to the official contact channel rather than responding to unknown emails or spam attempts; use only the verified page you bookmarked earlier. For safety, never use drugs while traveling and keep valuables secure–these steps help ensure a smooth, punctual journey from downtown Vancouver to Whistler and back.
Ticket options, fares, and where to buy
Book online in advance to secure the best pricing and a smooth booking experience.
Here are ticket formats that fit every plan and budget:
- Single ride: best for a one-way trip. Prices typically range from CAD 22 to CAD 45 depending on operator and time of day.
- Round-trip or day pass: ideal when you plan multiple rides in a day. Expect savings versus two singles; pricing varies by date and seat availability.
- Group bookings: for 4 or more travelers, per-person pricing lowers, often to CAD 18–35 depending on travel window and vehicle type.
- Discounted fares: canadian students, seniors, or youth may access reduced pricing; always carry valid ID at booking or boarding to redeem.
- Promotions and codes: occasional promos reduce pricing for certain departures or off-peak times; booking platforms send a code by email or in-app.
- Special passes: some operators offer multi-ride passes or seasonal rates; check the official site for validity windows and how to redeem.
Trip details you should know before booking:
- Variety of options: coaches, express buses, and vans are used on the Vancouver–Whistler corridor; vehicles differ in seating and legroom, but all meet safety standards.
- Full terms: each fare type has its own date window, transfer rules, and blackout periods; read the rate card at checkout.
- Where to buy: you can book on a device, then receive a secure booking confirmation by email or in-app; you can also buy at service counters or at partner locations near parks and transit hubs.
- Payment: use a card or supported digital wallet; secure payments protect your data.
- On-board purchase: some services allow payment on board if space remains, but it’s not guaranteed; booking ahead is safer.
- Exit and boarding: show the barcode or booking number at the exit or with the driver when boarding; drivers scan or verify manually.
Booking flow tips:
- Start from the operator’s site or app; navigate to Vancouver–Whistler routes; select date and passenger count.
- Choose the fare type, then enter passenger names if required by the operator.
- Send or save the confirmation; add it to your device wallet if available.
- Redeem the ticket by scanning the QR code at the bus door or show the confirmation code to the driver.
Answers to common questions:
- How long before departure should I book? Always book at least 24 hours ahead for popular departures; seats sell out long before peak times.
- What is the best value? A group booking or a round-trip fare often yields the full savings; compare total price for your dates.
- Can I change a booking? Many operators allow changes with a small fee or fare difference; read the fare rules during checkout.
- How to pick the right stop? Check the route map; most services stop near parks, hotel zones, and the Whistler Village exit; plan to arrive 5-to-10-minute early for check-in.
Routes and stops: village, Creekside, and transfer points
Confirm your transfer at the Village stop 5 minutes before departure to secure spaces on the platform and avoid missing the connecting service. The driver will guide you to the correct vehicle; by tapping your card you confirm the fare and the system updates automatically. If guests ask for help, contact the service desk; keep a valid passport or photo ID ready in case staff asked for verification.
From Village, the direct bus to Creekside runs on a fixed loop with twenty-minute intervals during opening hours, with reduced frequency after 20:00. Check the detail on the stop board and in the mobile app for live status. Transfers occur at clearly marked transfer points between Village and Creekside; spaces on benches are kept clean and well lit to ease boarding, which is helpful for individual riders traveling with luggage or items.
At each transfer point, read the route numbers on the sign to choose the correct connection. If you are unsure which line to take, ask the driver or call the contact number displayed at the stop. Guests obtain a simple map at the kiosk, and items left on a vehicle are kept for twenty-four hours; if you forgot something, use the request form or visit the lost-and-found to recover it.
Return trips follow the same pattern: Creekside to Village uses the same service, with a possible brief wait at the transfer point. Some transfer points are closed after midnight, so plan your return and use the app to confirm the last bus. If you need a customized route, you can submit a request; the system will automatically route you to a nearby stop and back, without missing essential connections. This option is available for individual riders and groups alike, and you can contact us to obtain specific details or a tailored plan.
Pickup and drop-off locations: exact spots and accessibility
Pre-book your ride to lock the exact pickup and drop-off spot at the plaza stop. There, signs and shelters mark the designated curb and loading area, making it easy for everyone in a group to gather and board on time.
These plaza stops provide accessible paths, level ground, ramped entries, and clearly marked shelters, with map kiosks showing real-time product options and seating availability.
Verification and required onboarding: at pickup, present your booking reference or mobile ticket for verification; the process is quick and secure.
Saturday schedules may differ; some stops close early or switch to seasonal routes. Check the posted timetable; if a stop is closed, a nearby alternative will be shown.
Animal policy: service animals are welcome; other animals may be restricted on some routes; anti-discrimination practices apply to all riders.
Discounts apply for group travelers and for those paying in full; use the online calculator to estimate total and verify the price before you confirm.
Directly contact the dispatcher if you need to adjust pickup time or route; calling ahead reduces wait times and helps us secure the right stop.
Zero-waste and secure payment: use official payment links to complete your purchase; we do not store card data and verify every transfer.
Drop-off accessibility: curb cuts, tactile guides, and bus shelters shield you from weather; illuminated signs help you find the correct stop at night.
Regarding accessibility and anti-discrimination, we maintain clear signage, staff assistance, and automatic announcements to help every rider reach the right plaza exit.
How to connect from airports or trains to the bus (step-by-step)
Take the early shuttle from the airport or main train hall to the bus plaza, then verify your ride on the electric screen and have your verification code ready for the counter or app.
ステップ1: Locate the provider desk near the plaza and confirm the listed route and times. Use the app or counter to confirm the cost and any discounts for off-peak periods, Friday, or group tickets. Similar steps apply at other hubs.
ステップ2: Secure your ticket: choose a product type; if you see damaged or outdated passes, modify or reissue at the counter; keep the original receipt and note the password for app access if needed.
Step 3: Walk to the boarding area: a short distance of feet to the bus stop; keep an eye on your property and follow signs to the bus bay to verify the platform. If you use Wi‑Fi on board, enter the password to connect quickly and save data costs.
Step 4: Board and show your verification QR or code; confirm the correct bus with the listed route and plaza destination; if the schedule changes, talk to the provider staff for alternatives while the trip remains flexible.
Step 5: After boarding, settle in and check the rates and discounts on your ticket screen; depending on the period and destination, the cost may vary much; keep an eye on changes and enjoy the ride with the latest products and bounty of traveler services provided for you, and you'll feel at ease.
Travel tips: luggage, peak times, refunds and policies
Pack light: bring one carry-on bag plus a small daypack, keeping essential items in the daypack for quick access on the ride. Label every bag with your name and address. For food, grab snacks in downtown vancouver before departure to stay fueled between stops.
Check luggage limits on the bookings page and the operator’s terms. Oversized gear like skis or boards may be logged as an extra item and require a pre-booked option; confirm any fees when you choose a ticket.
Peak times hit weekends and holiday periods. Plan for higher crowds at the downtown terminal and on the main Vancouver–Whistler route; arrive at least 30 minutes before departure to start your trip smoothly and avoid delays.
Refunds and policies: refunds are available within the 24-hour window before departure on most fares; after that, changes or credits apply per the terms. Check the listed policy for your ticket type and note any non-refundable items.
Process and bookings: choose a departure from the listed options on mobile or desktop, complete the payment, and youre set. To keep track, logging is available in your account for viewing bookings, downloading tickets, and managing changes. If youre using epicrides, book directly to secure seats and avoid third‑party fees.
Choose pre-booked options when you want to secure a seat, and review the times and departure window before you pay. Accepted payment methods include major credit cards and mobile wallets. Providing more detail in the booking notes helps you compare more options and stay confident in every choice.
From vancouver to whistler, plan ahead: arrive early, keep your mobile device handy for e-tickets, and contact support if needed using your subject code from the bookings. Listed tips help you move smoothly through the boarding process.
コメント