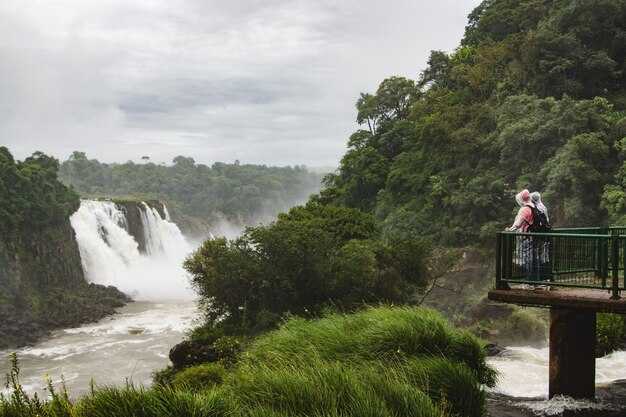
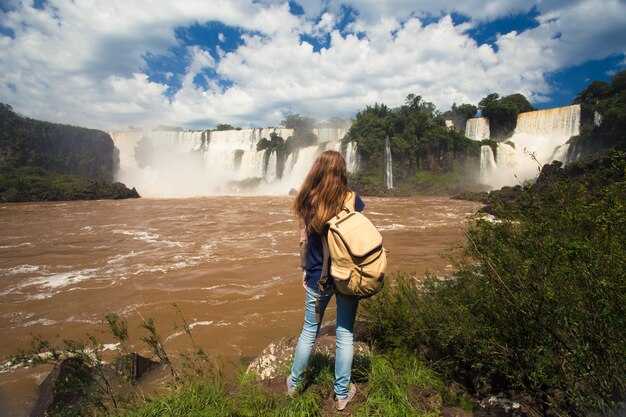
advice: arrive before 9 am to enjoy cooler temperatures and clearer viewpoints on the Brazilian side. If you have arrived, head straight to the upper decks to catch the spray without long lines. Plan your route to maximize short walks between shaded spots and bring a light backpack with sunscreen and a microfiber towel.
Find your base: The belmond Hotel das Cataratas on the Brazilian side offers easy access to the park entry. If you lean toward budget options, frequent hostels around Foz do Iguaçu keep daily costs reasonable. michaela, an australian traveler, says a flexible plan and conversation with staff unlock quiet paths after rain. bring an amount for local taxis or shuttle buses, and reserve a couple of hours for a relaxed morning walk.
What to wear and pack: Wear sturdy shoes with grip for slippery stones. dont forget a lightweight rain jacket; the spray from the falls sticks to everything. Pack a compact poncho, bottled water, and a small power bank for photos. A daily plan helps you hit viewpoints in the best light, especially as temperatures rise.
Plan your route: Start at the main Brazilian circuit and work your way to the Garganta do Diabo overlook. Use the park shuttle to hop between trailheads, especially in peak heat. Look for wildlife, like toucans and coatis, along shaded stretches. A well-timed visit in the morning or late afternoon yields better lighting for photos.
Practical tips: Bring protection for cameras; the spray can fog lenses. dont rely on data connectivity in the park; download offline maps beforehand. The amount of walking is moderate but stairs add up; take breaks and hydrate. Consider a late-afternoon viewpoint, when temperatures drop again and mist creates rainbows.
Best Time to Visit the Brazilian Side for Garganta do Diabo Viewpoints
Plan your visit for May or September and start before 9 a.m. to catch Garganta do Diabo viewpoints on the Brazilian side with soft light and thinner crowds.
In these dry-season months, the wide catwalk stays dry, the air is comfortable, and visibility is best for photography. If you come in summer, be ready for higher humidity and occasional showers that heighten the mist and create dramatic portraits; the views remain powerful, especially in early morning light or late afternoon when the land and forest contrast most.
weve found that morning visits pay off: over the years, travelers have learned to optimize timing by starting early; weekdays are generally calmer; backpackers and local guests mix with day-trippers on weekends, but the quieter hours are still present. To simplify logistics, use rideshare from town to the park entrance, a reliable means to avoid parking hassles. On-site facilities provide a simple lunch option at the gate, but for a fuller meal you can purchase in town or at a nearby mall after your visit. wifi coverage is strongest near the main plaza; along the main catwalks it can be spotty, so download offline maps in advance. At the gate you obtain a map and can purchase tickets online to start smoothly. The Garganta route on the Brazilian side is wide and well-maintained, with viewpoints that place you between the spray and the forest land; some overlook on the opposite bank offer a different perspective if you plan a separate day trip to the Argentine side.
Timing and viewpoints
- Start early: aim for 7:00–9:00 a.m. to beat crowds and catch the best light.
- Prefer May or September for lower rainfall and comfortable temperatures, with strong water flow still present.
- Choose weekdays when possible; weekends draw backpackers and families, increasing crowding at key lookouts.
- Check the weather and park alerts the night before; morning mists can affect visibility if you start too late.
Practical planning

- Wear sturdy shoes for a wide, well-maintained path that remains mostly flat but can be slick after rain; plan for tiny spray droplets on skin and glasses.
- Pack light rain gear, sunscreen, and a small backpack; dorm-style hostels around town offer budget options if you’re traveling with a group.
- Purchase tickets online in advance to start your day smoothly; at the gate you can obtain a map and you’ll see coverage updates on-site.
- Use rideshare means to reach the entrance; it’s a common, cost-effective option for solo travelers and groups.
- Be mindful of wifi coverage: stay offline with maps if the signal is weak on the trails; download the route beforehand.
- Consider adding a second day to explore the Argentine side for a fuller variety of viewpoints between the two countries.
Getting There: From Foz do Iguaçu to the Brazilian Park Entrance
プライベート送迎を予約する or use a reliable taxi to reach the Brazilian Park Entrance quickly. From Foz do Iguaçu to the entrance, expect about 25–30 km of road, 30–45 minutes in light traffic; peak times can stretch it to 60 minutes. If you arrive via the IGU airport or other area airports, a pre-booked shuttle or taxi offers door-to-gate service, saving you stops and backtracking. Here’s a practical approach that keeps everyone on track.
Two solid ride options: private transfer or public bus
Option A: Private transfer. A driver waits in the arrivals hall at IGU or at your hotel and delivers you directly to the Park Entrance. Expect to pay around R$80–120 one way, depending on your hotel location and traffic; it’s better to pay a bit more for reliability, especially with kids or a lot of gear. If you’re traveling with others, the per-person cost drops and the space helps you pack everything you need. Passengers appreciate the convenience after travel, and the driver can stop for a quick photo along the road if you ask.
Option B: City bus. From downtown Foz, Bus 120 Cataratas runs roughly every 30–40 minutes and stops at the park gate. The ride takes about 60–75 minutes and costs around R$5–7. Board at the Terminal de Ônibus or at major urban stops; you’ll avoid parking hassles but share the ride with other passengers. If you missed the first bus, there are later departures–check the current timetable at your hotel or the terminal; plan to arrive early to beat the heat and crowds. Instead, if you’re on a tight budget, this is a better choice for the day.
There, crossing to the argentinean side is optional but can be a good complement in a full day. If you decide to cross, bring your passport and be prepared for customs checks; plan a separate entry and exit window, and note that afternoon temperatures can rise a few Fahrenheit degrees. If you want to explore ciudad neighborhoods on the other side, do it after you finish here and return for the Brazilian gates.
Practical packing and planning: pack light, leave bulky bags at the hotel if possible, and carry a small water bottle; the weather on the Brazilian side is sunny most days. In summer, temperatures often peak in the 80s or 90s Fahrenheit, so sunscreen, a hat, and a light jacket for cooler mornings help. The entry plaza is a short walk from the bus stop, but you’ll do more walking inside the park beyond the gate. Here, the shortest walk from the gate to the main outlooks takes about 15–25 minutes. If you’re touring with kids, pace yourself and add rests; everyone benefits from a relaxed rhythm. Create a simple itinerary list to guide your day, then review it at the bus stop to learn about current conditions and time windows, and leave some buffer for unexpected stops with others who share tips and plans.
Finally, a quick note to add to your plan: begin at the entrance, buy tickets, and consider the electric train for faster access to the most famous viewpoints on the Brazilian side. The vistas are amazing, and mornings offer softer light for photos. If you want a special day that blends park scenery with city culture, this route is worth the effort. The plan is straightforward, practical, and designed for smooth travel; by following these steps, you’ll avoid delays and enjoy the falls with less stress.
Ticketing, Parking, and Entrance Logistics for Garganta do Diabo
Purchase tickets online in advance and select an earlier time slot to make the visit easier and to avoid crowded queues during peak months.
Ticketing options on the official site include single-entry passes and combination experiences. Price varies by age and country of residence, with exchange rates available at checkout. The site accepts cards and cash, and the counter at the entrance can process exchanges for nearby networks if necessary.
Parking near the entrance is limited. Lot A sits closest to the Brazil-side entry, while Lot B is about a kilometre away along a walkable path. Expect hourly rates, with payment possible at the booth or via a mobile app. Plan for 1–2 hours if you want to explore both circuits and the lookout points without rushing.
Entrance logistics place you at a controlled gateway for Garganta do Diabo. Gates open early and close in the late afternoon; bring only essential belongings to speed checks, as staff conduct standard security inspections. Have your requirements ready–photo IDs, tickets, and any permitted tech–while keeping belongings compact to avoid intrusive lines. Use the main walkway and circuit route to reach the famous lookout without backtracking.
Local guidance from avid visitors adds value: Silva, a guide from Barroso, suggests starting at the lower circuit lookout to catch the best light, then following the walkways along the main circuit. The route is walkable for most guests, with a comfortable kilometre-scale stretch between lookouts. After the falls, many travelers enjoy a relaxed dinner nearby before departing for the airports or hotels in the country.
| カテゴリー | Recommendation | 備考 |
| Ticketing | Book online; choose morning slot; print or save on phone | Price varies by country and age; exchange available at counter |
| Parking | Use Lot A near entry; Lot B is a short kilometre walk | Pay hourly; app or gate; plan 1–2 hours |
| Entrance | Arrive early; carry only essentials | Security checks are standard; lookouts along the walkway |
| ヒント | Bring water, wear walkable shoes, consider a dinner stop after | Avid photographers will appreciate early light; Silva recommends route via lower circuit |
The Main Trail: Distances, Prime Viewpoints, and Walking Time to Devil’s Throat
Start at the entrance and walk directly toward Garganta do Diabo; this one-way segment conveniently sets you up for the final platform and definitely feels efficient for most visitors.
悪魔の喉笛へのメインコースは、片道約2kmで、快適なアウトドアペースで歩くと約40〜50分です。 各展望台でゆっくりしたり、たくさんの写真を撮ったりする場合は、最終プラットフォームへの完全なアプローチに60〜90分を見込んでください。
主要な視点と歩行スパン
およそ0.7〜0.9km進むと、最初の展望台から下の滝と、明るい光の中で虹を作る水しぶきの広い景色を眺めることができます。さらに0.5〜0.6km進むと、川と森林に覆われた岸辺のパノラマが広がるトレイル中間の展望台に着きます。
悪魔の喉笛の最後の展望台は、約2km地点にあり、馬蹄形の滝を間近で見られる最高で最も爽快な場所です。ここは誰もが写真を撮る、高く劇的な瞬間であり、そよ風に舞う水しぶきと、残りのトレイルが価値のあるものだと感じさせる劇的なスケールがあります。
ルート沿いには、休憩用の座席や日陰の場所があり、家族連れや暑さや日差しに気を配る人にとって、より快適な散歩になります。移動のニーズについては、ビジターセンターで上部テラスへのエレベーター assisted アクセスについてお問い合わせください。一部のセクションでは、メインデッキへのスロープアクセスまたは代替ルートを提供しています。
午前中に訪れても午後に訪れても、日陰と座席のおかげで一定のペースを保つことができます。展望台からは、北西に広く広がる川と周囲のジャングルが見え、穏やかな時間帯には野生動物の目撃が可能です。距離を示すスペイン語とポルトガル語の標識を探し、特定の停留所の詳細な計画のために地図を手元に置いてください。元気があるなら、それぞれの展望台がアウトドアアクティビティになり、道自体がコンパクトな小旅行になります。
このプランは、あなたのペースと興味に合わせて調整できます。この地域に滞在する場合は、近くのレストランで散策前後に軽食を取ることができます。時間がない場合は、最初の、または2番目の展望台の後で引き返してルートを短縮し、それでも主要な見どころを捉えることができます。
熱帯雨林のウォーキングに何を着て、何を持っていくか
速乾性のあるパンツまたはショーツと、通気性のある防水ジャケットから始めましょう。丈夫で滑りにくいクローズドトゥの靴を履いてください。自転車での移動や、場所から場所への短い乗車を予定している場合は、しっかりフィットする靴を選び、手袋を持参してください。
重ね着が役立ちます。吸湿発散性のあるベースレイヤー、軽いミッドレイヤー、コンパクトなレインシェルです。何を着るかは予報と湿度への耐性によります。朝は涼しく、標高が高いほど急上昇することがあります。雨はすぐに降ってくる可能性があるので、準備しておきましょう。
What to Pack
入り口からは、電子機器用のドライバッグが入った8〜12リットルのデイパックを運びます。飲み物ボトルまたは水分補給システムを詰めてください。60〜90分のウォーキングで少なくとも1.5リットルを目安にしてください。
日焼け止め:帽子、サングラス、日焼け止め。虫除け対策:虫除けスプレー。雨対策:ポンチョ、またはパックにカバーがない場合は軽量のレインジャケット。
携帯電話やカメラ用の防水ケース、予備のバッテリー、エネルギー補給用のスナックバー。
近くに温泉があるので、散歩の後に温泉に行く予定があればタオルを持ってきてください。
国境付近の場所ではペソの現金を持ち歩いてください。公園内でのほとんどの買い物はカードが使えますが、現金のみの露店もあります。宿泊施設と食事については、近くにホテルやレストランがありますので、それに応じて計画してください。
国内外からの訪問者は、入口の外で送迎やタクシーを手配できます。開館時間は季節によって異なります。ほとんどの周回コースは60〜90分かかります。混雑する日もあるので、写真スポットや展望台のために余裕を持って時間を確保してください。
写真のヒント:ブラジル側からイグアスの滝を捉える
ポルトエリアへ日の出直後に行き、跳躍台にかかる鮮明な水しぶきと暖かい光を捉えましょう。高速レンズを用意し、ミストのシャープなエッジを維持するために、頻繁にフィルターの水分を拭き取ってください。撮影の習慣を身につけましょう。数分ごとに光を確認し、撮影前にシーン全体を掃引して、一瞬の虹を見逃さないようにします。
ブラジル側では、トレイルからの視角が限られているため、主要な見晴らし台と内部の樹冠路を回るには60〜90分の周回コースを計画してください。静かな時間帯にスケジュールを合わせるために、更新された公園の開園時間と出発時間を確認してください。日付や天候によって反射具合が異なり、全体的な状況もすぐに変化する可能性があります。ミシオネス地方への旅行を組み合わせる場合は、慎重に調整しつつも、邪魔な混雑を避けるために柔軟に対応してください。各展望台で太陽光を最大限に活用できるように、ルートを計画する上での基礎としてこれを活用してください。
公園内では、主要なプラットフォームの近くは人が多くて邪魔になることがあります。スプレーが噴き出した直後に撮影し、その後、水辺に近い緑豊かな端に足を踏み入れて親密なフレームを狙いましょう。端に沿って生息する猫などの野生生物に注意してください。駐車場は入り口付近にあり便利ですが、シャトルの混雑がピークになる前に戻りましょう。脇道に沿って驚くほど静かなアングルを見つけることができ、足を保護するために快適な靴を履いてきて良かったと思うでしょう。
最高の時間と絶好の場所
プライムライトは夜明け後に発生します。サルトの視点からは、太陽が昇るにつれて虹が見えます。いくつかの展望台からは、水のカーテンの巨大な景色が見え、その後、遊歩道に沿って移動して、滝が森を通り抜けるようにフレームに収めます。非常に劇的なシルエットを撮るには、影が滝に沿って伸びる午前遅く、または午後遅くまで待ちます。内側のループをもう一度通って、木々の間から水の帯を捉えることを検討してください。全体として、いくつかの主要なスポットを選び、軽い三脚を使用して遊歩道での揺れを防ぎながら、常に変化する水しぶきを追いかけるためのスペースを確保してください。
ギア、設定、計画

パノラマには広角レンズ(16-35mm)、水の流れや霧のオーラの細部には中望遠(70-200mm)を使用します。露出はf/8–f/11、ISO 100–200程度に設定します。絹のような水面を表現するには、頑丈な三脚を使用して1〜2秒の露光を試すか、風で水しぶきが舞う場合はより速いシャッタースピードに切り替えます。偏光フィルターは晴れた日のグレアを抑え、NDフィルターは長時間露光を可能にします。RAWで撮影し、アプリを使ってトレイルの地図を作成したり、駐車場の場所を確認したり、日時や出発時刻を追跡したりします。近くに滞在する場合は、2〜3時間の時間枠でゆったりとしたペースで撮影できます。家族向けの旅行の場合は、短い区間に区切り、近くの高級ホテルでの滞在オプションも検討してください。ミシオネス旅行を組み合わせたり、複数の旅行を組み合わせたりすると、より多くの景色と少ない待ち時間で楽しむことができます。最後に、足元をチェックしましょう。一歩下がってスケールを測り、水しぶきから機材を守ってください。


コメント