
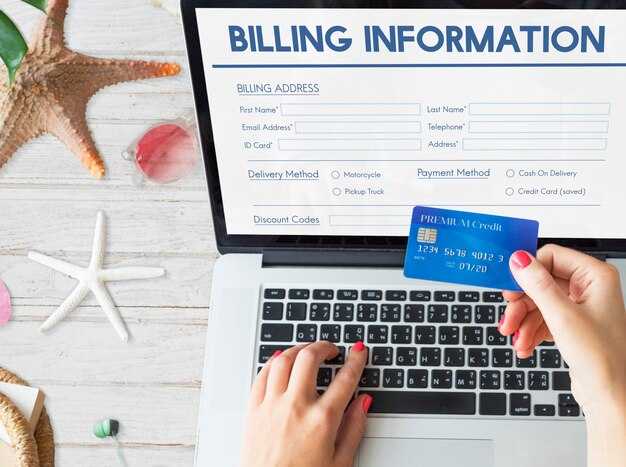
How to Open a Business Bank Account - A Complete Step-by-Step Guide for Small Businesses


Choose a bank that serves startups and small associations, and look for reduced monthly fees or fees waived for the first year. Ensure online onboarding so you can open the account in 3-5 days, even if you operate from home or a flexible workspace. Have your address and legal documents ready to prevent delays.
Compare banks based on the content of their offering, especially software integrations with your accounting and invoicing workflow. Consider the different packages and whether they provide solid onboarding support. If youve already got a stack of tools, ask about integration with your existing software and what data can be migrated. If youve market goods across borders, ask about cross-border fees and the handling of customs when needed. Ensure you can maintain a separate business account to keep personal spend out of the books, and confirm that the bank keeps your records content compliant with tax rules. And compare pricing transparency, because hidden charges add up, especially on cards, transfers, and international payments.
Gather the core documents: articles of incorporation or operating agreement (or bylaws), your EIN, government-issued IDs for signatories, proof of business address, and a brief description of operations for KYC checks because banks want to confirm the legitimate purpose of the account. If youve joined an association, bring governance documents to show responsible ownership and invoicing rules. Prepare a list of authorized signatories so you can open the account in one go and avoid delays.
Run a three-step onboarding: initiate the account online, upload documents, and complete identity checks. Many banks approve within 24-72 hours and ship a debit card in 5-7 days. Set up a small test transaction to confirm invoicing and vendor payments work. If you rely on invoicing, confirm that the bank supports ACH or wire options and that your software can export data in CSV to feed your accounting system. Ensure you allocate permissions so teams have only the access they need; this helps you stay separate from personal activity and keeps you supported by the bank's advisory resources.
Choose the Right Bank and Account Type for Your Business
Open a standard business checking account with a bank that has a nearby branch and a transparent fee schedule. This makes deposits and check processing straightforward, and you can visit the branch if issues arise.
heres a practical checklist you can use to compare options and pick the right fit for your trade and cash flow. youve got to balance cost, security, service, and the tools each bank provides.
Key factors to compare
- Branch network and addresses: aim for a branch within 15 miles, with clear hours and parking. Inquire about the exact addresses and the ability to handle large deposits in person.
- Account types: start with a standard business checking; evaluate a tailored package for cash management or merchant services if you process many card payments. Check what deposits, transfers, and payroll features are included.
- Costs and value: compare monthly maintenance fees, per‑item charges, minimum balance requirements, and any reduced fees when you meet a threshold. Look for included items like a set number of checks, ACH transfers, and online bill pay.
- Security and controls: ensure two‑factor authentication, fraud monitoring, stop‑payment options, and FDIC insurance coverage. Verify the security features on the page and what they actually deliver.
- Convenience and integrations: confirm online and mobile banking availability, multi‑user access, and integrations with your accounting software (QuickBooks, Xero) to save time.
- Support and accessibility: check phone support hours, in‑branch help, and whether you get a dedicated relationship manager if you’re a growing business.
- Documentation and setup: have your EIN, legal business name, formation documents, ownership details, and business addresses ready to fill in. the provided list usually ends with operator or resolution documents; last item is often a simple authorization form.
- Decision guidance: for sole proprietors, a simple checking account may suffice; for LLCs or corporations, open a separate account and obtain an EIN. you cant mix personal and business funds, and keeping them separate makes accounting easier.
- Cash handling features: ask about deposits, cashier’s checks, wire transfers, and any cass features they offer; get exact definitions and any extra costs in writing.
- Return path and settlement times: confirm typical funds‑availability times after deposits and how quickly checks clear–these details affect your day‑to‑day cash flow.
- Compliance and court obligations: if your business involves court orders or liens, confirm the bank’s process for handling such instructions and related documentation.
- Next steps: once you’ve chosen, gather the page of required documents, complete the application, and schedule a visit if you prefer in‑person review of the account controls.
First, shortlist three options based on branch access, fees, and service quality, then visit the closest branch to verify the level of support and the ease of opening the account. youve this time to compare and choose the best fit for your business needs.
Prepare Required Documentation by Entity Type and Jurisdiction
Collect exactly the documents for your entity type and jurisdiction, then tailor a single, well-organized application package. These steps apply to different entity types and jurisdictions.
Entity Type Documentation
Core filings and IDs cover most banks’ needs: Articles of Organization or Certificate of Formation, the Operating Agreement or Partnership Agreement, and the EIN (or state tax ID) for the entity. For corporations, attach Bylaws and a stock ledger; for LLCs, include the registered agent information and a concise ownership summary. Include the owner or managing member(s) passport or other government-issued IDs, proof of address, and a board or member resolution authorizing the account. If you operate a brick-and-mortar shop, attach lease terms or utility bills as proof of business location. If you have business plans, include a concise summary to help the reviewer understand your market approach. This documentation set is limited but still comprehensive, and it helps the best outcome in a single application rather than a second round.
Sole proprietors typically provide a DBA/doing-business-as filing, a government-issued ID, the owner’s EIN (or SSN if allowed), and a current business license. For partnerships, include the Partnership Agreement, EIN, and IDs for all partners, plus any amendments that update ownership or authority. Keep everything organized in named folders, so youre ready to respond to additional requests. Thats why you should maintain a clear structure that matches your setting. If you’re unsure, contact the provider or your Merrill branch to confirm the exact items the bank requires and to avoid delays. If the bank issues orders for additional items, reply promptly. If you have working capital plans or investor notes, include them; provide more detail where relevant.
Jurisdiction-Specific Requirements
State or national rules drive what counts as official documentation. In the US, banks often want proof of registration, a registered business address that matches tax records, and a resolution authorizing the account. In other countries, you may face translation needs, apostille or legalization, and certified copies of charters. Prepare translations by a certified provider and ensure IDs and addresses align with the applicant’s records. Some banks ask for источник of funds documentation, so have bank statements or a business plan that shows the origin of funds ready. If you bank with Merrill, visit a local branch or call the provider to verify the jurisdictional checklist and any localized twists. However, if your setup is unusual, verify directly with the branch. Keep files in a secure, organized folder and label each document with the entity name and jurisdiction to speed the reviewer’s message.
Open the Account: Online Application vs In-Branch – Step-by-Step
Start with Online Application for most registered entities; visit a branch when you require in-person guidance or manage a multi-entity structure. The online path keeps the length of setup short and the flow clear, while a branch visit offers hands-on validation and immediate access to advisors.
Online Application: Step-by-Step
Heres a quick online path flow: open the bank portal, select your business type (registered, LLC, corporation, non-profit), and enter the legal name, DBA if applicable, and business address. Provide the tax ID (EIN) and ownership details for all signers; list the drivers on file; upload corporate documents such as articles of incorporation, operating agreement, bylaws, and, if required, last year’s financial statements. Upload IDs for identity verification; choose account access roles and add authorized users. Review the data, sign electronically, and submit. The bank performs a rapid automated check and may request minor items; you receive a reference number and status updates by email or SMS. If you use a platform like bizee, some checks run in parallel, shortening the total length of the process. Some banks run compliance labs to speed verifications and reduce errors. If your business is owned by several individuals, name the owners clearly. Heres a quick checklist to complete online: check name and structure, verify tax ID, confirm signers and drivers, gather documents, attach IDs, review terms, and confirm funding method.
In-Branch: Step-by-Step
Schedule an appointment or walk in to the nearest branch. Bring originals of articles of incorporation, operating agreement, EIN, and a resolution authorizing the account, plus proof of address for the business. Bring IDs for all signers and a second form if needed. The banker will review the documents, verify identity, and set up account access roles. You can receive account numbers and online login details on the spot or within the same day. In-branch options include access to offers and programs like cash management tools, debit and credit cards, and international account capabilities for trade and cross-border activity. If you operate internationally, discuss tariffs and customs compliance, international transfers, and any associated fees. The branch team can tailor a package to your liability profile and help with risk controls. If your company has multiple owned entities, the staff can link them during the visit. Social channel support and app integration can simplify ongoing access. After approval, apply for cards, checks, and funding as needed; keep copies of signed forms and confirm the expected funding method to avoid delays.
Bottom line: Online applications fit little-to-no-frill accounts with digital features; visit a branch when you need hands-on help, multi-entity setup, or access to in-person advisory for liability management and international trade needs. Compare banks, offers, and tools across channels; frequently check updates on programs and fees to keep costs predictable.
Set Up Access, Cards, and Payment Tools for Your Team
Set up clear access roles and issue team cards now to lock down finances and streamline workflows.
Access and Roles
Define roles and apply least-privilege access: admins manage openings and settings, approvers approve transactions, and team members monitor activity. Use two-factor authentication and centralized control to improve security.
The criteria for access should reflect the activities of your team and your opening case; there, approvals will happen swiftly and traceably.
Keep personal accounts separate from business accounts to avoid cross-subsidizing expenses; this supports clean finances management and reduces risk when audits occur.
Cards and Spending Tools
Issue physical and virtual cards to people who handle expenses, and attach them to specific roles. Set per-card or per-transaction limits, and apply merchant restrictions to prevent personal charges or unauthorized purchases.
For traders or contractors, prefer virtual cards for temporary activities; remove access when projects end to reduce exposure. This flow keeps spend under control and makes reconciliation easier.
Record all transactions from cards to your general ledger so the flow into your accounting software remains clean and the support teams can respond quickly if an issue arises.
Link your cards to your accounting or expense platform; this offers a seamless integration that improves security and shortens reimbursement times. The benefits include better oversight, faster closing, and clearer audits.
International considerations: ensure your chosen tools support international payments and multiple currencies; verify the criteria for cross-border transactions and the security controls that apply to overseas vendors. If there is there an edge case, contact support to ensure smooth operation.
There are practical steps to take when opening accounts: define access windows, set approval thresholds, and document the flow of funds so everyone knows how to proceed, when to escalate, and how to close access when a role ends. This approach yields measurable benefits for your finances and protects the business from security risks.
Review Fees, Limits, and Compliance to Avoid Surprises
Compare fee schedules across banks, and select a checking package that matches your expected transaction volume. Look for a standard plan that clearly lists monthly fees, per-transaction charges, debits, and limits on checks. If youve got third-party processing requirements, confirm whether the bank allows you to bundle services into a single package with a utility or software solution. During the application, have your identity documents ready, along with owner or member details, to speed up approval and prevent delays later.
Clarify compliance steps before you commit: AML/KYC checks, identity verification, and any state filings. Note the data required for your industry, and how long the review window typically takes. Also confirm the expected turnaround for the documents you provide, and whether the bank contacts you via message or secure portal.
Fees, limits, and comparing effectively
List the standard monthly maintenance fee, inactivity fees, and any additional charges for debits, transfers, wires, and checks. Compare around three banks to see which offers the lowest all-in cost for your typical month. Consider third-party processing, if applicable, and whether a bundled package reduces the total cost. Ensure the plan supports your expected transaction mix and is suitable for your industry; a package that covers invoicing or vendor payments can simplify management. Verify daily and monthly caps for debits and transfers, and note any restrictions on card usage or remote deposits.
Compliance steps to stay ready
Prepare identity documents, business license, EIN, and proof of address; keep them ready for future needs. Keep your account owner and member details updated, and maintain standard security practices for staff access using your software. Use the bank app to set alerts for large or unusual transactions so you can manage risk in real time. After submitting the application, save the confirmation number and note the typical length of the approval window; you can reference these in later inquiries. Regularly review changes to fees and limits after updates to the product package or labs feature rollouts; adjustments could affect monthly costs and transaction caps.


