Come modificare l'indirizzo di fatturazione della tua...
Aggiorna ora l'indirizzo di fatturazione per assicurarti che le fatture raggiungano la casella di posta corretta. Mentre modifichi le impostazioni, verifica che la modifica si propaghi a tutti i sistemi connessi che tengono traccia di transazioni e flussi di documenti. Cerca l'icona nella barra in alto e apri la sezione Fatturazione per iniziare.
Passaggio 1: raccogli l'indirizzo esatto nuovo, la ragione sociale, il codice fiscale se necessario ed eventuali indirizzi di fatturazione secondari (utilizzati per il reindirizzamento). Prepara una breve nota per accompagnare le modifiche in modo che colleghi e fornitori comprendano le richieste di aggiornamento.
Passaggio 2: nel portale di fatturazione principale, modifica l'indirizzo. Se il tuo sistema comprende più prodotti, aggiorna il campo in ciascuna area di prodotto. Usa l'icona del profilo o la scheda Fatturazione; se usi Microsoft o altre piattaforme, ripeti l'aggiornamento lì in modo che l'indirizzo sia coerente tra pagamenti e record.
Passaggio 3: propagazione e collegamento tra gli strumenti. Verifica che il nuovo indirizzo sia collegato a repository di documenti come netdocuments e firmatari elettronici come lexsign. Aggiorna eventuali campi dell'indirizzo nei flussi di lavoro di raccolta e nel tuo CRM in modo che la portata delle fatture rimanga coerente con i record dei clienti.
Passaggio 4: convalida generando una fattura di prova. Rivedi l'esempio per confermare che l'indirizzo appaia nell'intestazione e nel contatto di fatturazione. Se hai già in coda fatture pagate, verifica che tali record ora mostrino l'indirizzo aggiornato; registra eventuali problemi in un tracker centrale e inoltrali tramite il tuo comunicatore per garantire una risoluzione tempestiva. Per più reparti, assegna responsabili e imposta un tempo di completamento previsto.
Passaggio 5: notifica alle parti interessate e aggiorna i modelli esterni. Invia un breve avviso a clienti e fornitori tramite e-mail o lo strumento di messaggistica del tuo sistema. Aggiorna i campi languageduration per le notifiche per garantire che gli avvisi corrispondano al nuovo indirizzo. Conserva promemoria sempre attivi per rivedere l'indirizzo ogni anno in modo che rimanga aggiornato.
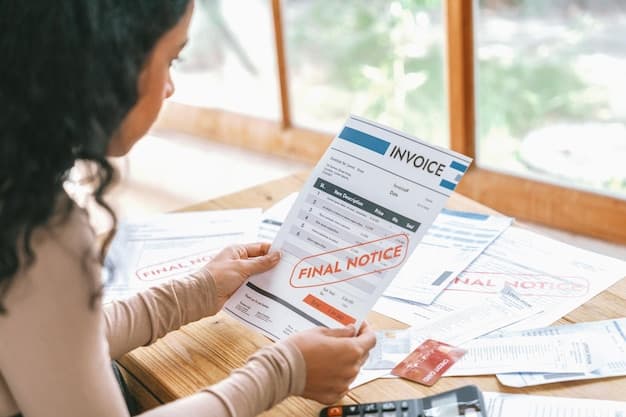
Verifica l'attuale indirizzo di fatturazione sulla tua ultima fattura
Apri l'ultima fattura nel tuo account o recuperarla elettronicamente, quindi confronta il blocco dell'indirizzo di fatturazione con i tuoi record. Questo rapido controllo è una forma di prevenzione contro le fatture indirizzate male e aiuta a garantire che la fattura vada al destinatario corretto. Prendi nota di qualsiasi discrepanza per riferimento e documenta la modifica per il tuo archivio.- Trova l'ultima fattura: accedi al portale di fatturazione, seleziona Fatture, quindi apri la fattura più recente. Annota il numero e la data della fattura come riferimento.
- Individua la sezione Indirizzo di fatturazione sulla fattura. Conferma che via, città, provincia/stato, CAP e paese siano corretti e non troncati. Se l'indirizzo non riflette la tua posizione attuale, aggiornalo nei passaggi seguenti.
- Se puoi modificare direttamente, fai clic su Modifica accanto all'indirizzo, aggiorna i campi e quindi salva. Se devi modificare il profilo, fallo in Preferenze e imposta il nuovo indirizzo come predefinito per le fatture future.
- Quindi rigenera la fattura o visualizzala di nuovo per confermare che le modifiche si propaghino al documento. Se il sistema non consente modifiche dirette, usa il flusso di configurazione per garantire che la modifica si applichi alle fatture successive; altrimenti contatta l'assistenza.
- Verifica la presenza di effetti sulla fattura: eventuali modifiche o note relative all'indirizzo, note di deposito o informative legali. Verifica gli importi e le righe; se le modifiche sono minori, le funzioni del sistema di fatturazione si applicheranno automaticamente, altrimenti richiedi assistenza.
- Salva o esporta una copia della fattura aggiornata e archiviala nei tuoi record. Prima di andare avanti, elimina eventuali duplicati per mantenere il riferimento pulito e sempre attivo per i futuri audit. Questo aiuta nei momenti in cui è necessario mostrare una prova dell'indirizzo.
- Rivedi chi può modificare gli indirizzi: se più utenti accedono al portale, conferma le autorizzazioni e assicurati che gli aggiornamenti siano tracciati nel registro attività. Abilita gli aggiornamenti automatici dell'indirizzo in Preferenze se supportato, rendendo questa una configurazione sempre attiva affidabile.