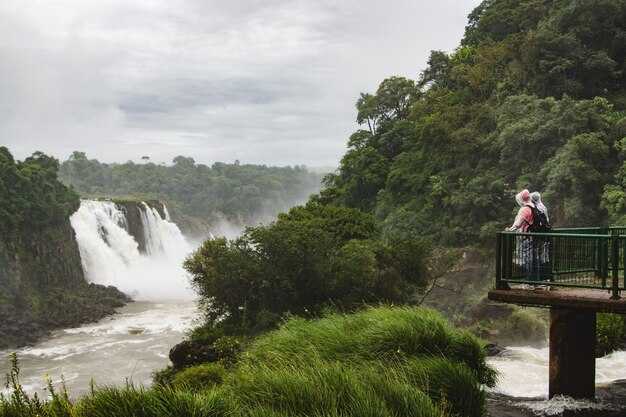
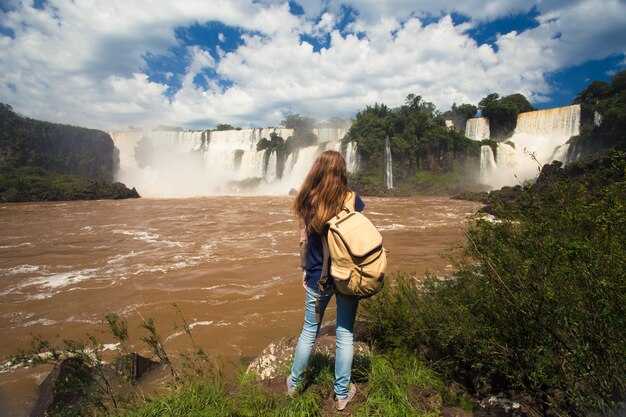
advice: arrive before 9 am to enjoy cooler temperatures and clearer viewpoints on the Brazilian side. If you have arrived, head straight to the upper decks to catch the spray without long lines. Plan your route to maximize short walks between shaded spots and bring a light backpack with sunscreen and a microfiber towel.
Find your base: The belmond Hotel das Cataratas on the Brazilian side offers easy access to the park entry. If you lean toward budget options, frequent hostels around Foz do Iguaçu keep daily costs reasonable. michaela, an australian traveler, says a flexible plan and conversation with staff unlock quiet paths after rain. bring an amount for local taxis or shuttle buses, and reserve a couple of hours for a relaxed morning walk.
What to wear and pack: Wear sturdy shoes with grip for slippery stones. dont forget a lightweight rain jacket; the spray from the falls sticks to everything. Pack a compact poncho, bottled water, and a small power bank for photos. A daily plan helps you hit viewpoints in the best light, especially as temperatures rise.
Plan your route: Start at the main Brazilian circuit and work your way to the Garganta do Diabo overlook. Use the park shuttle to hop between trailheads, especially in peak heat. Look for wildlife, like toucans and coatis, along shaded stretches. A well-timed visit in the morning or late afternoon yields better lighting for photos.
Practical tips: Bring protection for cameras; the spray can fog lenses. dont rely on data connectivity in the park; download offline maps beforehand. The amount of walking is moderate but stairs add up; take breaks and hydrate. Consider a late-afternoon viewpoint, when temperatures drop again and mist creates rainbows.
Best Time to Visit the Brazilian Side for Garganta do Diabo Viewpoints
Plan your visit for May or September and start before 9 a.m. to catch Garganta do Diabo viewpoints on the Brazilian side with soft light and thinner crowds.
In these dry-season months, the wide catwalk stays dry, the air is comfortable, and visibility is best for photography. If you come in summer, be ready for higher humidity and occasional showers that heighten the mist and create dramatic portraits; the views remain powerful, especially in early morning light or late afternoon when the land and forest contrast most.
weve found that morning visits pay off: over the years, travelers have learned to optimize timing by starting early; weekdays are generally calmer; backpackers and local guests mix with day-trippers on weekends, but the quieter hours are still present. To simplify logistics, use rideshare from town to the park entrance, a reliable means to avoid parking hassles. On-site facilities provide a simple lunch option at the gate, but for a fuller meal you can purchase in town or at a nearby mall after your visit. wifi coverage is strongest near the main plaza; along the main catwalks it can be spotty, so download offline maps in advance. At the gate you obtain a map and can purchase tickets online to start smoothly. The Garganta route on the Brazilian side is wide and well-maintained, with viewpoints that place you between the spray and the forest land; some overlook on the opposite bank offer a different perspective if you plan a separate day trip to the Argentine side.
Timing and viewpoints
- Start early: aim for 7:00–9:00 a.m. to beat crowds and catch the best light.
- Prefer May or September for lower rainfall and comfortable temperatures, with strong water flow still present.
- Choose weekdays when possible; weekends draw backpackers and families, increasing crowding at key lookouts.
- Check the weather and park alerts the night before; morning mists can affect visibility if you start too late.
Practical planning

- Wear sturdy shoes for a wide, well-maintained path that remains mostly flat but can be slick after rain; plan for tiny spray droplets on skin and glasses.
- Pack light rain gear, sunscreen, and a small backpack; dorm-style hostels around town offer budget options if you’re traveling with a group.
- Purchase tickets online in advance to start your day smoothly; at the gate you can obtain a map and you’ll see coverage updates on-site.
- Use rideshare means to reach the entrance; it’s a common, cost-effective option for solo travelers and groups.
- Be mindful of wifi coverage: stay offline with maps if the signal is weak on the trails; download the route beforehand.
- Consider adding a second day to explore the Argentine side for a fuller variety of viewpoints between the two countries.
Getting There: From Foz do Iguaçu to the Brazilian Park Entrance
Varaa yksityinen kuljetus or use a reliable taxi to reach the Brazilian Park Entrance quickly. From Foz do Iguaçu to the entrance, expect about 25–30 km of road, 30–45 minutes in light traffic; peak times can stretch it to 60 minutes. If you arrive via the IGU airport or other area airports, a pre-booked shuttle or taxi offers door-to-gate service, saving you stops and backtracking. Here’s a practical approach that keeps everyone on track.
Two solid ride options: private transfer or public bus
Option A: Private transfer. A driver waits in the arrivals hall at IGU or at your hotel and delivers you directly to the Park Entrance. Expect to pay around R$80–120 one way, depending on your hotel location and traffic; it’s better to pay a bit more for reliability, especially with kids or a lot of gear. If you’re traveling with others, the per-person cost drops and the space helps you pack everything you need. Passengers appreciate the convenience after travel, and the driver can stop for a quick photo along the road if you ask.
Option B: City bus. From downtown Foz, Bus 120 Cataratas runs roughly every 30–40 minutes and stops at the park gate. The ride takes about 60–75 minutes and costs around R$5–7. Board at the Terminal de Ônibus or at major urban stops; you’ll avoid parking hassles but share the ride with other passengers. If you missed the first bus, there are later departures–check the current timetable at your hotel or the terminal; plan to arrive early to beat the heat and crowds. Instead, if you’re on a tight budget, this is a better choice for the day.
There, crossing to the argentinean side is optional but can be a good complement in a full day. If you decide to cross, bring your passport and be prepared for customs checks; plan a separate entry and exit window, and note that afternoon temperatures can rise a few Fahrenheit degrees. If you want to explore ciudad neighborhoods on the other side, do it after you finish here and return for the Brazilian gates.
Practical packing and planning: pack light, leave bulky bags at the hotel if possible, and carry a small water bottle; the weather on the Brazilian side is sunny most days. In summer, temperatures often peak in the 80s or 90s Fahrenheit, so sunscreen, a hat, and a light jacket for cooler mornings help. The entry plaza is a short walk from the bus stop, but you’ll do more walking inside the park beyond the gate. Here, the shortest walk from the gate to the main outlooks takes about 15–25 minutes. If you’re touring with kids, pace yourself and add rests; everyone benefits from a relaxed rhythm. Create a simple itinerary list to guide your day, then review it at the bus stop to learn about current conditions and time windows, and leave some buffer for unexpected stops with others who share tips and plans.
Finally, a quick note to add to your plan: begin at the entrance, buy tickets, and consider the electric train for faster access to the most famous viewpoints on the Brazilian side. The vistas are amazing, and mornings offer softer light for photos. If you want a special day that blends park scenery with city culture, this route is worth the effort. The plan is straightforward, practical, and designed for smooth travel; by following these steps, you’ll avoid delays and enjoy the falls with less stress.
Ticketing, Parking, and Entrance Logistics for Garganta do Diabo
Purchase tickets online in advance and select an earlier time slot to make the visit easier and to avoid crowded queues during peak months.
Ticketing options on the official site include single-entry passes and combination experiences. Price varies by age and country of residence, with exchange rates available at checkout. The site accepts cards and cash, and the counter at the entrance can process exchanges for nearby networks if necessary.
Parking near the entrance is limited. Lot A sits closest to the Brazil-side entry, while Lot B is about a kilometre away along a walkable path. Expect hourly rates, with payment possible at the booth or via a mobile app. Plan for 1–2 hours if you want to explore both circuits and the lookout points without rushing.
Entrance logistics place you at a controlled gateway for Garganta do Diabo. Gates open early and close in the late afternoon; bring only essential belongings to speed checks, as staff conduct standard security inspections. Have your requirements ready–photo IDs, tickets, and any permitted tech–while keeping belongings compact to avoid intrusive lines. Use the main walkway and circuit route to reach the famous lookout without backtracking.
Local guidance from avid visitors adds value: Silva, a guide from Barroso, suggests starting at the lower circuit lookout to catch the best light, then following the walkways along the main circuit. The route is walkable for most guests, with a comfortable kilometre-scale stretch between lookouts. After the falls, many travelers enjoy a relaxed dinner nearby before departing for the airports or hotels in the country.
| Luokka | Recommendation | Muistiinpanot |
| Ticketing | Book online; choose morning slot; print or save on phone | Price varies by country and age; exchange available at counter |
| Parking | Use Lot A near entry; Lot B is a short kilometre walk | Pay hourly; app or gate; plan 1–2 hours |
| Entrance | Arrive early; carry only essentials | Security checks are standard; lookouts along the walkway |
| Vinkkejä | Bring water, wear walkable shoes, consider a dinner stop after | Avid photographers will appreciate early light; Silva recommends route via lower circuit |
The Main Trail: Distances, Prime Viewpoints, and Walking Time to Devil’s Throat
Start at the entrance and walk directly toward Garganta do Diabo; this one-way segment conveniently sets you up for the final platform and definitely feels efficient for most visitors.
Pääreitti Pirunkurkkuun on noin 2 km yhteen suuntaan, ja mukavalla ulkoiluvauhdilla kävelyyn kuluu noin 40–50 minuuttia. Jos aiot viipyä jokaisella näköalapaikalla ja ottaa runsaasti valokuvia, varaa 60–90 minuuttia koko matkaan lopulliselle tasanteelle.
Ensisijaiset näkökulmat ja kävelyetäisyys
Noin 0,7–0,9 km:n jälkeen ensimmäinen näköalapaikka tarjoaa laajan näkymän alemmille kaskadeille ja sumulle, joka luo sateenkaaria kirkkaassa valossa. Jatkamalla 0,5–0,6 km pääsee polun keskiosan tasanteelle, josta avautuu laajempi panoraama joen ja metsäisten rantojen yli.
Viimeinen Garganta do Diabo -plattformi saavuttaa noin 2 km:n kohdan, tarjoten korkeimman ja jännittävimmän lähikuvan hevosenkengän muotoisesta vesiputouksesta. Tämä on se korkea ja dramaattinen hetki, jonka kaikki valokuvaavat, sumua tuulessa ja dramaattinen mittakaava, joka saa muun reitin tuntumaan vaivan arvoiselta.
Reitin varrella on levähdyspaikkoja penkein ja varjoin, mikä tekee kävelystä mukavampaa perheille ja kaikille, jotka ovat tarkkana auringon tai kuumuuden suhteen. Liikkumisrajoitteisten kannattaa kysyä vierailijakeskuksesta hissillä avustettavaa pääsyä ylemmille terasseille. Joissakin kohdissa on rampilla varustettu pääsy tai vaihtoehtoisia reittejä pääkannelle.
Kävitpä aamulla tai iltapäivällä, varjo ja istuimet auttavat sinua pitämään tasaisen vauhdin. Näköalapaikoilta näet joen leviävän leveänä luoteeseen ja ympäröivän viidakon, jossa villieläimiä voi nähdä rauhallisempina tunteina. Etsi espanjan- ja portugalinkielisiä kylttejä, jotka merkitsevät etäisyyksiä, ja pidä kartat käden ulottuvilla yksityiskohtaista suunnitelmaa varten tiettyjä pysähdyksiäsi varten. Jos tunnet olosi energiseksi, jokaisesta näköalapaikasta tulee ulkoilma-aktiviteetti, joka muuttaa polun itsessään kompaktiksi retkeilyksi.
Tämän suunnitelman voit räätälöidä omaan tahtiisi ja kiinnostuksiisi sopivaksi. Jos oleskelet alueella, lähellä olevat ravintolat tarjoavat nopeita purtavia ennen kävelyä tai sen jälkeen; jos sinulla on kiire, voit lyhentää reittiä kääntymällä takaisin ensimmäisen tai toisen näköalapaikan jälkeen ja napata silti olennaiset kohokohdat.
Mitä pukea päälle ja mitä pakata mukaan sademetsäkävelyille
Aloita nopeasti kuivuvilla housuilla tai shortseilla ja hengittävällä, vedenpitävällä takilla; käytä tukevia, umpinaisia kenkiä, joissa on hyvä pito. Jos suunnittelet pyöräsiirtoa tai lyhyttä pyöräilyä paikasta toiseen, valitse jalkineet, jotka istuvat tukevasti, ja ota mukaan käsineet.
Kerrospukeutuminen auttaa: kosteutta siirtävä aluskerrasto, kevyt välikerrasto ja pieneen tilaan pakkautuva kuoritakki. Pukeutuminen riippuu sääennusteesta ja omasta sietokyvystä kosteudelle; aamut ovat viileämpiä, ja lämpötila voi nousta nopeasti korkeammalla. Sade voi alkaa nopeasti, joten ole valmis.
Mitä pakata
Kanna sisäänkäynnistä 8–12 litran päiväreppu, jossa on kuivapussi elektroniikalle. Pakkaa juomapullo tai nesteytysjärjestelmä; pyri vähintään 1,5 litraan 60–90 minuutin kävelyä varten.
Aurinkosuoja: hattu, aurinkolasit, aurinkovoide. Hyönteissuoja: hyttyskarkote. Sateensuoja: poncho tai kevyt sadetakki, jos repussasi ei ole suojaa.
Vedenpitävä kotelo puhelimelle tai kameralle; varaparistot; energiapatukka.
läheltä löytyy lämpimiä lähteitä, joten ota pyyhe mukaan, jos kävelyn jälkeen on tarkoitus vierailla lämpimissä lähteissä.
Pidä käteistä pesoina rajan lähellä olevia paikkoja varten; useimmat puiston sisällä olevat ostokset hyväksyvät kortit, mutta jotkut kojut ovat riippuvaisia käteisestä. Majoitusta ja aterioita varten lähellä on hotelleja ja ravintoloita; suunnittele sen mukaan.
Kansalliset ja kansainväliset vierailijat voivat järjestää kuljetuksia ja takseja sisäänkäynnin ulkopuolella; aukioloajat vaihtelevat vuodenajan mukaan. Useimmat kierrokset kestävät 60–90 minuuttia; vilkkaita päiviä on, joten varaa ylimääräisiä minuutteja valokuvauspaikoille ja näköalapaikoille.
Valokuvausvinkkejä: Iguazun putousten kuvaaminen Brasilian puolelta
Suuntaa porttoalueelle aamunkoitteessa saadaksesi raikasta pärskyä ja lämmintä valoa salto-tasanteelle; pidä nopea objektiivi valmiina ja pyyhi kosteus suodattimestasi usein, jotta sumun reunat pysyvät terävinä. Kehitä kuvaustottumuksia: tarkista valo muutaman minuutin välein ja pyyhkäise maisema ennen sitoutumista, jotta et menetä ohikiitävää sateenkaarta.
Brasilian puolella polut tarjoavat rajoitetusti katselukulmia, joten suunnittele 60-90 minuutin kierros, jotta ehdit ydinpaikoille ja sisäisiin latvuspoluille. Tarkista puiston päivitetyt aukioloajat ja lähdöt, jotta aikataulusi osuu hiljaisempiin hetkiin; päivämäärä ja sää muokkaavat heijastuksia, ja yleiset olosuhteet voivat muuttua nopeasti. Jos yhdistät misiones-matkoja, koordinoi huolellisesti, mutta pysy joustavana välttääksesi tunkeilevia väkijoukkoja. Käytä tätä pohjana reittisi suunnittelussa, jotta voit maksimoida auringonvalon jokaisessa näköalapaikassa.
Puiston sisällä väkijoukot voivat olla häiritseviä pääalustojen lähellä; pyri ottamaan kuvia heti suihkun jälkeen ja astu sitten reheville reunoille intiimien kehysten saamiseksi lähellä vettä. Ole tietoinen villieläimistä reunoilla, mukaan lukien kissat. Pysäköinti on kätevää lähellä sisäänkäyntiä, mutta palaa ennen kuin bussikuljetusten ruuhkat saavuttavat huippunsa; olet löytänyt yllättävän hiljaisia kuvakulmia sivupoluilta, ja olet iloinen, että käytit mukavia jalkineita suojataksesi jalkojasi.
Parhaat ajat ja näköalapaikat
Paras valo on aamunkoiton jälkeen; salto-näköalapaikalta näet sateenkaaren auringon noustessa. Joiltakin näköalapaikoilta näet valtavia näkymiä vesiputouksesta, ja sitten voit siirtyä pitkin rantakatua kehystämään putouksia, kun vesi leviää metsän läpi. Erittäin dramaattisia siluetteja varten viivy myöhään aamuun ja uudelleen myöhään iltapäivään, kun varjot venyvät putouksen yllä. Harkitse toista kierrosta sisälenkillä ikuistaaksesi veden nauhat puiden läpi. Kaiken kaikkiaan valitse pari keskeistä paikkaa ja käytä kevyttä jalustaa välttääksesi tärinää rantakadulla, ja jätä aina tilaa muuttuvan sumun jahtaamiseen.
Varusteet, asetukset ja suunnittelu

Käytä laajakulmaobjektiivia (16–35 mm) panoraamoihin ja teleobjektiivia (70–200 mm) vesiputousten ja utuisten aurien yksityiskohtiin. Aseta valotus noin f/8–f/11 ja ISO 100–200; silkkisen veden saamiseksi kokeile 1–2 sekuntia tukevan jalustan kanssa, tai vaihda nopeampiin suljinaikoihin, jos tuuli siirtää sumua. Polarisointisuodin auttaa vähentämään heijastuksia kirkkaana päivänä, ja harmaasuodin pidentää pitkiä valotusaikojasi. Kuvaa raakakuvia ja käytä sovelluksia reittien kartoittamiseen, pysäköinnin tarkistamiseen sekä päivämäärä-/aikaikkunoiden ja lähtöjen seuraamiseen. Jos yövyt lähellä, 2–3 tunnin aikaväli sopii rentoon tahtiin; perheystävällisille matkoille pidä osuudet lyhyinä ja salli ylellinen majoitusvaihtoehto lähellä. Jos yhdistät misiones-matkoja tai yhdistelet matkoja, löydät enemmän maisemia ja vähemmän odottelua. Lopeta tarkistamalla nopeasti jalkasi: ota askel taaksepäin arvioidaksesi mittakaavaa ja suojellaksesi varusteitasi roiskeilta.

 Käytännön opas Iguaçun putousten Brasilian puolelle">

Kommentit