


 Terminal Tips") Mexico City Airport Guide – Benito Juárez (MEX) Terminal Tips">
Mexico City Airport Guide – Benito Juárez (MEX) Terminal Tips">
Time Saver: Book a pickup or hotel shuttle to the arrivals curb—this helps you sidestep taxi queues and gate confusion. If you prefer public transit, the metro is the budget-friendly choice, but keep in mind you’ll need a short transfer from the airport area and some extra travel time.
Terminal Layout for Travelers: Terminal 1 and Terminal 2 each have separate check-in zones, but clear signs guide travelers toward security and gates. In both terminals you’ll find large food courts, reliable Wi-Fi, and easy access to baggage claim. The placement of escalators and seating areas helps you move efficiently, and staff can point you to the right airline counter if you need assistance. Your travel route depends on your arrival time.
Baggage and Reservations: Use self-check kiosks to reserve seats or lounge access; there are several great options in both terminals, including quiet zones near the gates. Keep essential items in a small bag next to your carry-on so you’re not searching during security, and take advantage of the large duty-free selection that opens early.
Getting Around After Landing: Rideshares and authorized taxis line up at the curb; many travelers rely on them for predictable pricing. From the Buenavista station, you can catch the metro to reach central Mexico City. The route passes the Zócalo area and other historic districts; plan for traffic, especially during peak hours, whether you’re traveling solo or with family.
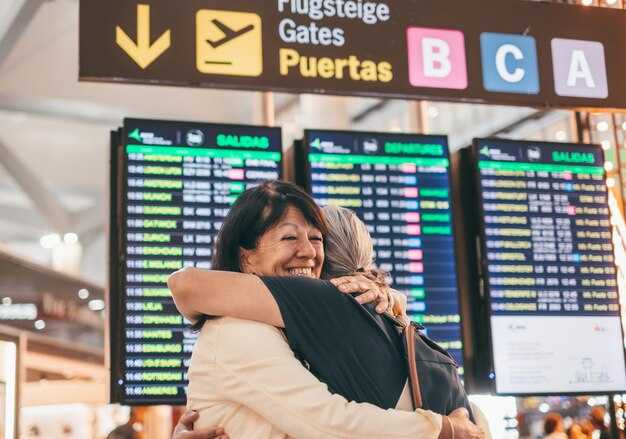
Today’s Reality: Many travelers arrive with reservations in hand but still need to locate their vehicles or rideshare pickups. If you’re visiting Mexico City, consider a short stroll along the coastal-inspired cafés near Reforma before your next flight.
MEX Terminal 1: Check‑in, security lanes, and baggage drop
Arrive 3 hours before international flights and 2 hours before domestic ones at MEX Terminal 1. Use self-service kiosks to print boarding passes and bag tags, then head to baggage drop to minimize queuing. This smart and practical approach saves time and keeps you moving through the terminal; knowing what to expect helps you stay calm, and it’s doable even on busy days. This plan offers plenty of comfort for travelers.
Check-in and Bag Tagging
Here are three steps to speed up the process. Self-service kiosks line the central hall on Level 1, beneath the glass roof. If you have a card linked to your airline profile, you can pull up your booking in seconds and print a bag tag. If you need help, counters are staffed, but expect longer lines during busy hours. The advantage of kiosks is speed and flexibility; check-in is faster during off-peak times. After tagging your bag, place it on the conveyor belt and proceed to security.
Security Lanes
The security area is along the main corridor; expect long lines during peak and popular hours. Have your liquids packed in a single clear bag, remove laptops, and keep your passport and boarding pass handy. On busy weekday mornings, queues can be long; at other times, you’ll get through faster. If your airline offers a dedicated or expedited lane, you can use it; otherwise, standard lines apply. The area is lively—a bustling hub of people moving toward the gates. Stay steady and move with purpose. Before security, prep your items to speed things along.
Baggage Drop
After check-in, head to the baggage drop zone near the main hall. Staff will scan your bag tag and route bags onto the conveyors. If you’re traveling carry-on only, you can skip this step. For larger bags, arrive at least 60 minutes before international departures or 45 minutes before domestic flights to ensure your luggage makes it on board. If you’re traveling tomorrow, plan accordingly and allow extra time for possible queues. At the information desk, staff can point you to the correct baggage belt and answer questions. For today’s travelers, this path saves time and helps you reach your gate stress-free—with careful planning and a calm pace. This option is sure to help many travelers.
MEX Terminal 2: Check‑in, security lanes, and baggage drop
Arrive at Terminal 2 at least two hours before domestic departures and three hours before international flights. With your ticket in hand, head to your airline’s designated check-in zone and use the self-service kiosks to print boarding passes and attach luggage tags. From there, you can proceed to the luggage drop and check any bags you don’t want to carry through security. Signs are clearly posted in English and Spanish, and staff are available at every step to assist you. If you’re traveling with others, consider making a quick plan to split up and tackle different lines to save time—especially on Sundays, when crowds tend to grow. Have your information ready to keep queues moving smoothly, and you’ll breeze through this part of your trip with minimal stress.
Check‑in flow
Enter Terminal 2 and choose the counters or kiosks marked for your airline. The best option for speed is to use the self-check-in kiosks—use them if you have a ticket or e-ticket. Have your passport or ID, ticket, and any visas ready. At the counters, present your boarding pass and confirm your seat; if you’re traveling with others, you can coordinate with the agent to check in everyone’s documents in one go, saving you valuable minutes. If you need to keep certain items in your carry-on, be aware of restrictions and dispose of any prohibited items before you reach security to avoid delays. After check-in, in most cases you’ll proceed directly to the luggage drop or the security corridor, depending on where your airline directs you. Flight information and current queue lengths are displayed, so you can estimate how long the process will take.
Security lanes and baggage drop
There are three main security lanes at the Terminal 2 entrance: standard, priority for premium passengers, and a lane optimized for families with children; their frequency adjusts based on passenger volume. At security, present your boarding pass and ID, remove large electronics, and place your carry-ons on the conveyor belt. Use the bins to dispose of any prohibited items, and keep bulky items out of your pockets to speed up the process.
There is a dedicated baggage drop near the security area for checked luggage, and you can see the belt number on the screen before you proceed. If you’re arriving or departing by car, you can use the clearly marked drop-off and pick-up lanes at the curb, which include separate zones for taxis and ride-hailing services. These routes help you avoid unnecessary detours, allowing you to get through the drop-off area in just minutes.
Before moving on, make sure you have all essential documents and any additional information handy to share with staff if needed—this helps reduce back-and-forth and keeps things flowing smoothly. On Sundays, crowds can make lines longer, so try to arrive early and take advantage of faster lanes when available.
Interterminal Transfer: Walking routes and transfer times between T1 and T2
Take the Interterminal Connector as your first option between T1 and T2. This amazing, affordable walking route keeps you inside the airport, so you avoid external transport and extra fees. The path is airport-operated, well marked, and takes about 15 minutes at a comfortable pace—10 to 12 minutes for brisk walkers and up to 20 minutes if you’re traveling with heavy luggage or lots of bags. This route is well known by frequent travelers for its consistency and ease, making it ideal for next-day connections or quick transfers when timing is tight. See the details below to plan your transfer and to explore the two practical routes available along with their conditions.
- Route overview: Start at T1 in the central concourse, follow the Interterminal Transfer signs toward the connector, and walk the flat, covered corridor to T2. The distance is around 1.2 km, with clear floor signs and occasional seating along the way.
- Route options: Route A goes straight via the main Interterminal Connector corridor; Route B adds a short detour through a secondary concourse area to enjoy brighter lighting and additional rest spots. Both routes end in T2’s departures hall.
- Estimated times: About 12–18 minutes at a normal pace; 10–12 minutes if you move briskly; up to 20 minutes with family or lots of luggage (a lot of equipment).
- Practical notes: The walk works well even with big crowds, offers ample shade inside the connector, and is accessible for strollers and wheelchairs. Also, some wayfinding decals include Puebla area references to help with orientation.
What to expect on the interterminal walk
Signs clearly indicate “Interterminal Transfer” and guide you along a single, straight corridor. The atmosphere is well known for its predictable conditions: clean, well-lit, and staffed with helpful personnel if you need assistance. This method reduces transfer times and offers a stress-free experience—ideal for travelers who want to quickly see their options between T1 and T2. If you’re early, you might enjoy a calm journey with little wait; if you’re tight on time, move briskly and check the details on the signs to avoid hesitation. For a closer look at the route, keep an eye on nearby signs and the location markers near the Puebla area displayed on the floor maps.
Practical tips and timings
- No ticket is required for this interterminal transfer; you stay within the airport’s internal transfer zone.
- Remember to allow extra time in your planning (around 5–10 minutes more) if you’re traveling with kids or heavy bags; this helps you stay on schedule and prevents stress during your journey.
- If you need assistance, Frida and Felipe at the information desks are known to help quickly with directions and signage; they can point you toward departures and well-known locations in each terminal.
- During busy periods, be prepared for crowding near peak times; otherwise, the estimated travel time remains stable, and the route stays safe and very convenient for transferring.
Location details: Start at Terminal 1 central concourse, follow the Interterminal Transfer signage, and end in Terminal 2 departures or arrivals depending on your next gate. Conditions such as weather do not affect the covered connector; however, brief open-air segments may influence comfort if you take a short detour for photos. This well-known and widely used option offers an efficient and familiar experience for many travelers; watch for signs for directions and details, and don’t forget to plan for tomorrow or early the next morning depending on your schedule and plans.
Ground Transportation: Getting to the city, rideshares, and taxis
Official taxis and fixed rates
Take an official taxi from the airport’s fixed-rate desk to the city center; it’s the simplest and most predictable option with upfront pricing. At Terminals 1 and 2, follow signs to the Authorized Taxi counters; an agent assigns a driver and prints tickets with the exact fare. The desks—located near baggage claim—display the fare for each zone. Typical fares to the Centro Histórico range from MXN 250–320; to Polanco, MXN 320–420. Rates are zone-based and shown at the desk, not influenced by traffic conditions. You can pay with cash or card where accepted, and keep the ticket until you arrive.
If you’re heading directly to a specific destination, tell the desk your direction and address, and they’ll confirm the best route. For comparing fares across locations, data-destination-countrymexique helps align quotes; you can reserve a ticket or arrange a simple transfer. Your ticket is printed at pickup, and if you like, you can grab a quick dessert at a café on the way.
Rideshares and alternatives
Rideshare apps—maybe Uber, DiDi, Beat—offer curbside pickup at the arrivals area. Open the app, enter your destination (for example, Centro Histórico, Roma, or Condesa), and compare price estimates and ETAs. Typical prices to Centro Histórico range from MXN 180–300; to Polanco, MXN 260–450. Surge pricing may apply during busy times. Thanks to live tracking, you can see the car approaching and won’t worry about getting lost; if needed, you can re-route mid-trip. Always verify the car’s license plate and driver’s name in the app before getting in.
Para una opción predecible, reserve un traslado privado a través de su hotel o de una agencia de confianza. Los boletos a menudo se emiten con anticipación y puede reservar para una hora fija. Si tiene un día completo, puede pedirle al conductor que se detenga en algunos restaurantes o sitios interesantes en el camino. Las cosas interesantes para ver en el camino incluyen una parada rápida para tomar un postre y vistas de grandes avenidas ricas en historia. Espere pagar entre MXN 20 y 60 por persona por un pequeño refrigerio, según la distancia.
Lleva un mapa y utiliza el campo data-destination-countrymexique para comparar costos entre sitios y elegir la mejor opción. Si planeas visitar sitios Mayas más adelante, planea tu ruta para minimizar el retroceso y mantener tu horario simple y eficiente. Gracias a la impresionante arquitectura e historia de la ciudad, llegarás listo para explorar.
Alimentos y bebidas: Las mejores opciones y bocadillos rápidos por terminal
Toma un burrito bowl en el mostrador de servicio rápido en la Terminal 1; tiene un buen precio y es la opción más barata para un comienzo rápido y contundente de tu escala. Aquí tienes un consejo: el mostrador cerca de la Puerta 12 facilita la compra y la salida, y el personal te recibe con una sonrisa rápida.
La Terminal 1 mantiene las cosas simples: tazones de burrito, tortas, empanadas, pasteles calientes y una barra de café confiable están a su alcance. Cerca del atrio central, encontrará una fila de mostradores que sirven rápidamente. La ubicación está claramente señalizada y puede pagar con tarjetas o efectivo.
La Terminal 2 ofrece una velocidad similar con una cafetería, jugos frescos, tacos rápidos y bowls para una comida ligera entre vuelos. Con la aplicación de mapas en tu teléfono, puedes navegar por los vestíbulos en segundos. Si necesitas un menú impreso, pregunta a un miembro del personal; normalmente hablan inglés y pueden ayudarte a elegir.
Consejos sobre el tiempo: El tiempo entre puertas te da aproximadamente entre 12 y 18 minutos para una parada de refrigerio, más si haces cola para café, pasteles o una comida para llevar. La duración de un bocado típico es corta, así que planifica escalas largas si quieres sentarte y relajarte un momento.
Otros consejos: Si estás comprando bocadillos de panadería para el avión, revisa primero las opciones más baratas; busca el área marcada como "más barato". Si tienes una escala más larga, puedes planear un futuro viaje a cenotes o reservar alojamiento cerca, teniendo en cuenta la ubicación para facilitar el acceso. Para un viaje rápido a opciones fuera de la terminal, hay taxis disponibles en las paradas designadas; pregunta en el mostrador de información y podrás hacer un plan rápido para maximizar tu tiempo, mientras te mantienes cómodamente cerca de tu puerta.
Comodidades y conectividad: Wi-Fi, carga, salones y baños
Conéctese al Wi-Fi MEX gratuito a los pocos minutos de su llegada e inicie sesión con su teléfono para comenzar a navegar; esta conveniente red mantiene a los viajeros conectados mientras se desplazan entre las puertas. Los letreros en inglés y español con iconos claros le ayudarán a encontrar enchufes, baños y salas de espera cerca de las áreas de espera, y el sistema funciona en todas las zonas del aeropuerto. La sesión básica dura sesenta minutos; hora tras hora, puede volver a conectarse para obtener tiempo adicional si es necesario. Esta sencilla configuración es ideal para una variedad de itinerarios y ofrece tranquilidad gracias a una conectividad fiable. Si desea acelerar las cosas, tómese un momento para localizar una estación de carga cerca de su puerta y mantenga sus dispositivos encendidos mientras espera.
Conceptos básicos sobre wifi y carga
Hay tomas de corriente disponibles en la mayoría de las áreas de asientos; lleve un banco de energía compacto y utilice cables USB-C o USB-A para mantener sus dispositivos cargados durante una escala. En las zonas premium, encontrará más enchufes y, a veces, carga rápida USB-C cerca de las mesas. El método es sencillo: conéctelo, verifique el indicador de carga y vuelva a sus actividades en cuestión de minutos. La señalización utiliza fuentes e iconos claros, lo que hace que la conectividad sea conveniente para todos los viajeros, con instrucciones en varios idiomas. El sistema le permite agregar tiempo adicional en línea con solo unos pocos clics si necesita más minutos.
Salas de estar, baños y navegación
Las salas VIP ofrecen gran comodidad y espacios más tranquilos; las opciones de acceso incluyen pases de un día, membresías de aerolíneas o entrada de pago a la sala VIP, así que asegúrese de comparar las opciones antes de ir. Los baños están distribuidos por ambas terminales, con estaciones para cambiar pañales en las áreas familiares y accesorios sin contacto en las zonas de mucho tránsito. Para obtener indicaciones, consulte el mapa del aeropuerto o pregunte al personal del aeropuerto; si se encuentra con un guía útil como Felipe, él podrá indicarle la toma de corriente o el baño más cercano. Durante las horas pico, siga las señales azules de servicio y llegará a su puerta de embarque con minutos de sobra, todo mientras disfruta de las comodidades que hacen que su tránsito sea más placentero.
Consejos de navegación: Mapas, señalización y mesas de ayuda en MEX
Toma un mapa en el mostrador de información cerca de la estación Benito Juárez al llegar, luego usa una copia digital del sitio web para orientarte rápidamente.
Mapas y señalización en MEX
Utilice la señalización bilingüe que le dirige a llegadas, salidas y traslados. Los mapas de la zona muestran las ubicaciones de la Terminal 1 y la Terminal 2, con tres zonas para ayudarle a planificar su ruta. Lo mejor es empezar en el mostrador de información, recoger un mapa y, a continuación, utilizar el sitio web para descargar una copia sin conexión. Si su vuelo llega un jueves o durante un día con cambios de puerta, las pantallas se actualizan cada pocos minutos. Para las excursiones a Tulum u otros destinos, los mapas destacan la estación más cercana y el mejor camino para las conexiones de tren o metrobús. La señalización mexicana suele utilizar zonas codificadas por colores; preste atención a las flechas claras que señalan la terminal correcta. Guarde una copia impresa en su bolsillo, incluso si confía en el sitio web, para tener una copia de seguridad cuando no tenga equipaje o necesite moverse rápidamente entre terminales. Para los vuelos, siga las indicaciones hasta la ubicación correcta y lea las flechas para confirmar su ruta.
Mesas de ayuda y consejos prácticos
En caso de duda, acércate a un mostrador de información en Llegadas o cerca de seguridad. El personal bilingüe allí puede imprimir un mapa, explicar la distribución o enviarte indicaciones por correo electrónico. Solicita un mapa de tu área de puerta; esto facilita la navegación por un camino específico. Si viajas ligero sin equipaje, puedes moverte más rápido por la terminal, pero ten a mano tu pasaporte y tarjetas de embarque; los horarios y los cambios de puerta pueden cambiar rápidamente. Consulta el sitio web para conocer los horarios de salida actuales y prepárate para cambiar de puerta si es necesario. Para destinos como Tulum, una revisión rápida de tres rutas (tren, metrobús o taxi) a menudo puede ahorrarte tiempo y dinero.
| Recurso | Ubicación | Notas |
|---|---|---|
| Mapas | Mostradores de información, llegadas y zonas de seguridad | Impreso y digital; use lutiliser para descargar copias sin conexión |
| Señalización | Señales aéreas y de pared en todo T1 y T2 | Codificado por color según el área; siga las flechas hasta el emplazamiento |
| Mesas de ayuda | Mostradores de información, Terminal 1 y 2 | Asistencia en inglés/español; los horarios varían, actualizaciones de los jueves |
| Enlaces de transporte | Áreas de estaciones para tren y metrobús | Elige entre tres opciones para llegar a la ciudad; consulta el sitio para ver los horarios |
| Guía de Vols | Paneles cerca de las salidas | Busca vuelos; planifica la conexión para tu próximo viaje |
Comentarios