
Car Repair and Servicing - Essential Tips for Reliable Vehicle Maintenance

Check oil level and tire pressure before every trip. Looking for leaks, worn belts, and low fluids is quick and saves time on the road.
Set a policy for maintenance and reserve calendar slots for service visits. Prior to busy driving seasons, review the service history and align with a trusted shop. This team of technicians stays on track and works to avoid gaps in coverage, tailoring checks for different models.
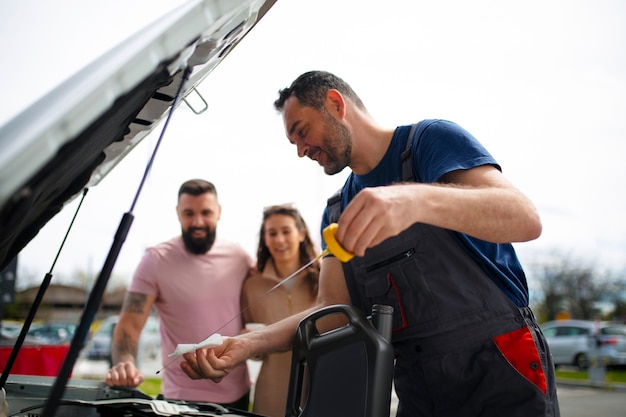
Schedule inspections every 5,000–7,500 miles or six months, whichever comes first. During these checks, they examine brakes, belts, hoses, coolant, battery, and fluids, and they document findings with photos for your records. If you drive for taxis or ride-hailing fleets, keep these notes handy for decisions after a meeting with the mechanic.
Inspect seats and seatbelts, especially on longer drives or sightseeing trips. Check seat cushions for wear, adjust front seats and mirrors, and verify that child seats or cargo restraints fit securely. For drivers in busy areas, this routine improves comfort and safety for all passengers, including those in taxis.
Maintain a simple record system and use a trusted источник for parts and service intervals, so you can reuse notes across times and vehicles. For insurance, keep proof of regular inspections and repairs; this helps after claims. If you manage more than one car, invite your team to review the schedule during a monthly meeting to stay aligned.
Car Repair and Servicing: Practical Tips for Reliable Vehicle Maintenance; Pack sturdy shoes for winter travel
Check tire tread and pressure now; carry a spare tire and a compact inflator in the pick-up for winter travel, and set a baseline for pressure to prevent surprises on icy roads.
- Eight-point pre-trip check: verify battery health, inspect tire condition, confirm fluid levels (oil, coolant, brake fluid, windshield washer), test exterior and interior lights, evaluate brakes and wipers, ensure HVAC conditioning functions, and assemble an added emergency kit for the road.
- Battery and charging: clean any corrosion on terminals, measure system voltage (aim for 12.6–12.8 V when engine is off), and replace if readings stay under 12.4 V. A healthy battery boosts confidence during cold starts and helps you avoid stranded mornings on thousands of miles of winter routes.
- Tires and grip: inspect tread depth (most vehicles should not dip below 6/32 in for winter), check sidewalls for cracks, adjust inflation to the vehicle tag, and carry a portable tire inflator. If you expect a long ferry or train leg, consider snow chains where allowed and verify local rules before departing.
- Cooling and heating conditioning: top up coolant with the correct mix (50/50 unless specified otherwise), check radiator hoses for cracks, and ensure the radiator cap seals firmly. In swedish and copenhagens winters, a reliable cooling system aids defogging and keeps the engine at a stable temperature, reducing overheating risk on long drives.
- Fluids and filtration: check engine oil level and viscosity per manual, replace oil if it’s dark or thick, test brake fluid for moisture, monitor transmission fluid color and level, and fill washer fluid to cope with glare and salt spray. Following these checks minimizes surprises in unfamiliar places like airport corridors or busy terminal lots.
- Visibility and weather readiness: inspect headlights, taillights, and signal lights; replace worn blades and test defrosters; keep a small ice scraper and a compact towel to clear mirrors. You shouldn’t ignore warning lights; addressing them early preserves safety in crowds of travelers and reduces risk at remote fuel stops.
- Winter-pack readiness: pack sturdy shoes for winter travel, a compact shovel, traction mats, a flashlight, and a first-aid kit. Also include a high-visibility vest, a thermal blanket, and a basic toolkit. An insured roadside aid plan adds peace of mind, and a weather-aware driver can handle added delays with calm. If you’re willing, add a high-efficiency battery jumper and a small bottle of coolant additive to cover sudden needs on thousands of miles.
- Trip planning and documentation: prior to departure, map your route with a reliable service network, check ferry and train times, and verify airport shuttles or pickup options. Send yourself a confirmation email with service tickets, keep printed copies for the car, and set reminders to recheck fluids 2–3 days before each leg. If you’re in the world of long-haul travel, a quick WhatsApp or email chat with a local shop can prevent last-minute detours.
Winter-Travel Toolkit
- Boost-tested jumper cables and a portable inflator
- Thermal blanket, gloves, and sturdy snow boots
- Ice scraper, de-icer, and small shovel
- High-visibility vest and reflective triangles
- Emergency contact list and spare service tickets
- Owner’s manual and proof of insurance
Whats next: settle on a routine that fits prior to departures, build up a routine that travelers seeking reliability can rely on, and avoid delays by keeping a steady maintenance cadence. This approach boosts confidence, helps thousands of miles feel manageable, and makes winter driving less stressful for drivers, passengers, and pickup crews alike.
Pre-trip vehicle inspection checklist: tires, brakes, lights, and fluids
Start with a ready-to-drive check: inflate each tire to the vehicle’s cold PSI from the door-jamb sticker, verify tread depth at least 2/32 inch (1.6 mm), and confirm the spare is present with a usable jack and lug wrench. Use a reliable gauge, inspect for bulges or nails, and check valve stems. If youre planning an international trip or rides between residence and work, this thorough routine saves time and keeps you seamlessly on the road. whats more, assess the battery’s last replacement date, clean corrosion from terminals, and test it with a meter; add an optional health check if you have the tools. In stockholm winters, a sturdy setup matters, so check for frayed cables and consider a quick load test. Reserve a few minutes before every trip; keep the passenger safe, and stay prepared for every mile ahead. If any item looks off, address it immediately rather than delaying. Know that tasting fluids is unsafe; fluids should never be tasted. This habit adds sophistication to your routine while keeping your insured status and the vehicle ready-to-drive and prepared for the next rides.
Tires and pressure
Check each tire for cracks, bulges, or nails; measure tread depth with a gauge, and replace when it drops below 2/32 inch (1.6 mm). Inflate to the recommended cold PSI on the placard, not after a long drive. Inspect the spare tire, jack, and lug wrench; test lug-nut torque with a torque wrench if you can. Wear sturdy shoes during the check and adjust pressure when the tires are cold, since heat can skew readings. If you find uneven wear, rotate or replace tires to maintain stability and reduce hydroplaning risk. Added attention to tread helps you avoid less traction on wet roads and in heavy rain; this step supports reliability across rides.
Brakes, lights, and fluids
Brakes: inspect pad thickness; replace if under 3 mm on any wheel. Test braking at low speed in a safe area to ensure even response; listen for grinding, and check rotor wear. Lights: confirm all headlights, taillights, brake lights, and turn signals illuminate brightly; replace bulbs as needed and verify fuses. Fluids: engine oil should sit between the MIN and MAX marks; top up with the correct grade if low. Coolant level should be between the marks; check for oil or coolant leaks under the vehicle. Brake fluid must be within the MIN/MAX window; if it’s dark or contaminated, replace. Transmission fluid (if applicable) should be pink and not smell burnt. Windshield washer fluid should be full. Battery: test terminal cleanliness and voltage with the engine off (aim for about 12.6 V); clean corrosion and replace if it fails a load test. Insurance and documents: carry proof of insured policy and registration; keep them easily accessible. If anything requires immediate service, schedule it before you depart; this keeps you on the road with confidence and peace of mind.
Oil, coolant, and wipers: when and how to check and top up
Check oil level and top up if below the min mark before every long drive; read the dipstick and use the exact viscosity grade listed in the owner manual. After topping up, recheck within 5 minutes with the engine off on level ground to ensure readiness for passengers and pickups. In Stockholm, quick checks are priced affordably at many workshops near landmarks; seeking a quick path to comfort, you can pair the visit with air-con-service and have fluids, wipers, and cabin air checked together.
Oil level and top up
Open the hood, locate the dipstick, pull it out, wipe, reinsert, and read the marks. If oil is low, add small amounts (0.5 L at a time) while the engine is off and wait a moment between additions. Always use the exact grade from the manual; mixing brands or viscosities can affect lubrication, especially in cold or hot weather. For urban driving among landmarks and busy market areas, check more often during seeking reliability in daily use; if unsure, contact a local service center such as kontaktomnicarservicedk in Stockholm for guidance and immediate availability of priced maintenance options.
Coolant and wiper system
Check coolant level when the engine is cold. Look for the min and max marks on the reservoir and top up with the same type of coolant (or pre-mixed solution) recommended by the manual. Do not open the radiator cap if the engine is hot. After topping up coolant, run the engine for a few minutes to circulate, then recheck. For winter driving, use a 50/50 mix unless the manual specifies otherwise. Inspect the coolant hoses for cracks and the radiator cap for tightness. Wiper blades should be replaced if they streak or chatter; select blades sized for your model. Top up windshield washer fluid with winter-grade solution if you operate in Stockholm's cold climate. Keep a small bottle in the pickup or taxi car so you stay ready-to-drive for rides among passengers and local transfers; this helps you stay ready for immediate pickups at nearby landmarks and stations, including areas around market and taxis stands.
Battery and charging basics: safe testing and signs of failure
Test the battery with a handheld voltmeter when the engine is off. A healthy static reading sits around 12.6 volts; 12.4 volts or lower suggests reduced capacity or sulfation risk and warrants further check.
With the engine running, check the charging output at the battery terminals. Target range: 13.8 to 14.4 volts. Readings consistently below 13.5 volts or above 14.8 volts point to an issue with the alternator, drive belt tension, or wiring that needs service.
Perform a brief load test by turning on headlights and, if accessible, the rear defroster for about 10 seconds. If the voltage drops more than 0.5 volts, the battery's ability to sustain a charge is reduced and a professional test or replacement may be needed.
Safety rules: keep away from metal jewelry, wear eye protection, and disconnect the negative terminal first when removing the battery. Work on a stable surface in a dry area, and avoid contact with hot engine parts; never lean over the battery while connecting clamps.
Signs of trouble include hard starting, lights that dim noticeably, terminal corrosion (white or bluish crust), a swollen case, or a vent that leaks. If any appear, plan a formal test or replacement before the next trip.
Charging system check steps: inspect clamps for tightness, inspect cables for cracks, and examine the belt driving the alternator. Remove any corrosion using a bicarbonate solution with a nylon brush, dry completely, then reattach clamps firmly. Use a charger with automatic shutoff to bring the battery to full charge, and avoid rapid charging that creates excess heat.
For idle periods: if the vehicle sits unused for several weeks, disconnect the negative lead to curb parasitic drain, store the battery in a cool, dry location away from heat sources, and recharge every 4–6 weeks or as specified by the battery type.
When to seek professional help: if the resting voltage remains below 12.4 volts after a full recharge, or the charger fails to bring the level up within a reasonable time, arrange a diagnostic with a technician who can test the alternator, starter, and electrical harness. Bring model details and recent symptoms to speed the process.
| Symptom | Recommended action |
|---|---|
| Slow crank or long cranking time | Check resting voltage; if below 12.4V, perform a load test or replace battery; inspect the alternator and belt for proper tension. |
| Dim or flickering lights | Measure voltage with engine running; if charging under 13.5V, inspect the alternator wiring or belt tension. |
| Terminal corrosion (white/blue crust) | Clean with a bicarbonate solution and brush; reseat clamps and check for leaks or loose connections. |
| Swollen battery case | Do not use; replace the unit and check for overcharging or internal failure. |
| Frequent jump-starts | Test both battery and charging system; replace if age is high or resting voltage remains low after charging. |
| Battery fails to hold a full charge after charging | Test with a load and consider replacement; inspect the electrical harness for parasitic drains. |
Packing winter travel gear: sturdy shoes, warm socks, and traction aids
Always start with a waterproof, insulated boot with deep tread as your primary winter travel shoe. This ensures secure footing during vehicle inspections, tool handling, and movement between front and rear areas in snow or ice.
Use a customized packing list tailored to your route and vehicle type. This approach minimizes bulk while keeping essential gear at hand for winter arrivals.
Mind the space in your bag to avoid overpacking and ensure room for added parts you may pick up on the road.
- Sturdy shoes: waterproof, insulated, with a solid tread for grip on ice and slush
- Warm socks: three sets (liner, mid-weight Merino, thick wool) to manage moisture and warmth
- Traction aids: microspikes or snow cleats; consider snow chains where allowed
- Accessories: gaiters, warm gloves, hat, balaclava, compact ice scraper
- Storage: weatherproof pouch for socks and small parts; a dedicated space for added gear
Warm socks keep feet warm and dry during long work sessions in cold shops and while performing door-to-door checks on vehicles in winter conditions.
Traction aids adapt to conditions. Usually, a mix of microspikes for icy sidewalks and lightweight cleats for packed snow covers most scenarios. If you face steep entries or slick parking, add compact chains in your kit where allowed and carry them in a front-seat bag for quick access.
Logistics and planning: For 2-day trips, pack an extra pair of warm socks and an added traction aid in case of delays. Some providers at airports offers direct, door-to-door transfers and meet-and-greet options to streamline arrivals. Check the location-specific rules for traction devices and dont assume one solution fits all routes, especially when traveling from stockholm to lund or during winter arrivals in murano.
Emergency roadside kit: must-have items and quick usage tips
Store a compact, weatherproof roadside kit in the trunk and verify its contents monthly to stay prepared for unexpected stops.
What to include and why Keep a small bag or case with the following items grouped by function: power and illumination, signaling and safety, tools, tire care, and comfort essentials.
Power and illumination: flashlight with spare batteries, headlamp, a high-visibility vest, and an emergency blanket to stay warm at night.
Signaling and safety: reflective triangles or LED beacon, a bright signal light, and a whistle to attract attention if you’re off the roadway.
Tools and basic repairs: jumper cables, a portable charger, a compact multitool or screwdriver set, duct tape, zip ties, gloves, and a small pry bar for minor tasks.
Wheel and tire care: spare tire, jack, lug wrench, and wheel chocks; check tire pressure with a gauge before trips and recheck after a swap.
Comfort and survival: bottled water, non-perishable snacks, a compact rain poncho, and an extra thermal blanket for cold waits.
Documentation and planning: a notepad and pen for notes, a roadside assistance card with contact numbers, and a small flashlight for dusk emergencies.
Quick usage tips: If you experience a flat, move to a safe spot, turn on hazard lights, set wheel chocks, loosen lug nuts, raise the vehicle at proper jacking points, swap the tire, lower the car, and retighten nuts in a star pattern. For a dead battery, connect jumper cables in the correct order, start the donor vehicle, then your own, and disconnect in reverse order. After any stop, recheck your kit and replenish used items before continuing.


